Photos and info about the repair work done by Brian May and Greg Fryer to the Red Special guitar during 1998 at Brian’s “Allerton Hill” studio:
——————————————————————————————-–
Red Special Book: it was a pleasure to be asked by Brian May to contribute photos and text about our 1998 Red Special restoration for his book written with Simon Bradley (formerly of ‘Guitarist’ magazine): “Brian May’s Red Special – the story of the home-made guitar that rocked Queen and the world”.
Between 1998 and about 2011, Brian and I talked many times about writing such a book. Early in the piece I had some preparatory work done, and although I was keen to get started on the book it always unfortunately seemed that either Brian or I were just too busy with other projects.
2020 version of Red Special book from https://www.theredspecial.com/

Red Special Book 2020 version image from theredspecial.com
The website piece below details much of our 1998 restoration and repair work.
Please also see Brian’s website, loaded with information: http://www.brianmay.com/
——————————————————————————————
The ‘Red Special’ guitar was designed and built by Brian May and his dad Harold between 1964-1966 and is one of the most extraordinary, innovative and creatively complete electric guitars ever built.
To put it simply, the ‘Red Special’ is a work of genius which addresses many design issues such as the tremolo tailpiece/bridge system and headstock design far better than any of the other very successful contemporary guitars of the time (think Fender Stratocaster, Gibson SG & Les Paul etc). Particularly in the two areas of headstock design and tremolo tailpiece/bridge system, no guitars since the middle 1960s have bettered Brian and Harold’s innovative design.
The unique beautiful flowing lines of the Red Special’s guitar body and neck have few equals and are on a par with the greatest electric guitars ever designed such as the Fender Stratocaster and Gibson Les Paul.
And since the 1960s due to Brian’s equally extraordinary playing, the ‘Red Special’ has become one of the rock guitar world’s great icons.
Greg Fryer background:
In 1980 I began repairing and building guitars in Sydney Australia with the great Romney Godden who was Sydney’s best guitar repairer/builder during the 1970s and 80s. Romney left Sydney and I set up my own business in 1983 and during the following 13 or so years worked with local and touring acts including such as INXS, Midnight Oil and Pink Floyd. From my teenage years I was fascinated by Brian May’s guitar and tone, and especially by its ‘space age’ unique look, and I tried to learn as much as I could about Brian’s guitar and signal chain from the literature available in the 70s and 80s.
By good coincidence I was already experimenting with transistor treble boosters courtesy of my friend Nick Thurn who had a good knowledge of guitar valve amp and transistor electronics and who was the first guitarist I ever heard playing an AC30 (Nick was an amazing fluid player). After owning several types of guitar amplifier I settled on the Vox AC30 amp as preferred choice of amplifier in my own playing with rock bands around the Sydney area during the 1980s.
Please also see more info at: https://fryerguitars.com/about-us/
Red Special guitars:
In early 1996 my interest was reignited in Brian’s wonderful guitar and his whole guitar sound again, mainly because my girlfriend played me several Queen albums and after not hearing Queen’s music for several years I once again fell in love with it again and with Brian’s superb playing and unique sound. Because my work as guitar repairer/maker since 1980 had involved me in repairing, analysing and being intimately familar with the pros and cons of the best guitar designs of the day (Fender, Gibson, Gretsch, Ibanez etc), it dawned on me that it was the right time to look more closely at Brian’s unique Red Special guitar.
I wrote to Brian’s management with the objective of making for him the most accurate replica of his guitar to date, a guitar that he would consider worthy of using as a spare. After meeting with Brian in July 1996 to discuss the project, I then spent a very intense eighteen months thoroughly researching the parts materials components building techniques needed, obtaining everything I needed, and then building the three replicas at my workshop in Sydney.
In late 1997 the guitars were finished and I arrived in London at Brian’s studio. Brian gave the guitars names to help personify and distinguish them from each other, and to add a touch of wry good humour as well. The guitars became known as ‘John’, ‘Paul’ and ‘George Burns’ (with an obvious nod to The Beatles, Burns Trisonic pickups and the famous American comic George Burns), and it was a very great honour and also a great relief to have Brian tell me that my instruments were wonderfully close in sound and feel to his original unique Red Special. At the end of my stay in London I took ‘Paul’ back to Australia whilst ‘John’ became Brian’s main backup for the Red Special and ‘George Burns’ is Brian’s main dropped-D tuning guitar for songs like ‘Fat Bottomed Girls’ etc.
The Red Special was in need of repairs to many areas, although considering that the guitar had been used solidly for over 30 years of live playing around the world, it was also in surprisingly good overall shape especially given the the extremes of temperature and humidity that it would have encountered. Harold and Brian had made a very solid and dependable instrument.
Brian’s guitar tech Pete Malandrone told me that the Red Special had hardly been touched repair-wise during its 30 odd years of playing around the world, something that again validated the quality of its build.
Examples of the work needed: some areas of the guitar such as the white binding needed immediate attention because it had become unglued and was barely hanging on. Most other areas needed general repair and maintenance or parts replaced for better quality ones such as the tuning heads. The 3 Burns Trisonic pickups were giving Brian difficulty at high amp volume levels and causing micophonic feedback. Vibration in and around the pickup and its metal cover was causing the bad feedback at loud amp volumes, so it was my job to work out ways to improve this and also to repair many years of damage to the metal pickup covers from Brian’s sixpence.
All the work was conducted at Brian’s Allerton Hill studio near London, and many of the tasks were either assisted or supervised by Brian.
As the project began and we discussed the general approach to the repairs that were needed, Brian’s confidence grew in what should be tackled (and probably also in me, still a relatively unknown quantity) and he began to add items to the repair list. Some of these were scary and difficult and most required materials and techniques that I had not previously encountered in conventional guitar repair or the building/repairing of Gibson and Fender style guitars. Fortunately we began to build up a team of specialists from different areas such as paints, glues, plastics, metal machining etc who we could draw on for advice or to make specialist parts where needed.
When Brian was otherwise occupied by the recording of his album and couldn’t assist in the repair processes, at the beginning of each day over a cup of tea he and I would discuss the ongoing repairs and the priorities. Brian would usually pop in during a break in recording to see how things were going with the guitar.
At times it was nerve-wracking handling a legendary instrument that wasn’t insured, worth millions of pounds, irreplaceable and much of it in a delicate condition. I certainly needed a strong drink after some of those days! All humour aside however, even at the most difficult times in the repair process I realised that it was a tremendous privilege and opportunity to be working with Brian and his guitar tech Pete Malandrone, and that I had great responsibility to be as consistent and reliable as possible, and to not be nervous otherwise the results might suffer. It was certainly very helpful having Brian around to discuss the guitar and many other things with, and Brian and Pete were very gracious hosts indeed.
Repairs:
Neck: mahogany dowels made for glueing into various screw holes in headstock, these screw holes were from the first set of tuning heads which Brian fitted when the guitar was made, and also from the Gotoh locking heads which were fitted sometime in the 1980s.
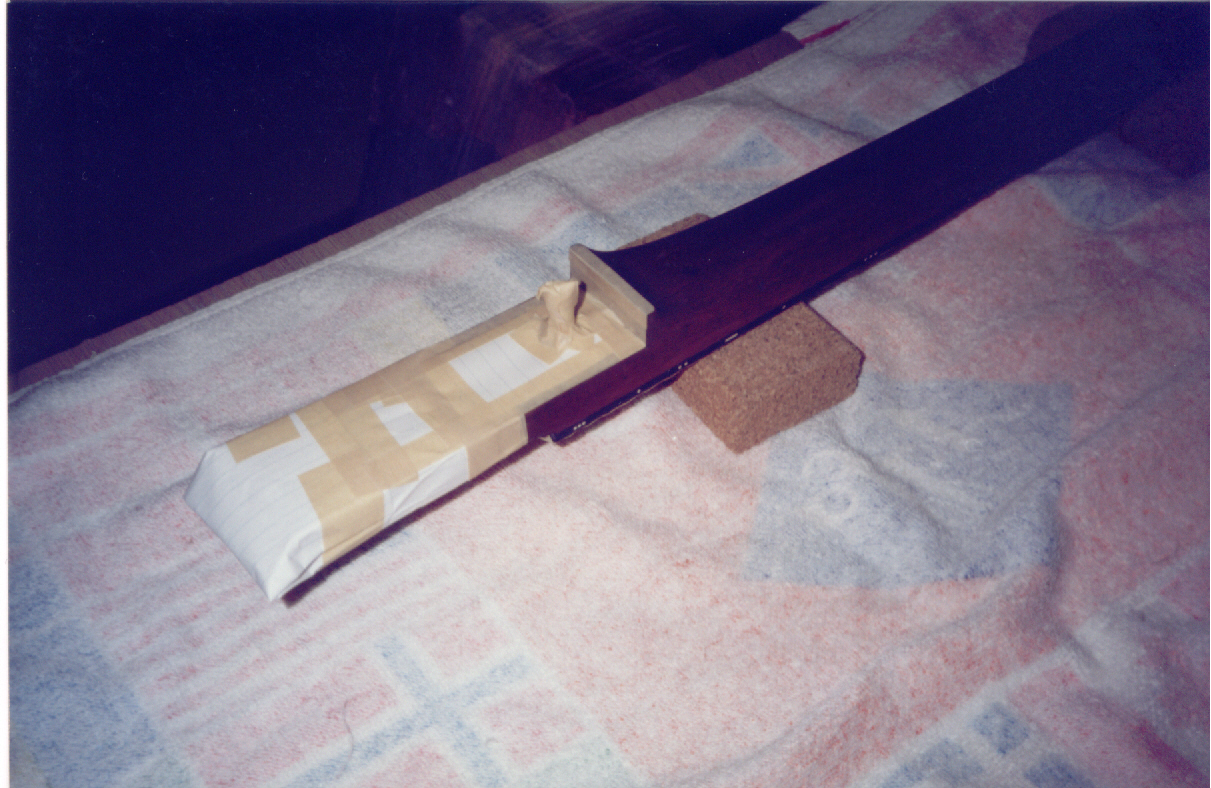
Originally Brian painted the white fingerboard side dots and longitudinal ‘stripe’ dots onto the Red Special’s neck. Because these were painted on top of the Rustins Plastic Coating, we realised that they would disappear as soon as we started sanding the surface for overcoating with new Rustins.
Brian asked if I could inlay these dots/stripes into the surface of the Red Special’s fingerboard in a similar way to how I did them on my 3 Red Special replicas.
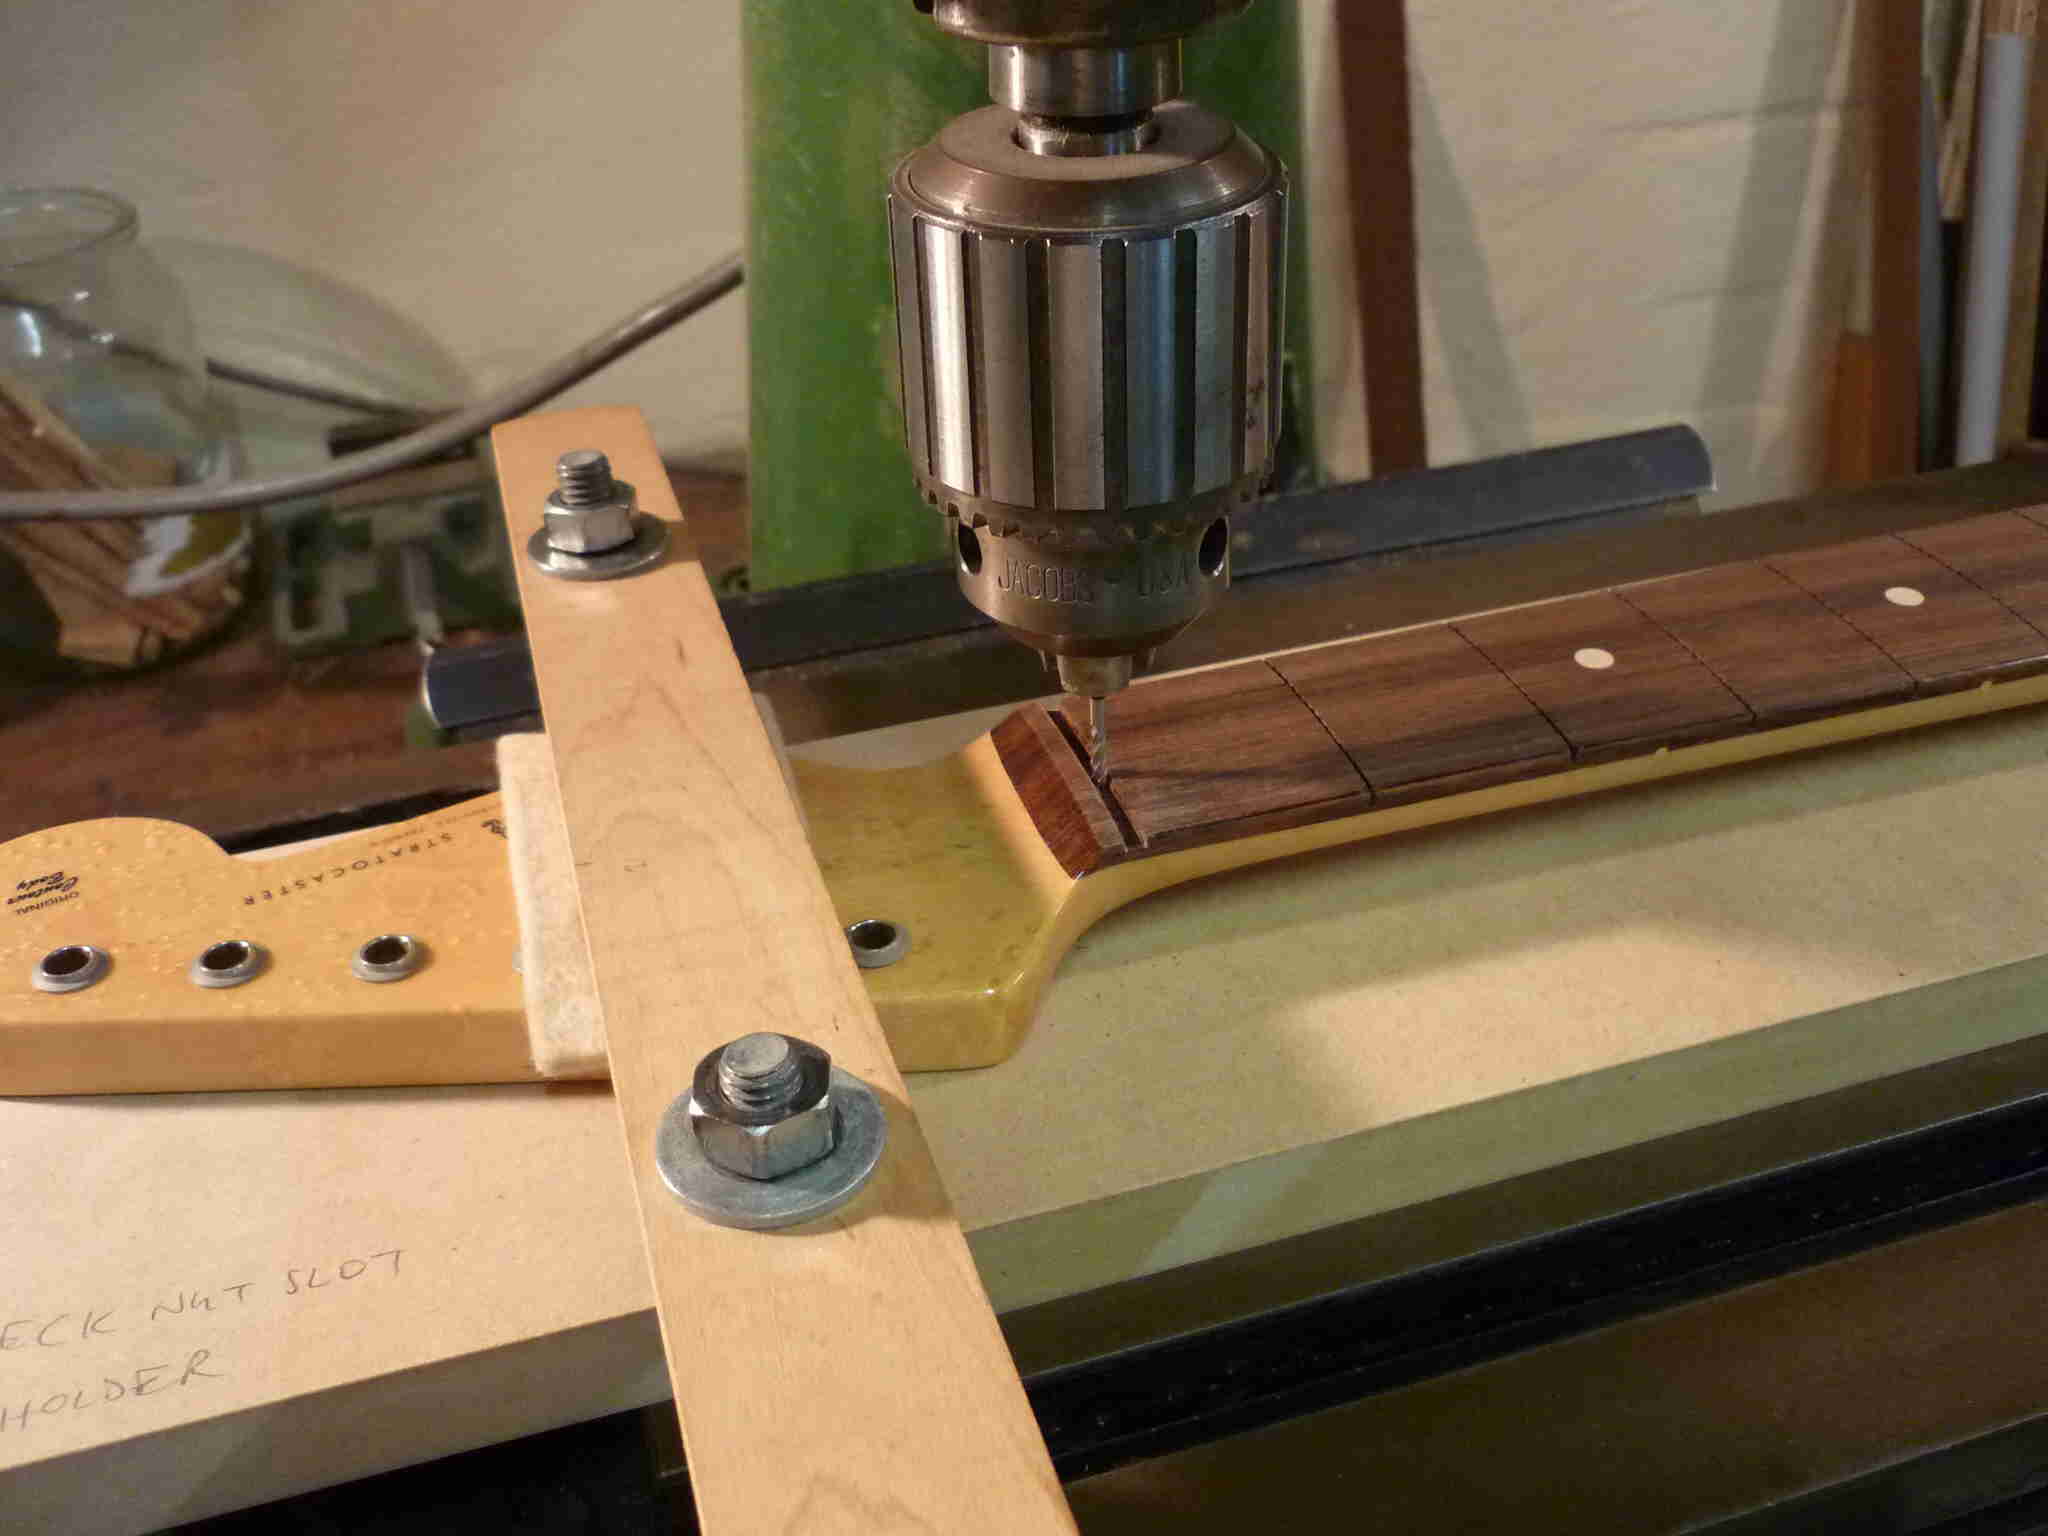
For the side dots on John, Paul and George Burns I clamped the necks using 2 felt lined vyces to the bed of my workshop’s drilling and milling machine. I then installed the dots and stripe dots using a 1/16″ dia end mill. The dots and stripe dots were milled approx 3/32″ deep into the timber. These were then filled with a white epoxy resin mix, and when hard the epoxy was sanded flush with the surface prior to painting.
For the work on Brian’s neck we needed to find a similar drilling and milling machine in a workshop within a 50 mile radius of Windlesham Surrey, and hope that the business owner was happy for me to bring out Brian’s guitar neck and use their machine. Fortunately Brian’s PA Julie Glover had relatives Graham and Brian Nash who operated a business called Nagro Frames at Reading, and we learned that they had a milling machine which might hopefully be suitable.
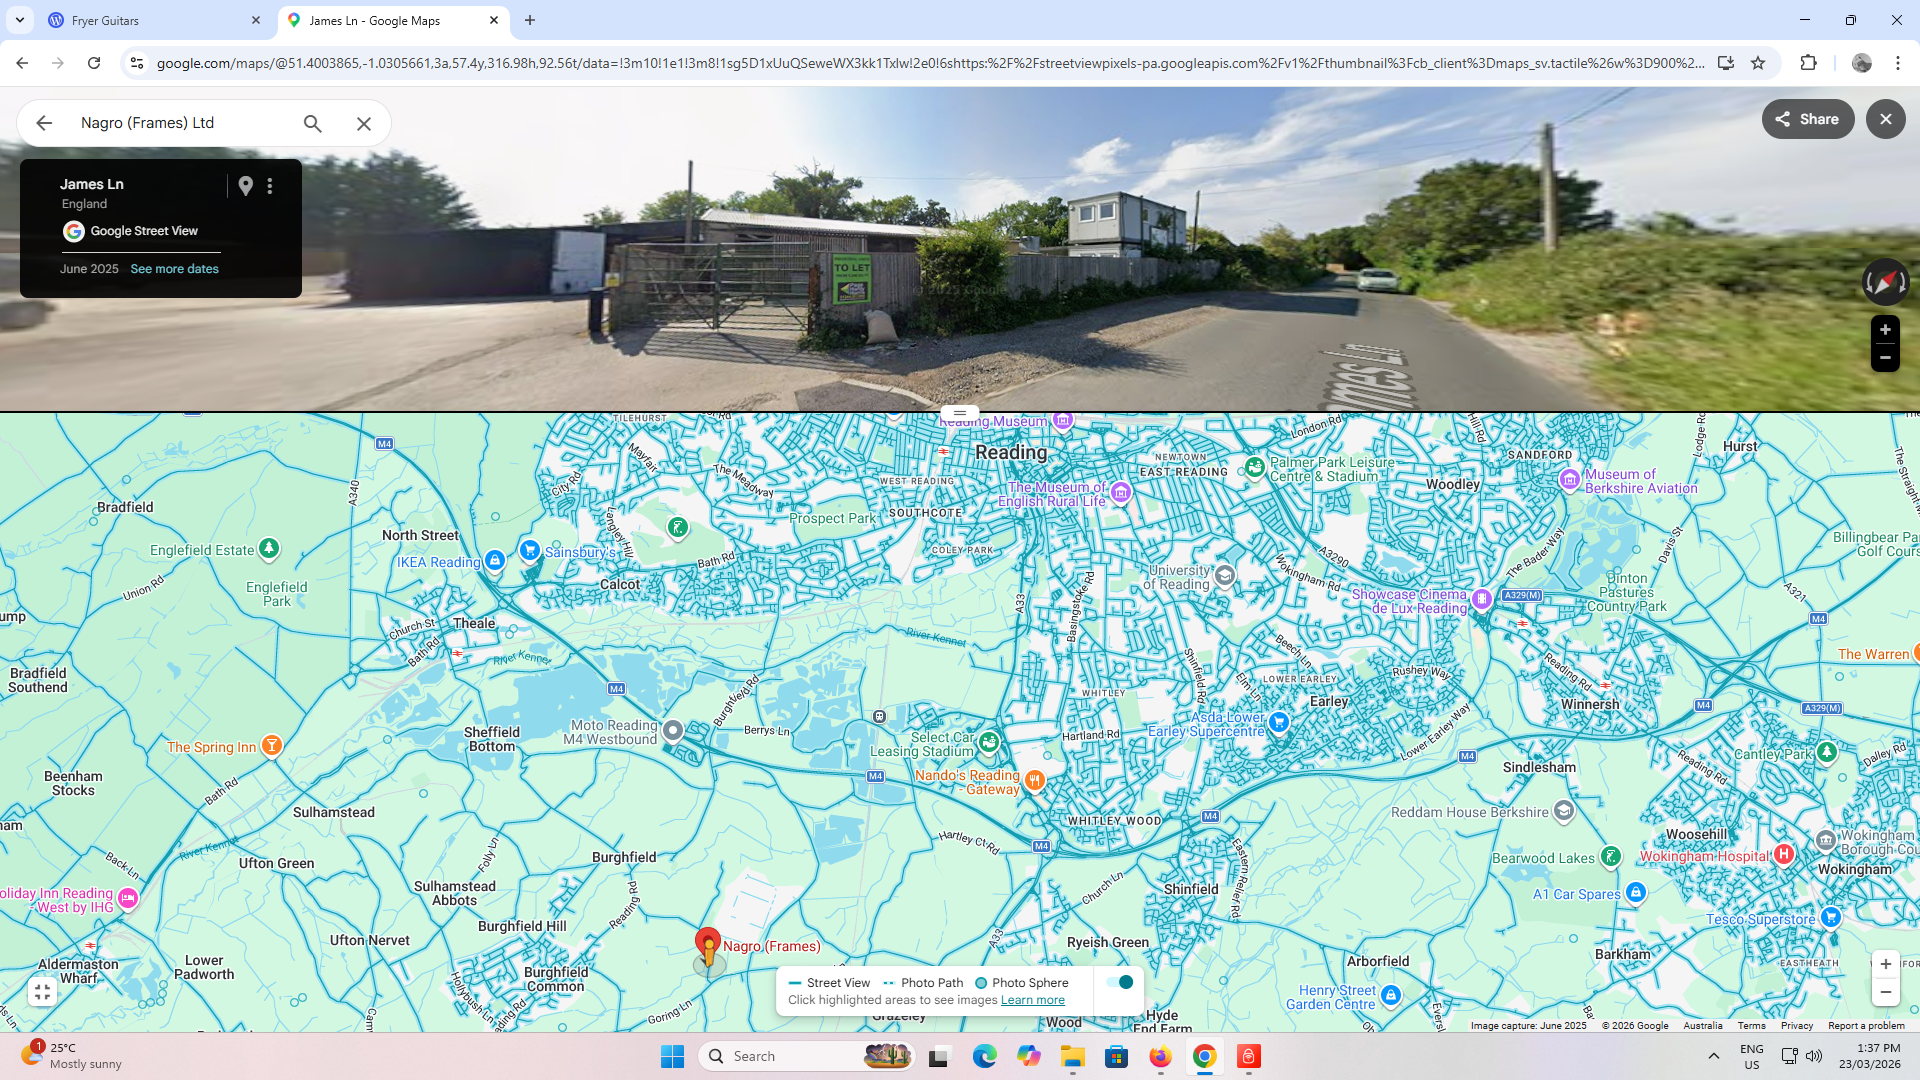
260323 screenshot of Nagro Frames at James Lane Reading where I did the milling work to Brian’s guitar neck
On 20th April 1998 I travelled out to Reading to do the work. It was far from an ideal setting and I was VERY nervous about doing such critical work on Brian’s neck without a perfect setup along with suitable lighting, tools, clamps and sufficient time to do test runs and not rush the main work. There was obviously NO going back if a mistake was made.
Nagro Frames was located in the country area outside of Reading and to my surprise I drove down narrow country lanes to get there. There were paddocks with cows and sheep either side of the roads. and several times I wondered what the hell I was going to find. Nagro Frames had a shed which was filled with frame making and other rural equipment, with people coming and going and truck deliveries arriving and being unloaded etc. It was here in the shed that the milling machine was located. Doing such a critical job in this less than ideal setting made me nervous! Although the milling machine was different to mine at home in Sydney, I managed to setup a workable arrangement with temporary tables set up on milk crates and wooden pallets, and temporary lighting brought in for the job.
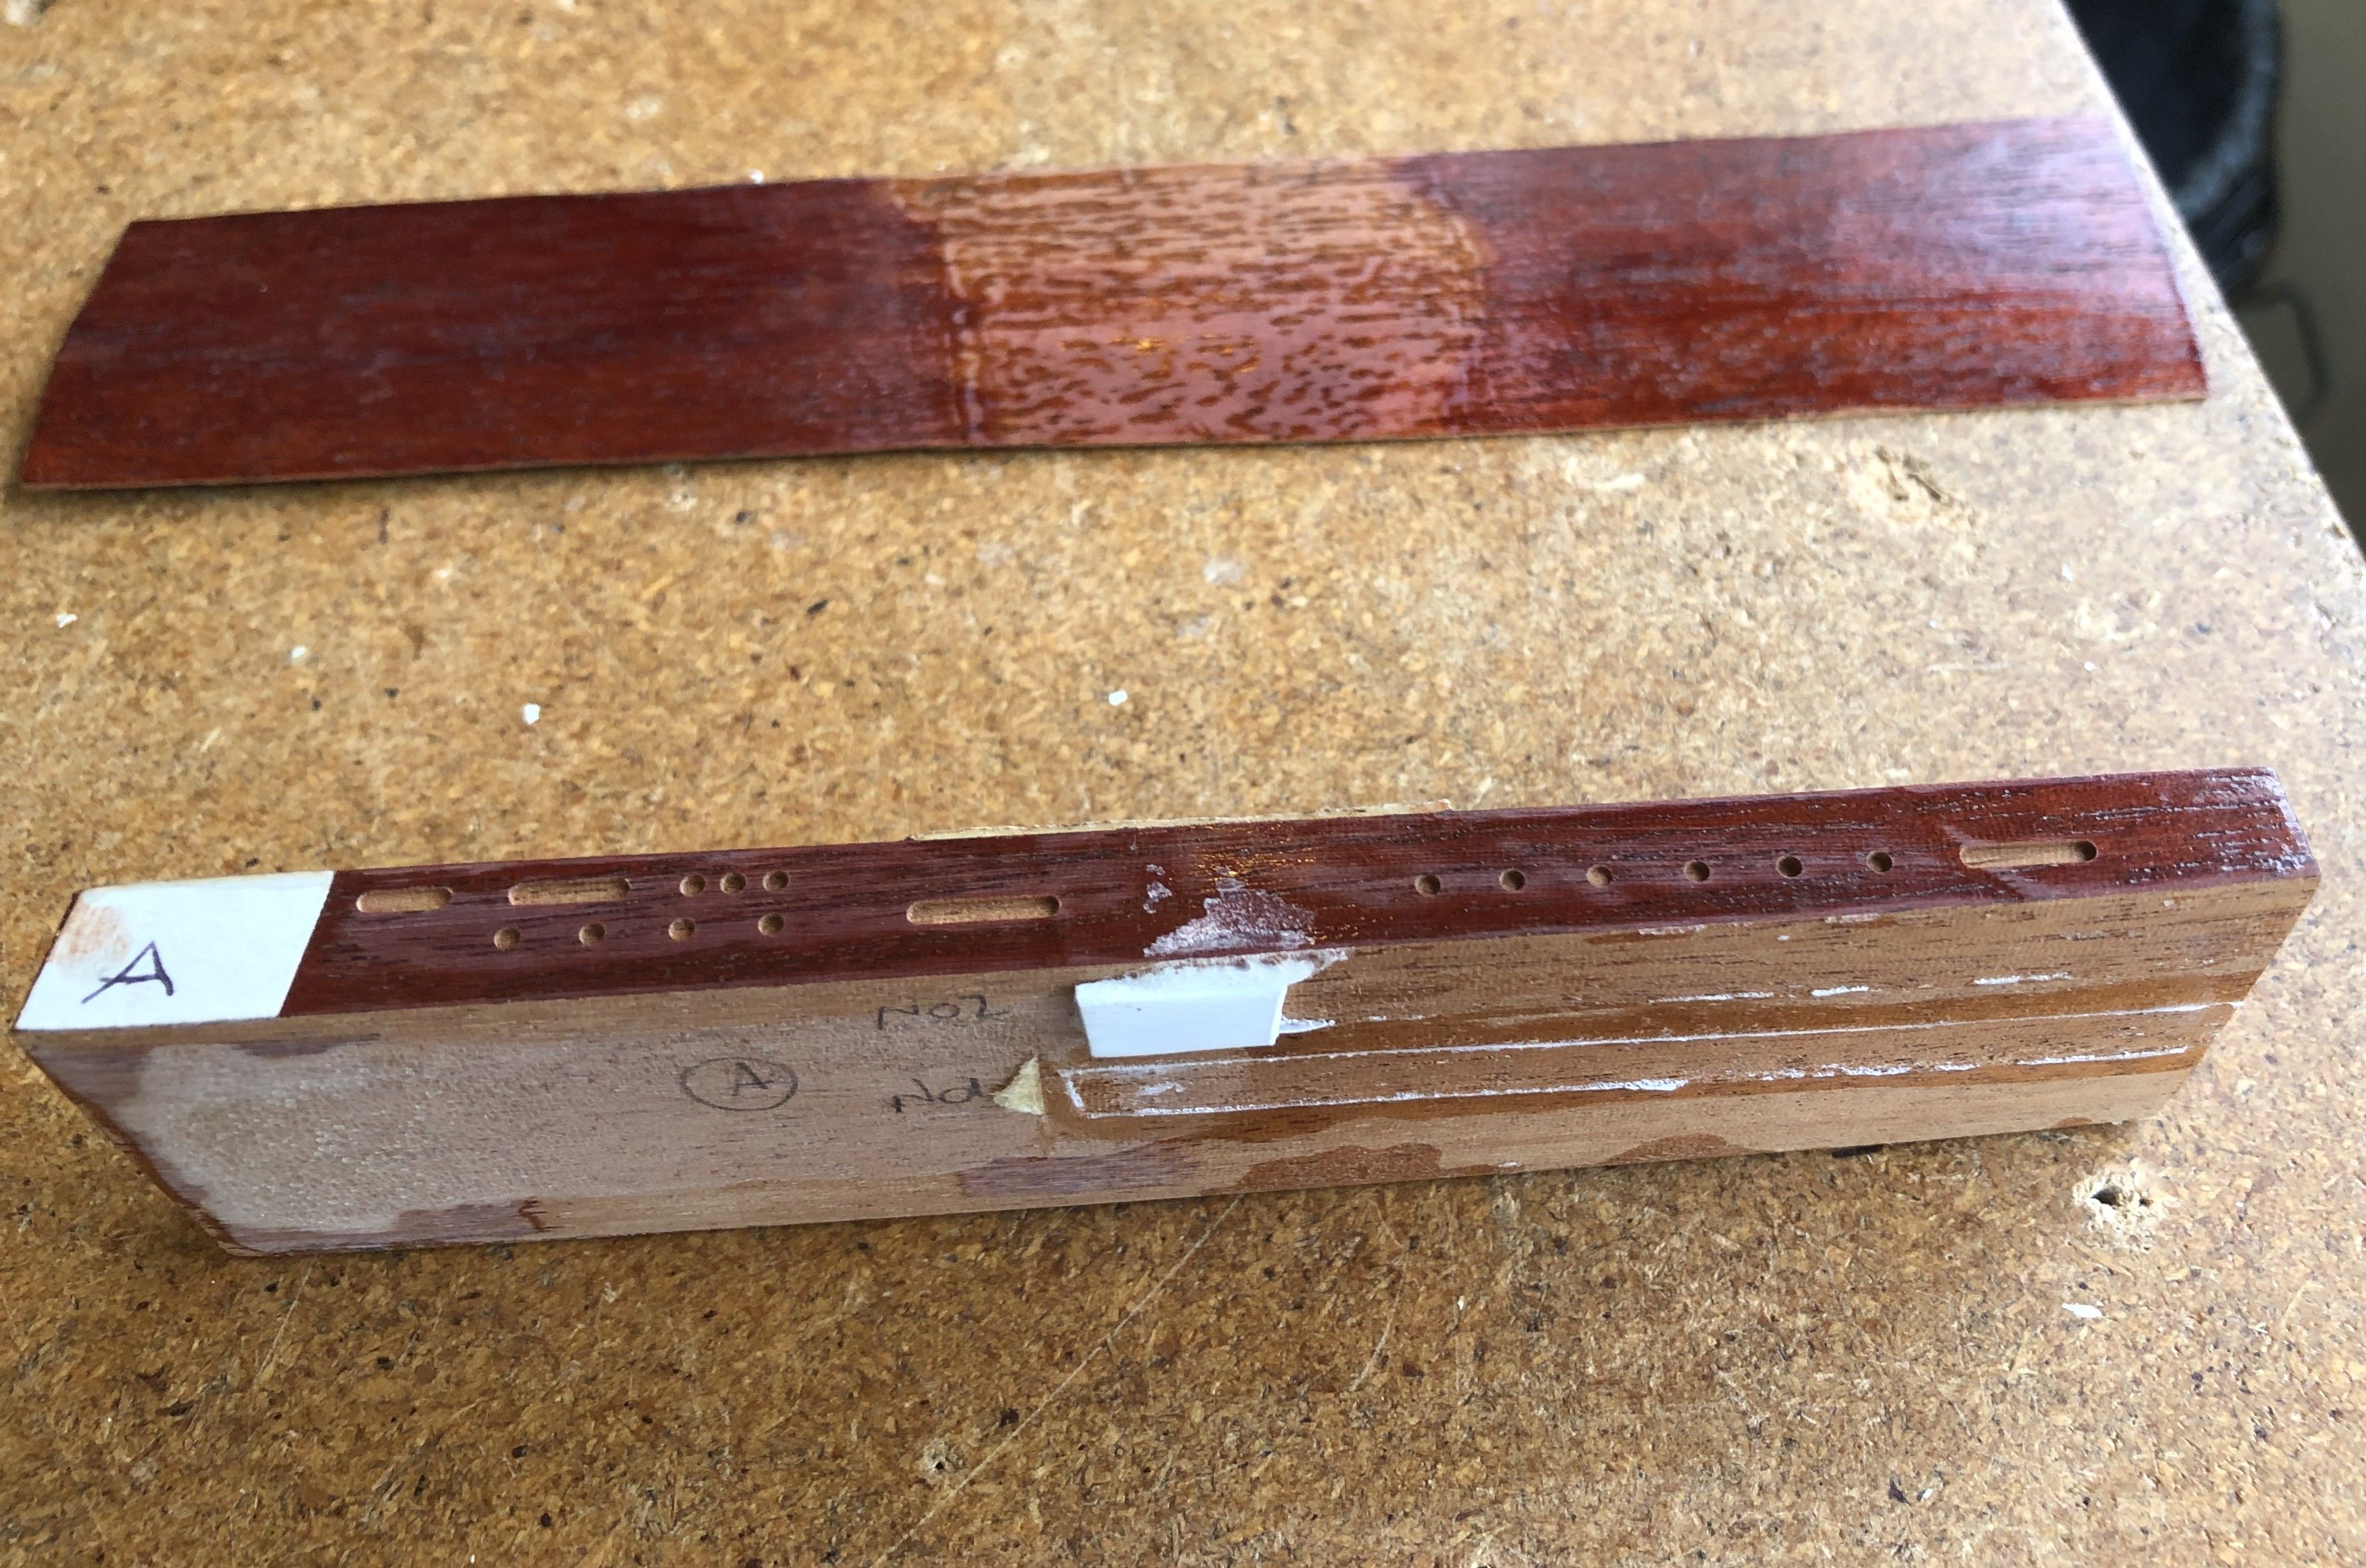
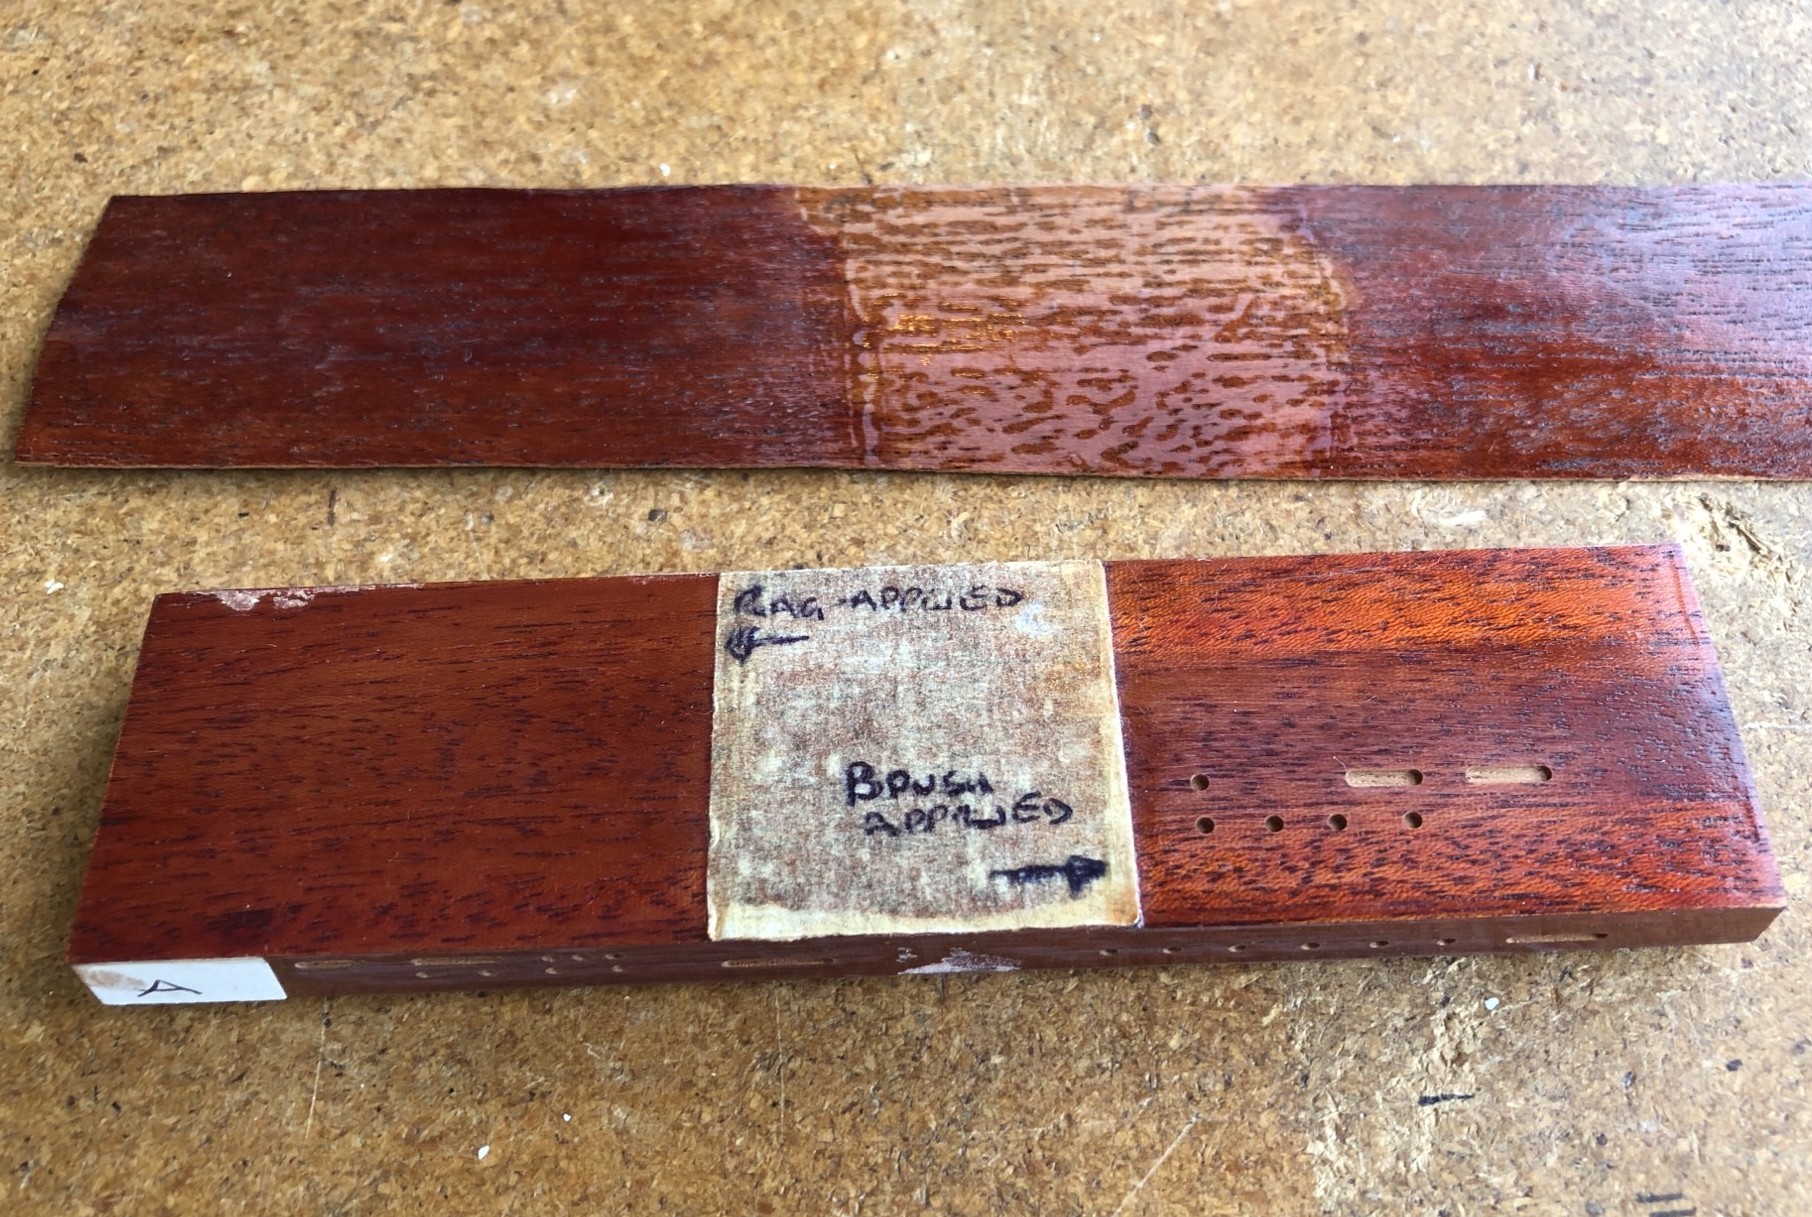
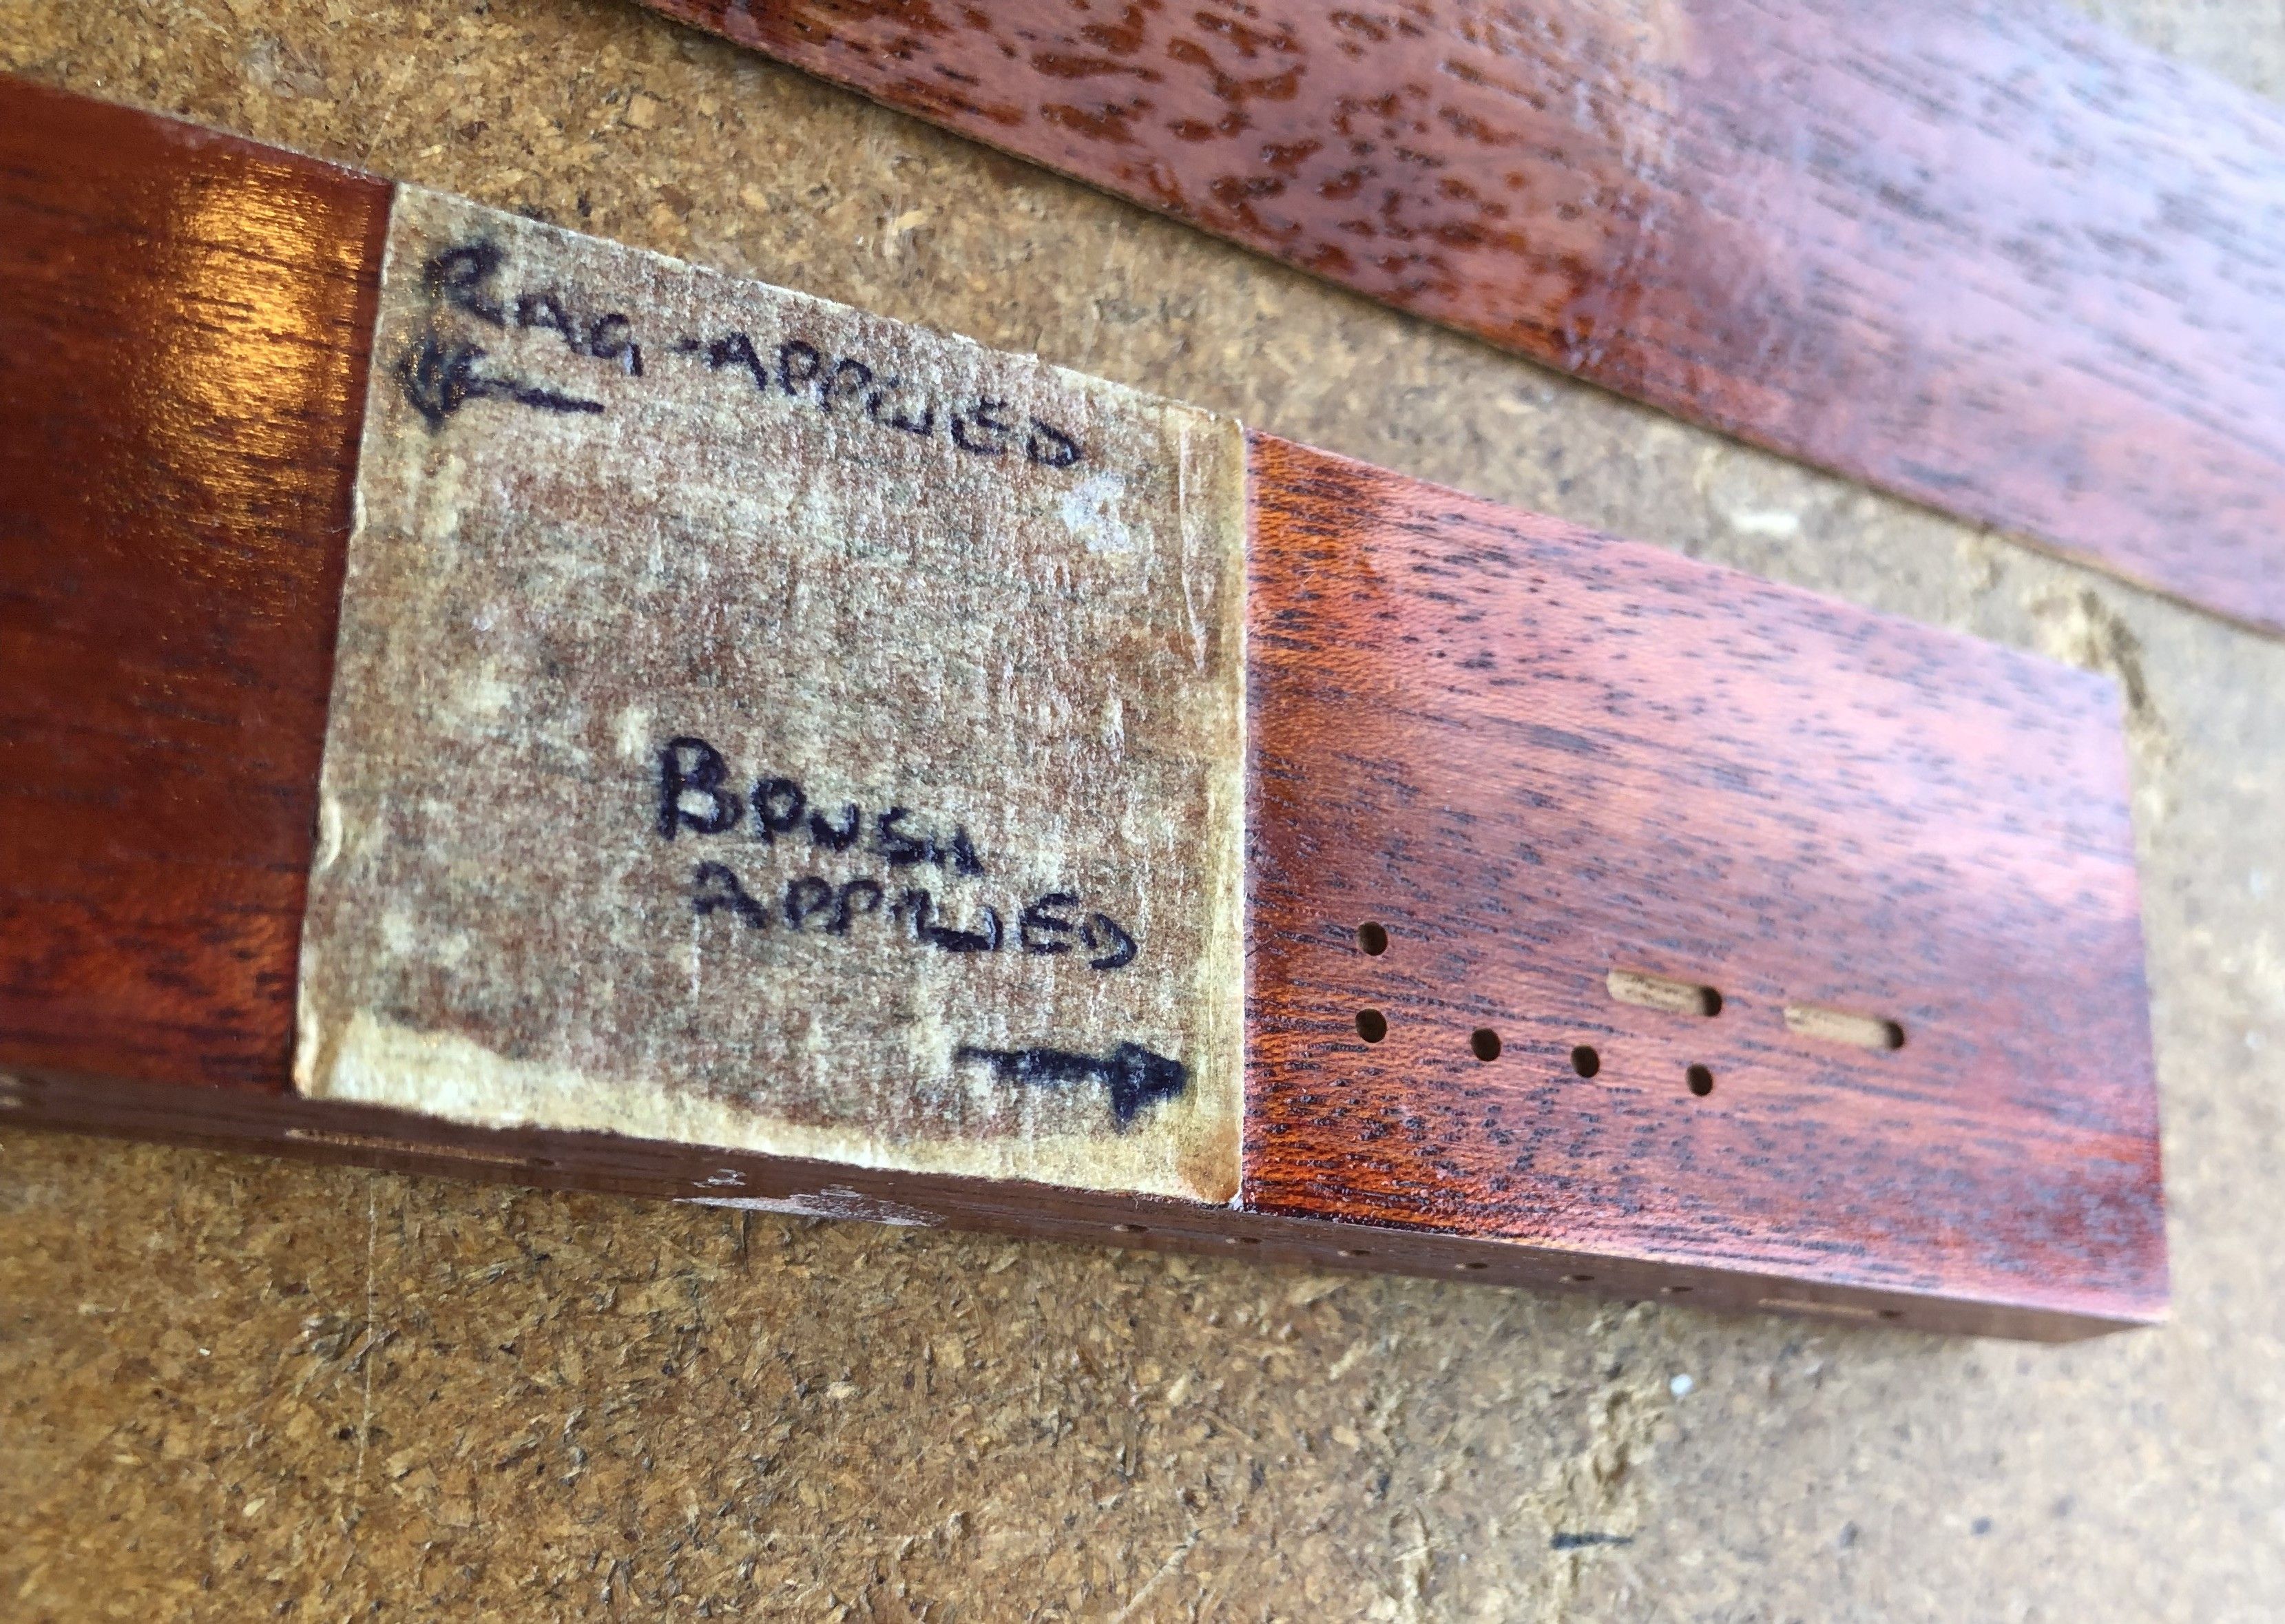
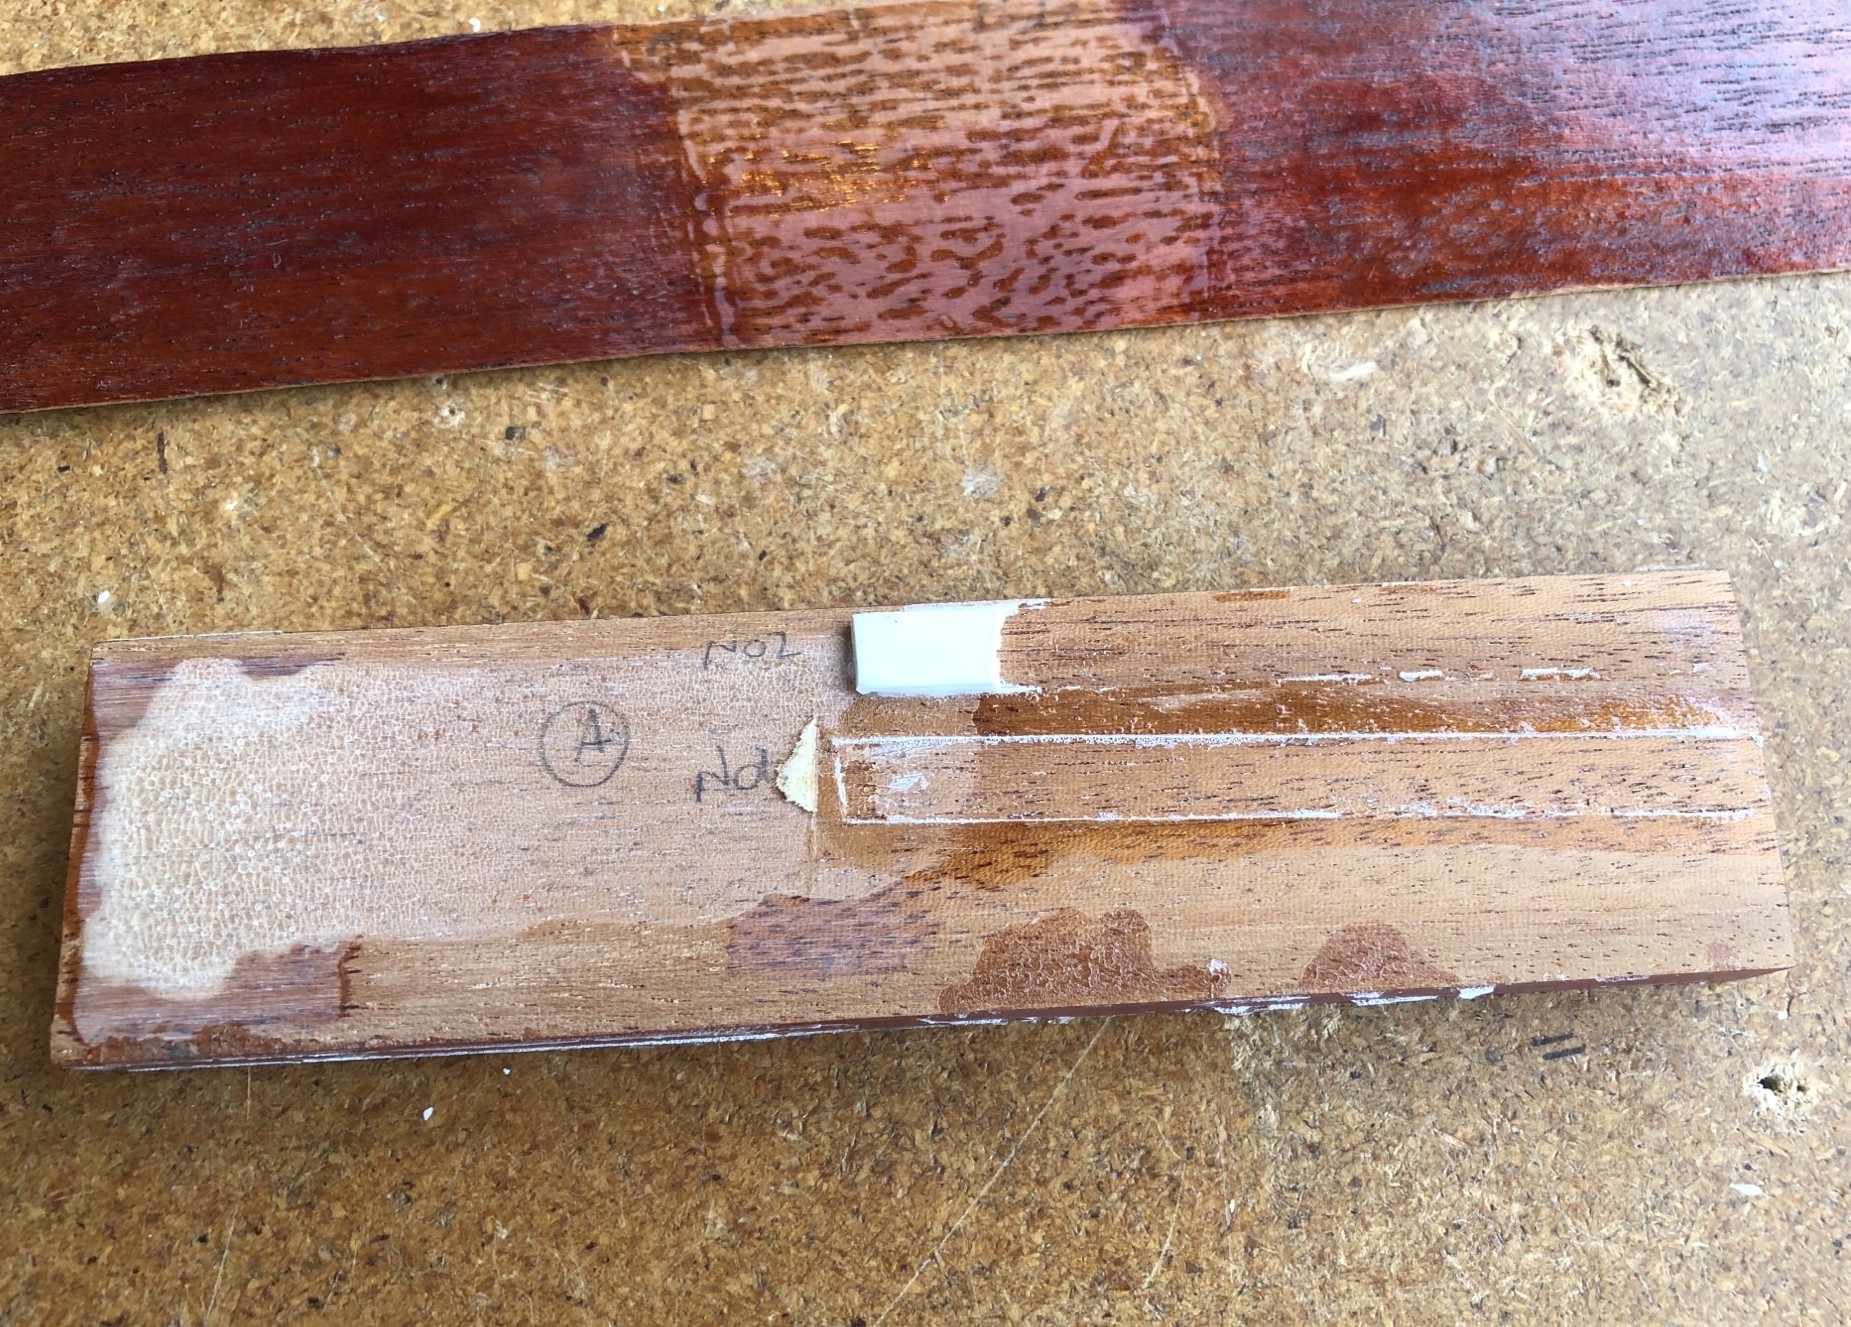
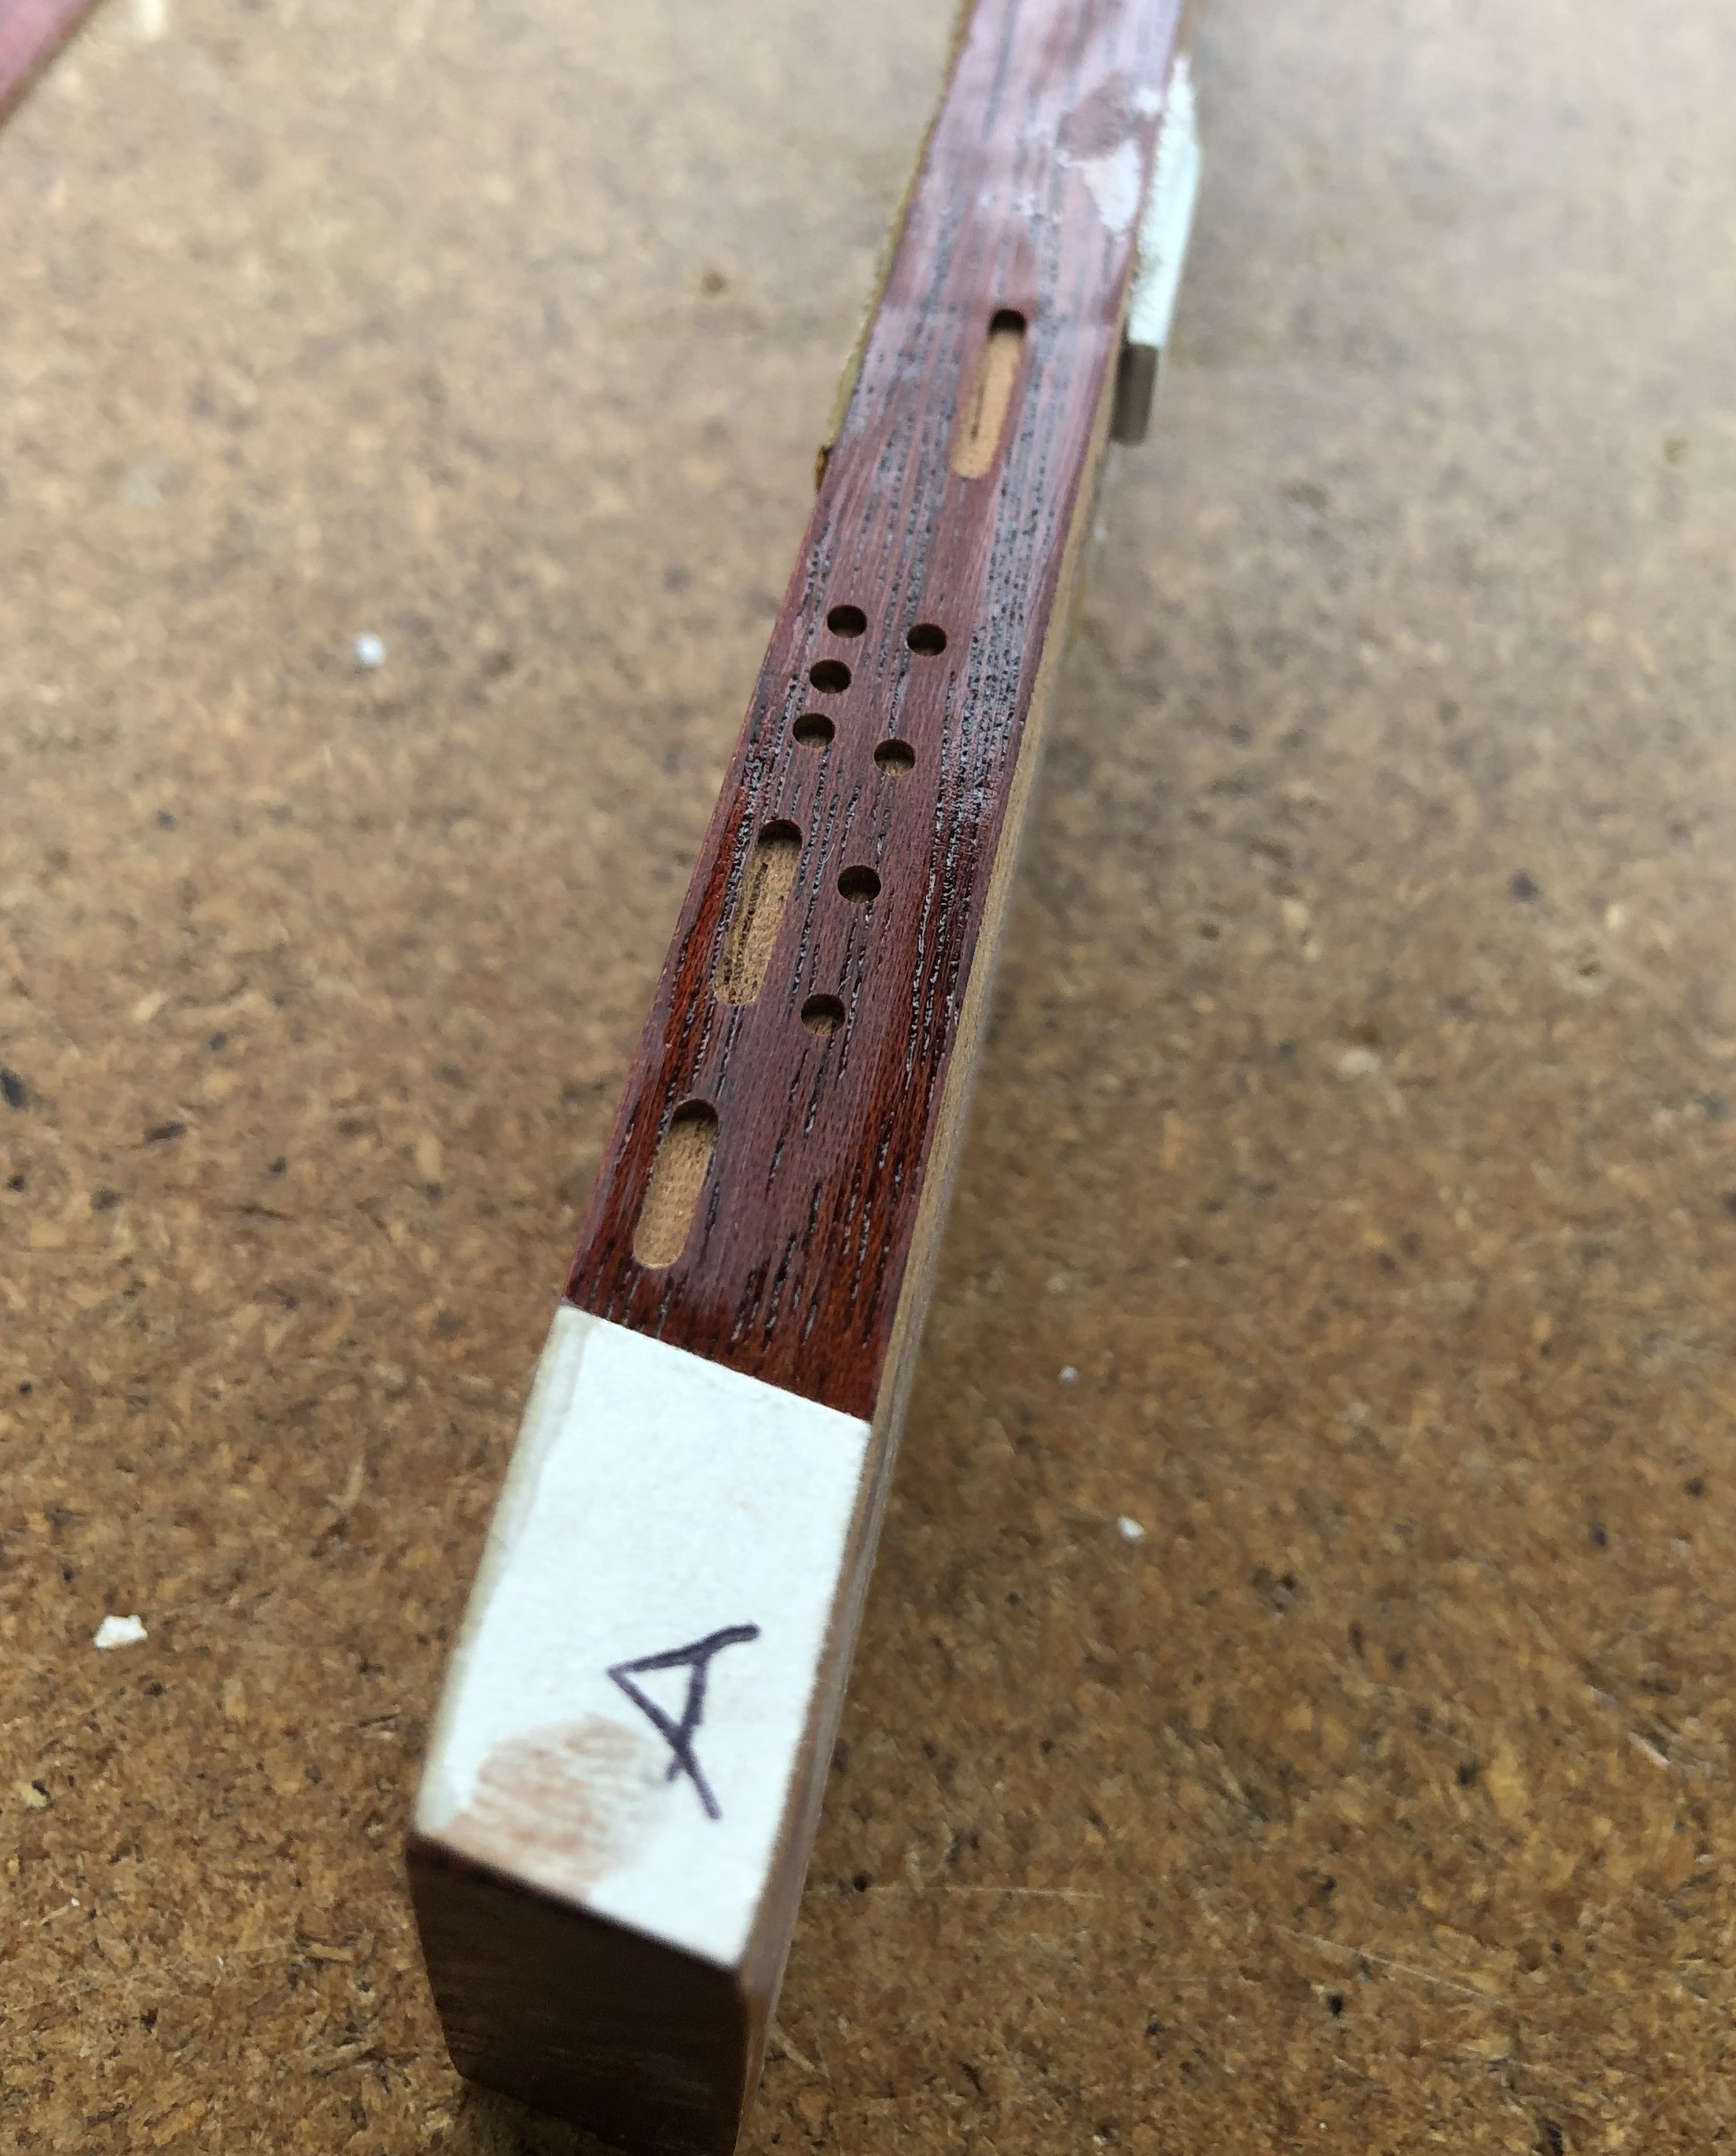
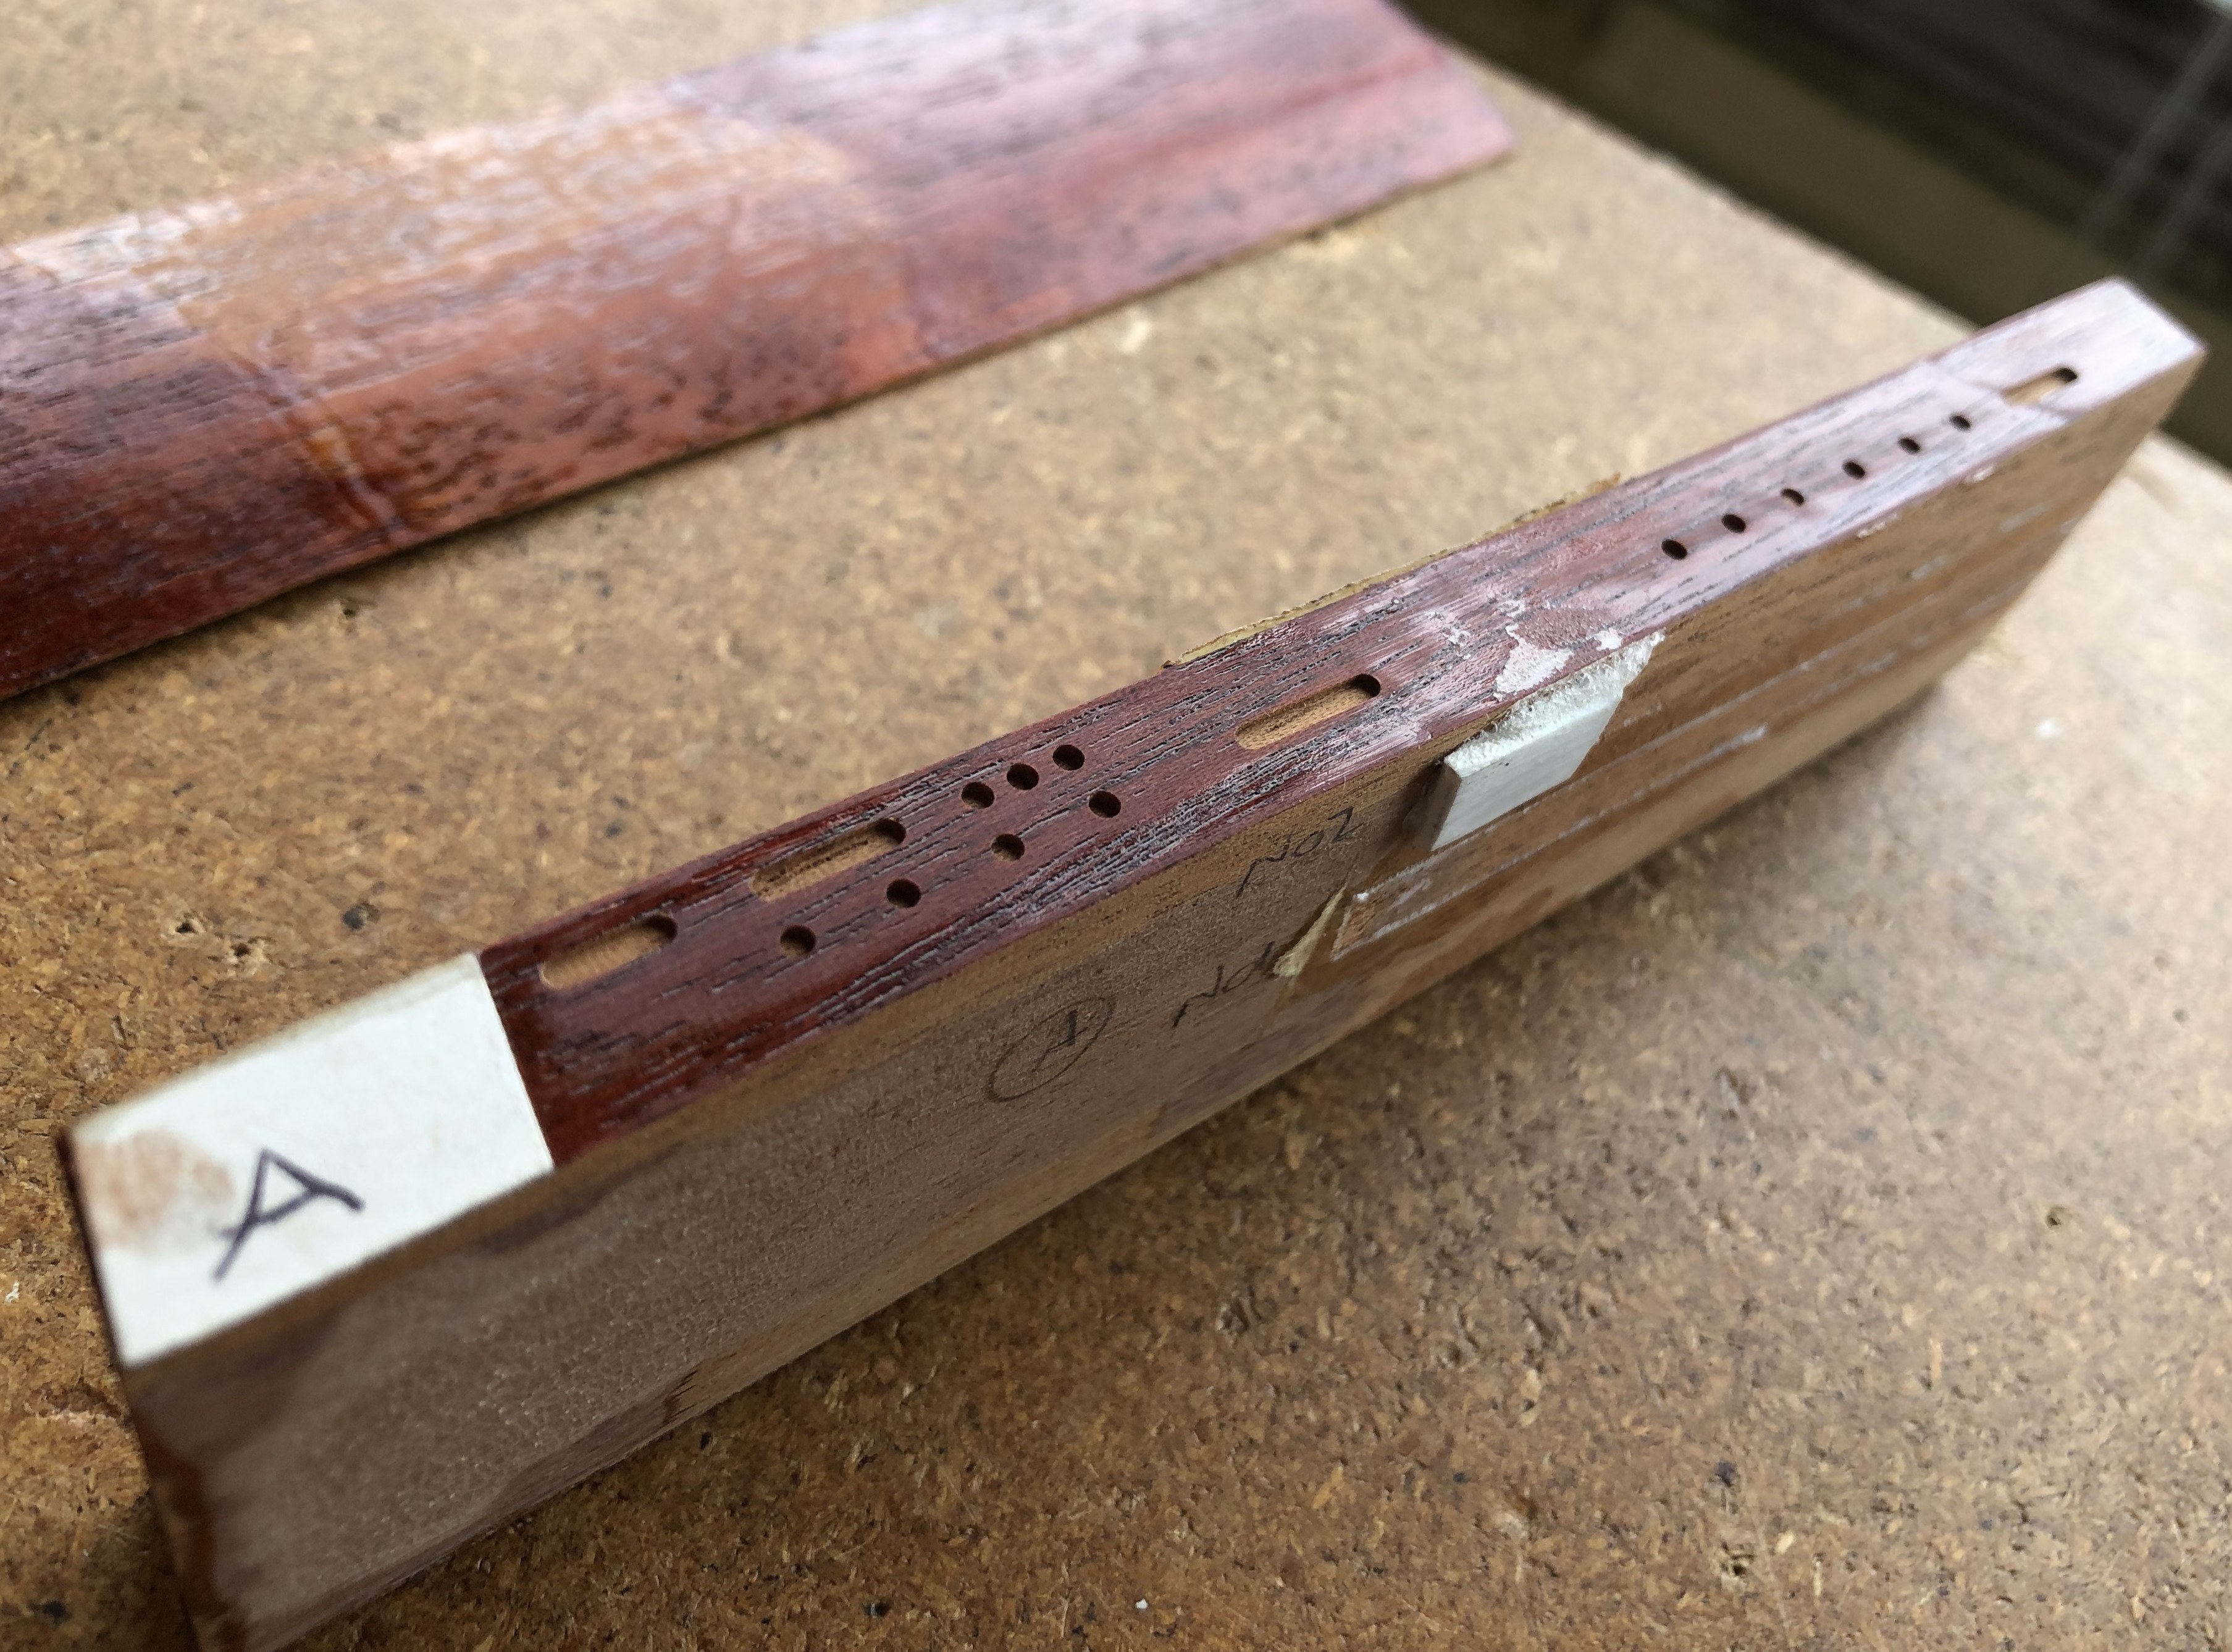
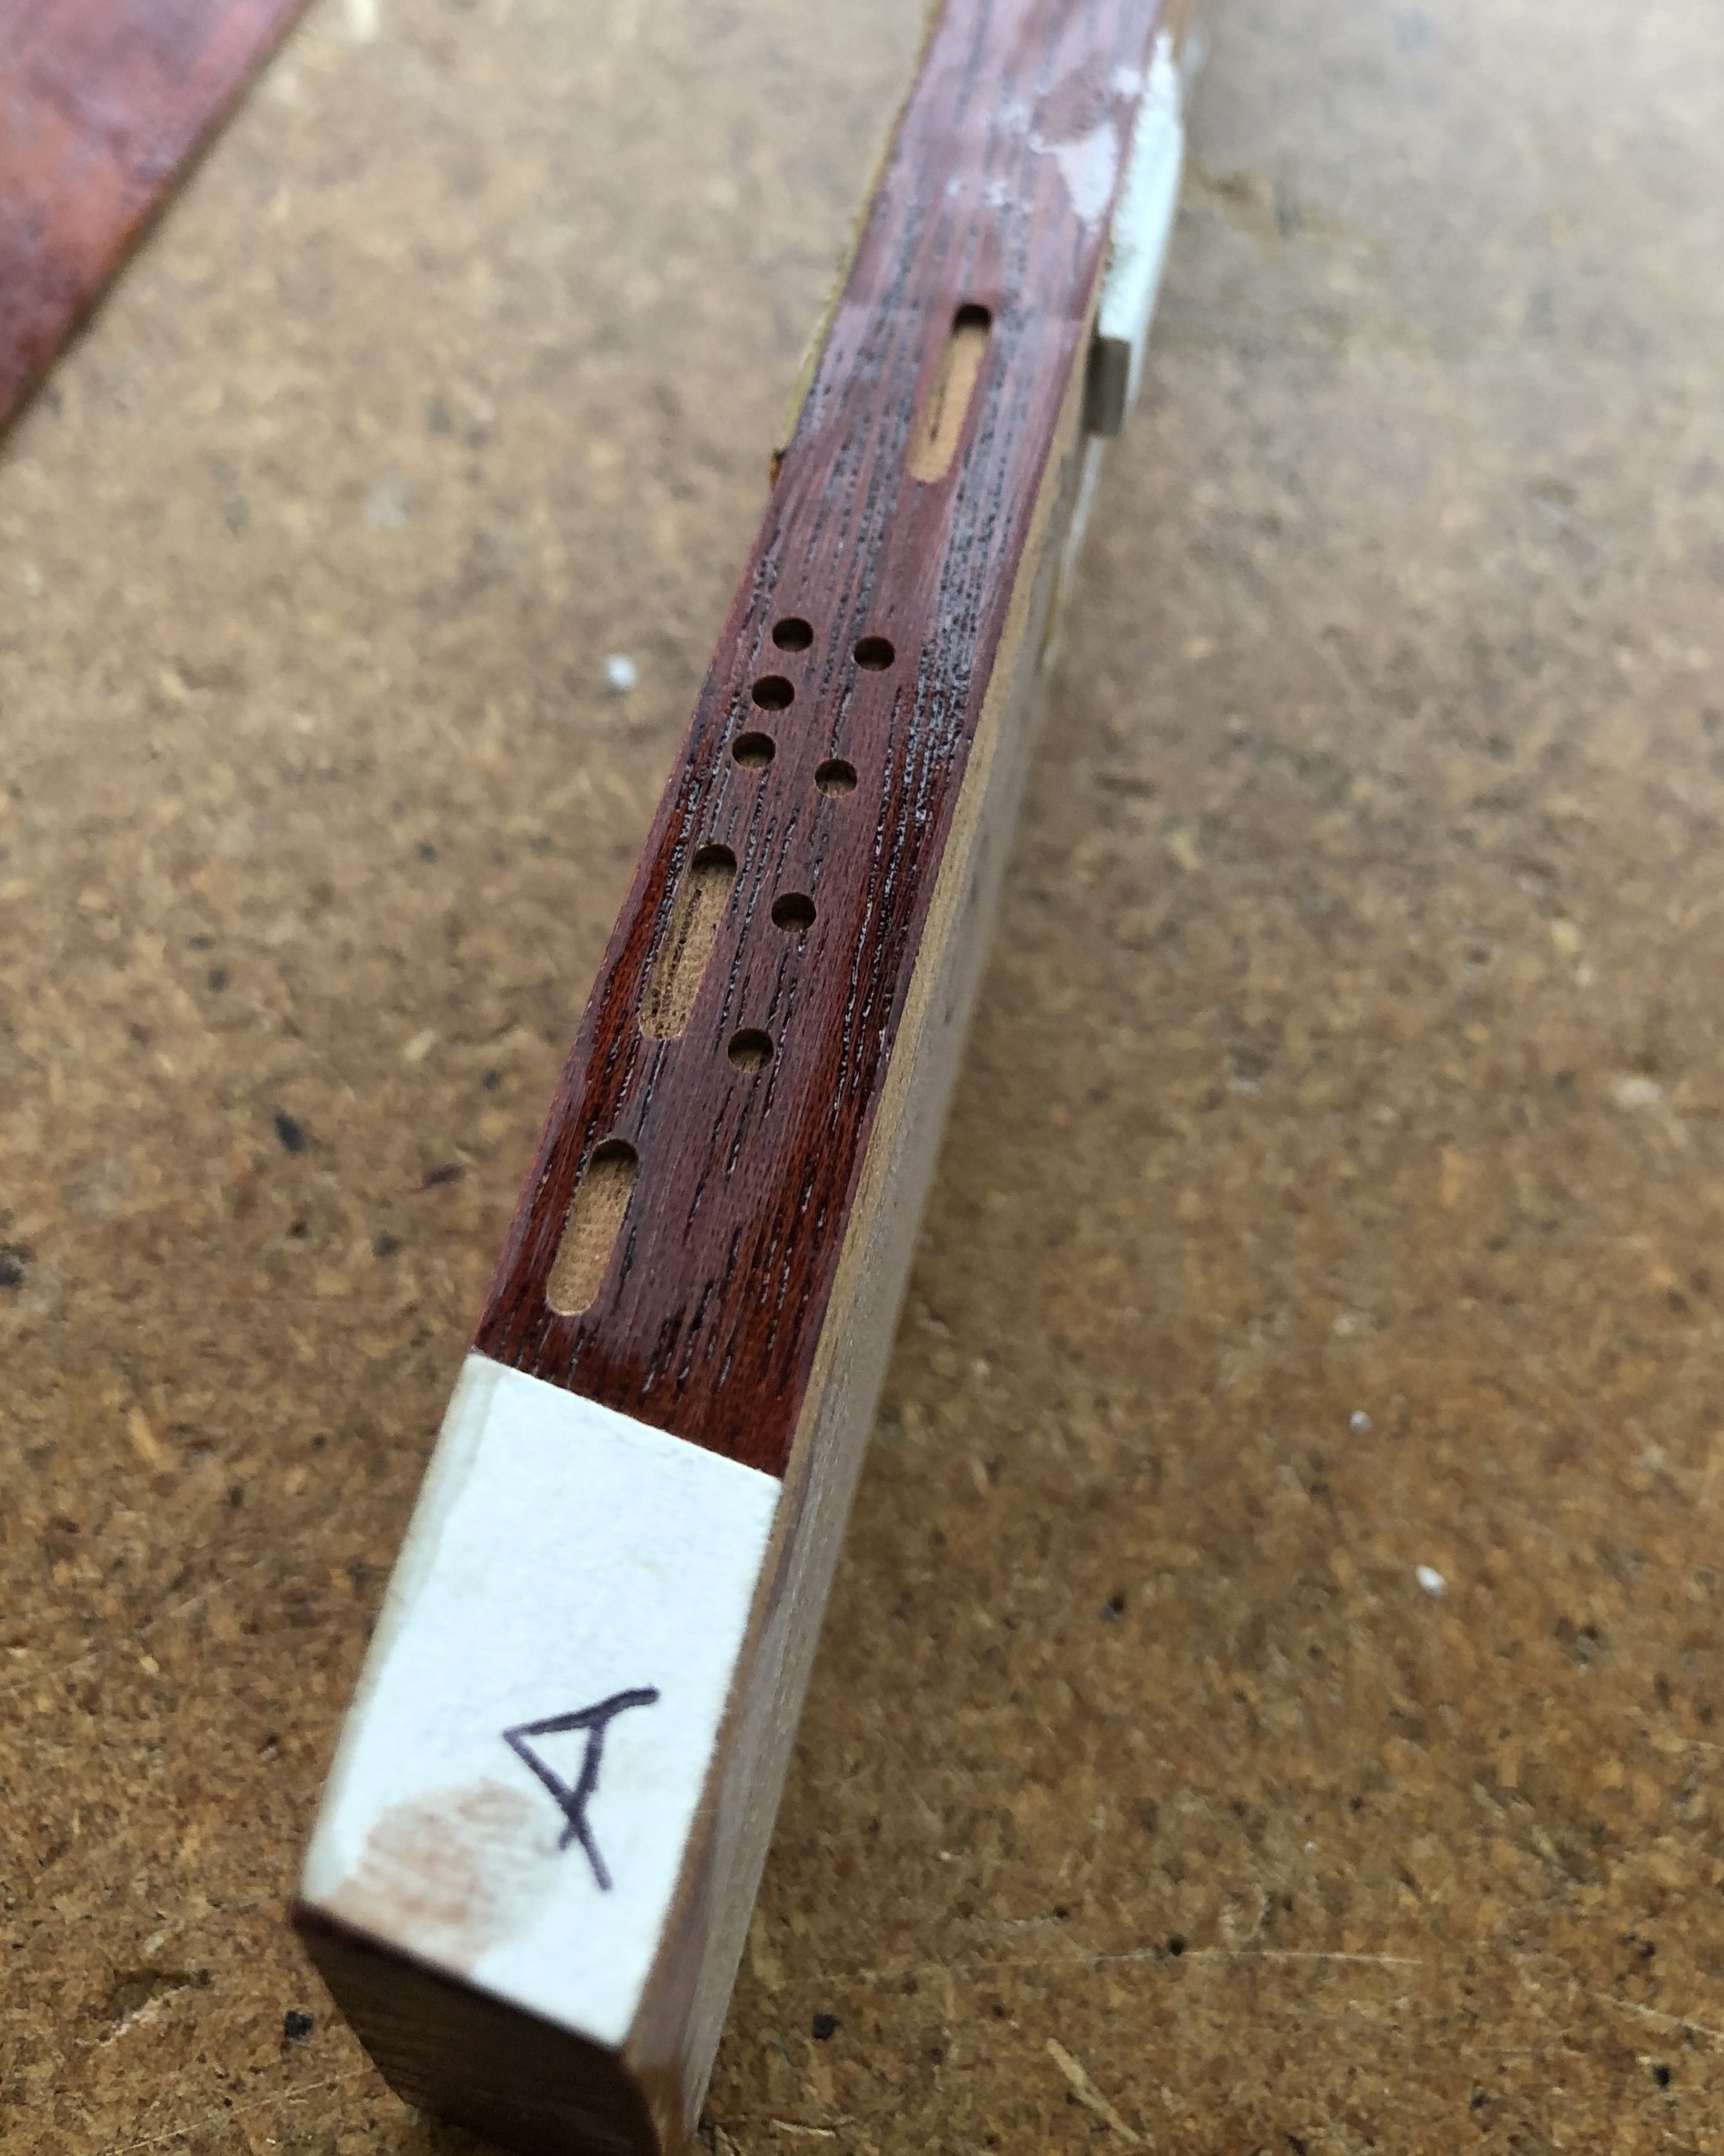
First I did a test run on a piece of mahogany which Martin James (from Foxell and James the paint suppliers) and I had prepared with stains to attempt to replicate the Red Special’s red Furniglass stain overcoated with Rustins Plastic Coating. I also used this test piece to assess different combinations of glues for the re-glueing of the white binding on the Red Special’s body.
In March 2026 I still have this test piece of mahogany from 1998 and you can see Martin’s handwriting on the side and edge tags after he had tried rag application of stain and then brush application. You can also see my white binding glueing experiments, with a small piece of binding still glued onto the mahogany surface. I tried glueing pieces of binding onto the bare wood and also onto the painted side which had the Rustins surface, reasoning that Brian’s Red special binding channel would also have a mixture of bare wood and Rustins paint that the new binding glue mix would need to adhere to as best as possible. After glueing various overhanging pieces of white blinding, the following day I tore them off by hand and assessed which combination of glues worked the best. You can see my pencilled ‘No 1’ and ‘No 2’ which kept track of the glue combinations I had used.

Next I set up Brian’s neck sideways in the milling machine and used a brand new UK made Dormer 1/16″ diameter end mill bought for the job. The Red Special’s neck was clamped to the machine, protected from damage to wood and paint using thick felt pieces. The dots and stripes were milled into the fingerboard edge at approx 3/32″ deep. Fortunately it all worked perfectly.
Soon I will look through my collection to see if I took any photos while I was there at Reading.
Here are 2 examples of using my milling machine in my Sydney workshop: the first is milling the nut slot of a Strat® neck using a 1/8″ dia end mill, and the second using a 1/2″ dia end mill long series to mill the pickup cavities of a Strat® body. Hopefully I can soon find photos from 1997 of using the milling machine to mill Red Special necks.

Back at the Allerton Hill workshop the dots and ‘stripe dots’ then were filled with the Australian made Epiglass white epoxy resin filler. This was the same that I used for the side dots and stripe dots of John, Paul and George Burns. I had previously used the epoxy resin filler on my custom Strats® for fingerboard dots (coloured with a cream pigment to look like the early 1960s Fender® clay dots), and used also on boats which the marine epoxy product was originally designed for. The following day after the white epoxy mix was dry I then carefully filed and sanded down the epoxy so it was flush with the surface, avoiding sanding through the surrounding thin black fingerboard paint.
Later at Mark Reynolds step father Paul’s spray painting booth at Leicester, the neck was overcoated with Rustins Plastic Coating.
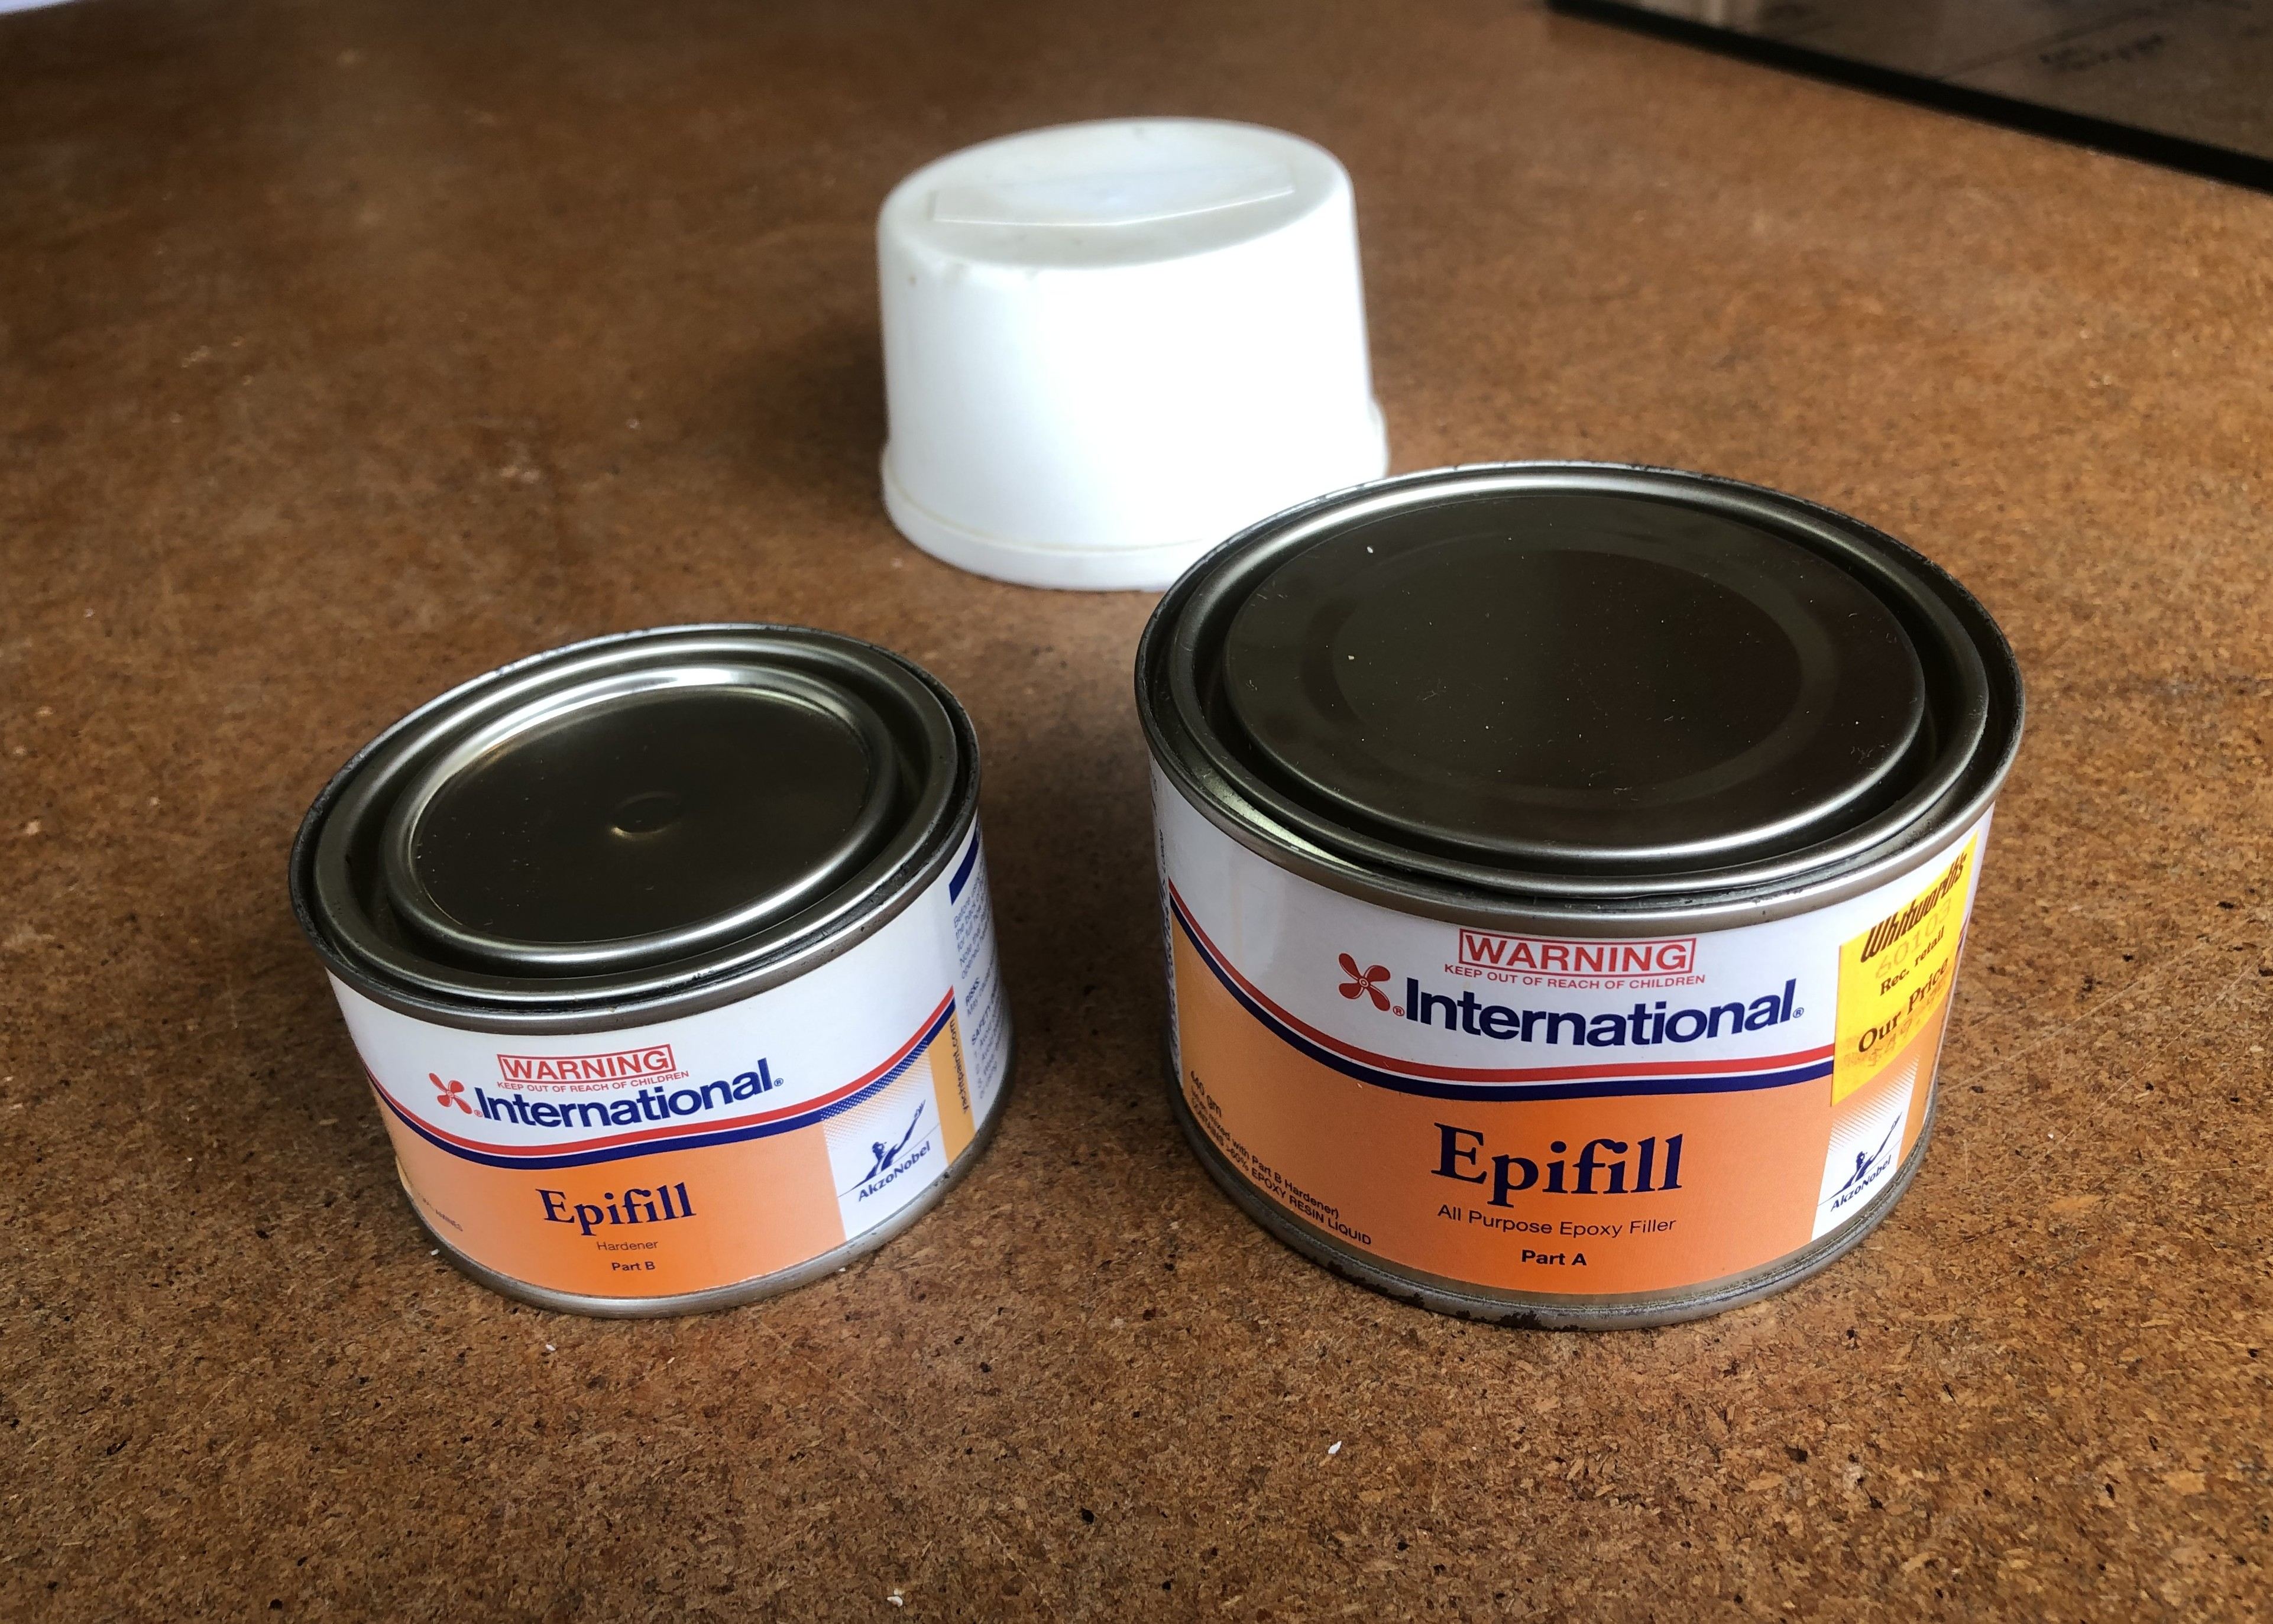
Epiglass epoxy resin filler is currently being made by International
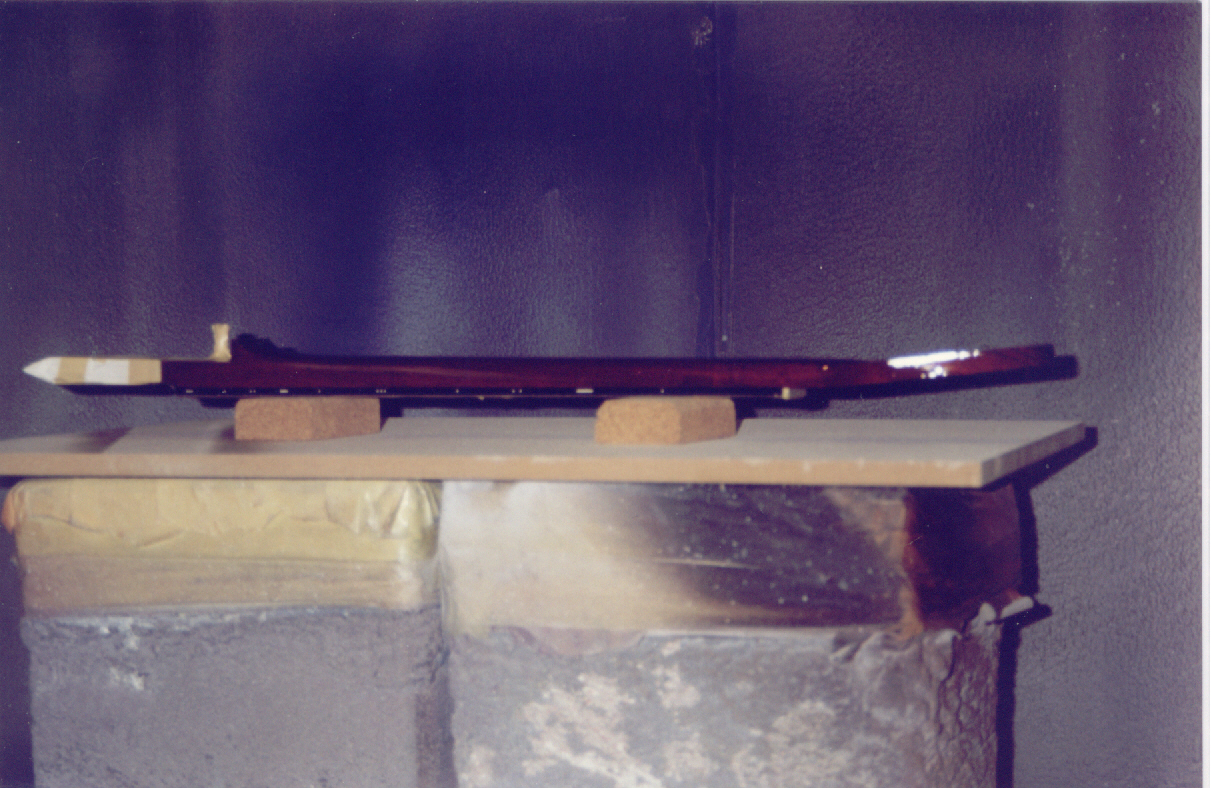
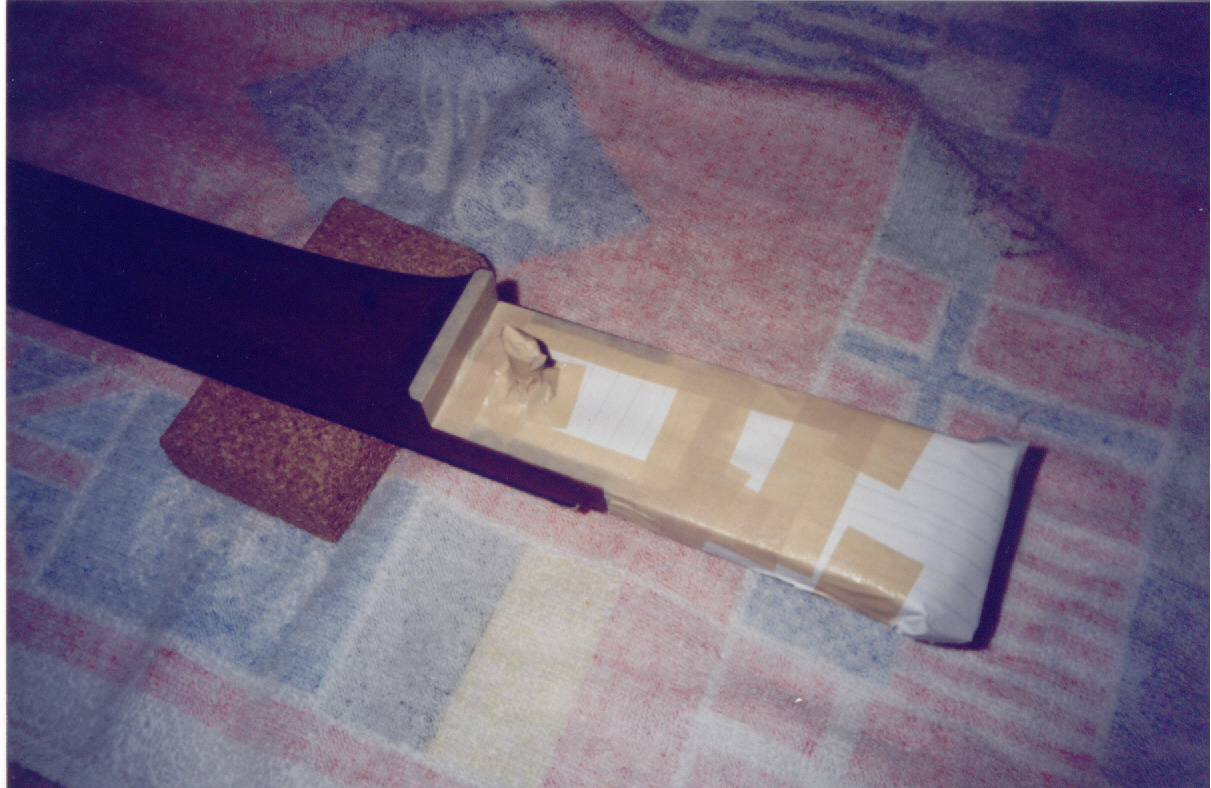
Thanks to Mark Reynolds for the next series of photos taken on Monday 4th May 1998 at Leicester at his step father’s spray painting booth. Photos show preparation before spray painting the neck and body, with everything masked up and degreased several times to remove oil, wax and silicone contaminants from the surface to be painted.


3 Burns Trisonic pickups: these were taken apart and the brass covers panel-beaten to get them flat and straight again after years of being pounded by Brian’s sixpence, coils and baseplate were then reassembled with materials such as 0.5mm rubber to dampen microphonic feedback and finally the whole pickup with cover attached was soaked for 45 mins in a parrafin wax solution for further feedback reduction.
Switches, pots and jack were all examined and cleaned, any suspect areas of the wiring were resoldered.
Scratchplate:
The section which had broken off was first reglued, and then was reinforced across the break with black acrylic (perspex) piece and brass sheet inlaid. The surfaces were then fine sanded and hand polished to look same as rest of the scratchplate. The rectangular hole in the scratchplate where a switch for the original fuzz/distortion unit had been was filled with a black acrylic piece glued in, then sanded flat. I then inlaid a mother of pearl “May Star” – made from the same batch as the star inlaid in George Burns’ fingerboard as the 5th fret marker – into the scratchplate’s surface. After glueing, the star was sanded flat and hand polished.
Pickup surrounds made from 1/8″ or 3mm thick black acrylic (perspex) for 3 Burns Trisonic pickups, these were made by hand and were set up in a jig in the milling machine and were then milled down in thickness from the standard sheet thickness of approx 3mm to 1.75mm which was a very similar thickness to Brian’s original pickup surrounds. The originals had broken away over many years.
After Brian told me how he wanted the thinner pickup surrounds to look, I completed sets for the Red Special and also for my guitars ‘John’, ‘Paul’ and ‘George Burns’. For this I used some of the surrounds that that I brought from Australia, but because I didn’t have enough for the 4 guitars, several perspex 1/8″ thick blanks were also kindly cut out and supplied by Mark Reynolds from Leicester. The edges of the pickup surrounds were then rounded and fine sanded by hand and then hand polished, then glued onto the scratchplate surface with a special purpose .005″ thick 3M #467 acrylic double sided tape.
Bridge and Tremolo Tailpiece:
Extra bridge rollers were made for Brian’s Red Special and for the 3 Fryer Red Specials by Andrew May and Richard Den Brinker in Sydney Australia.
The tremolo tailpiece was taken apart cleaned measured rust sanded off tailpiece top and polished with silicone car polish to seal the mild steel surface as best as possible against further corrosion.
Hardened steel knife edge cleaned de-rusted and finally polished to reduce corrosion, then teflon paste applied for lubrication between it and tremolo tailpiece. Everything lubricated and adjusted.
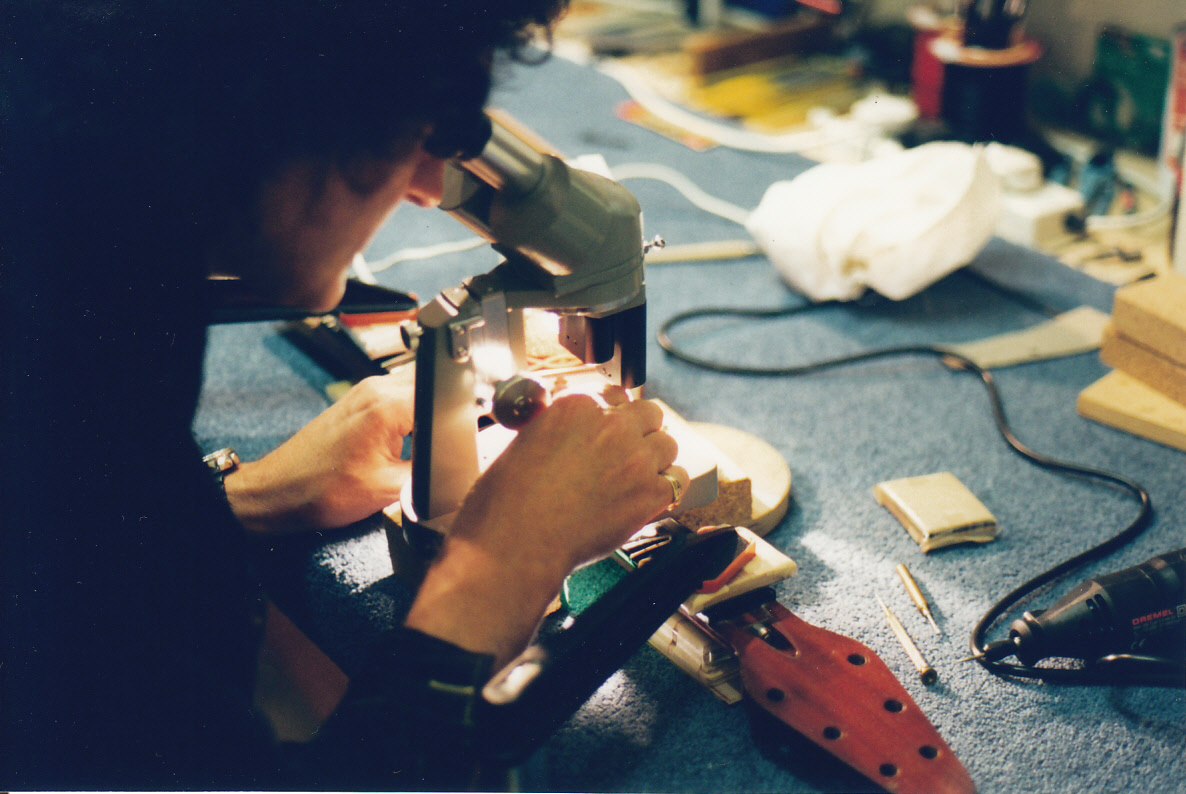
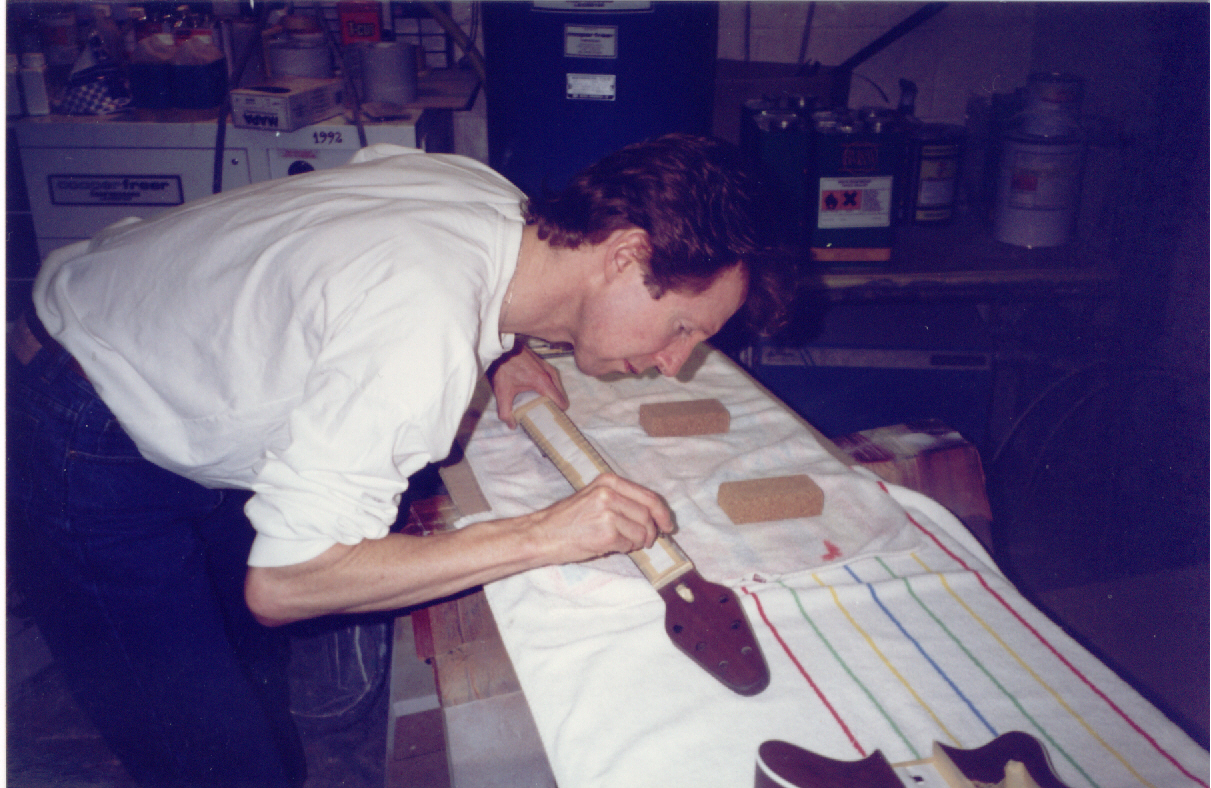
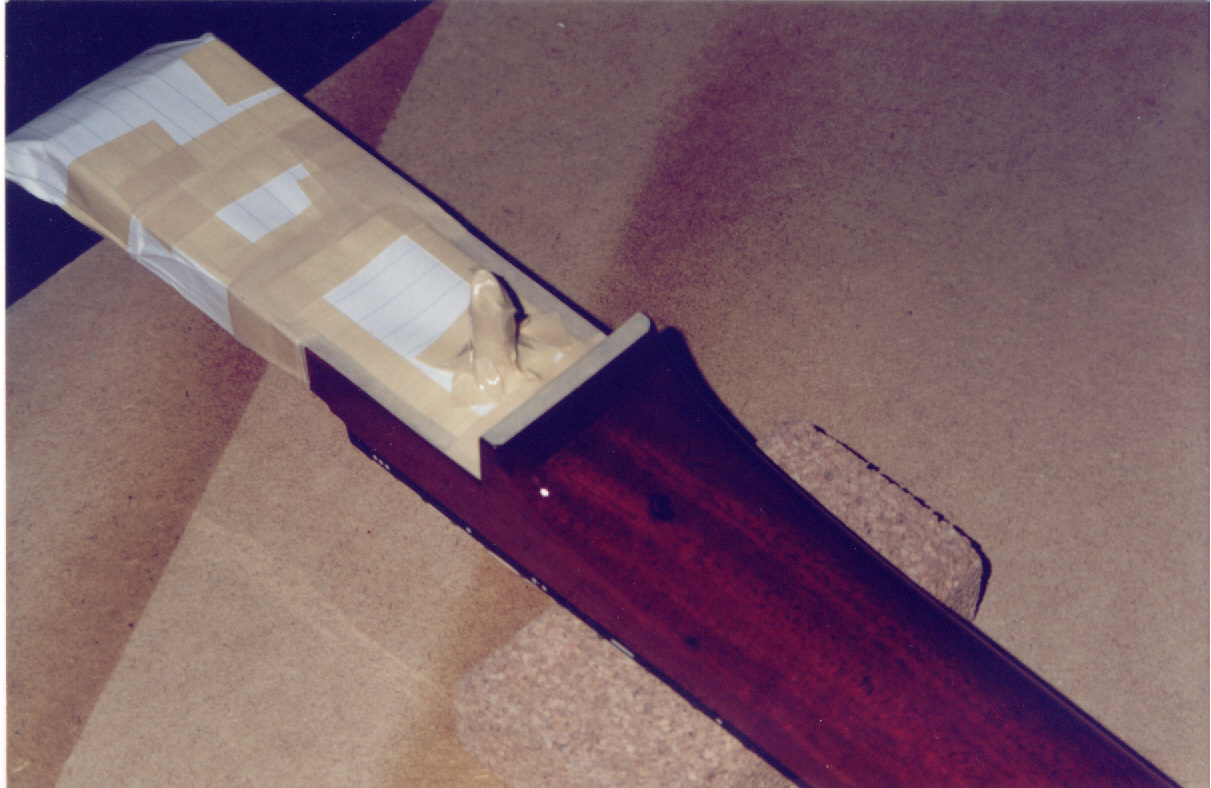
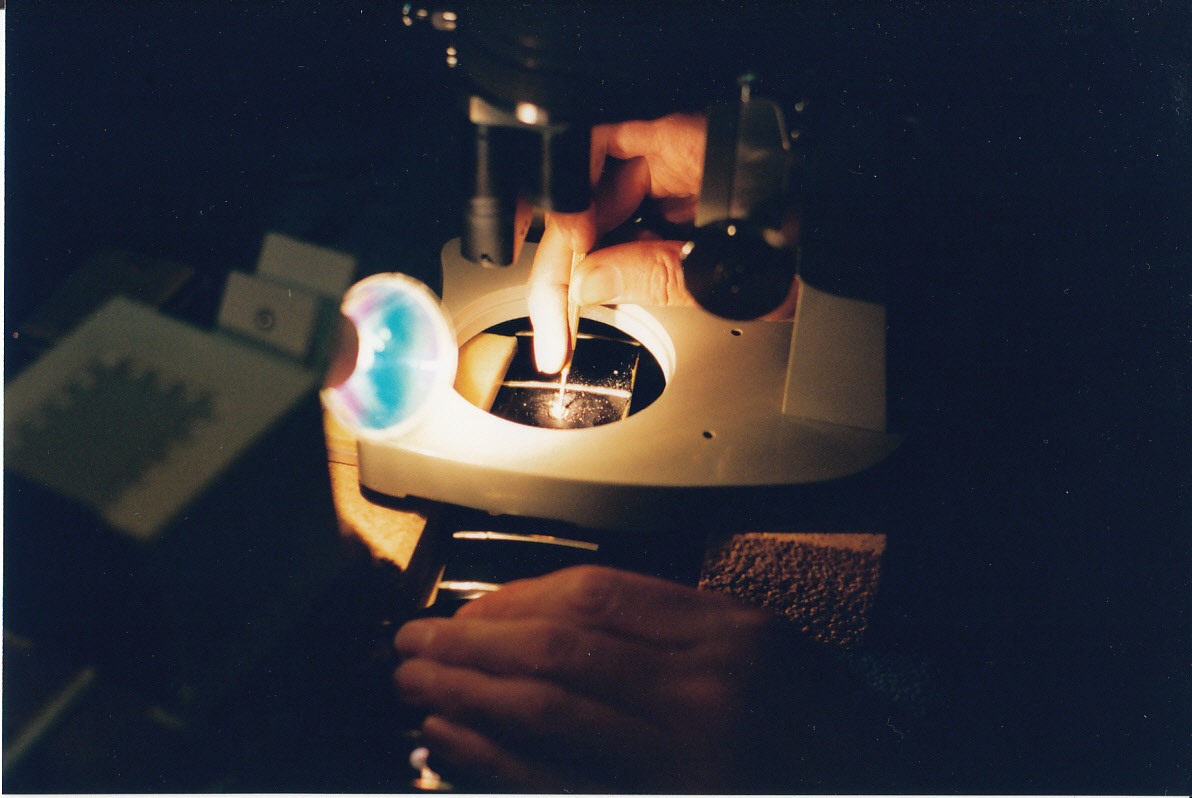
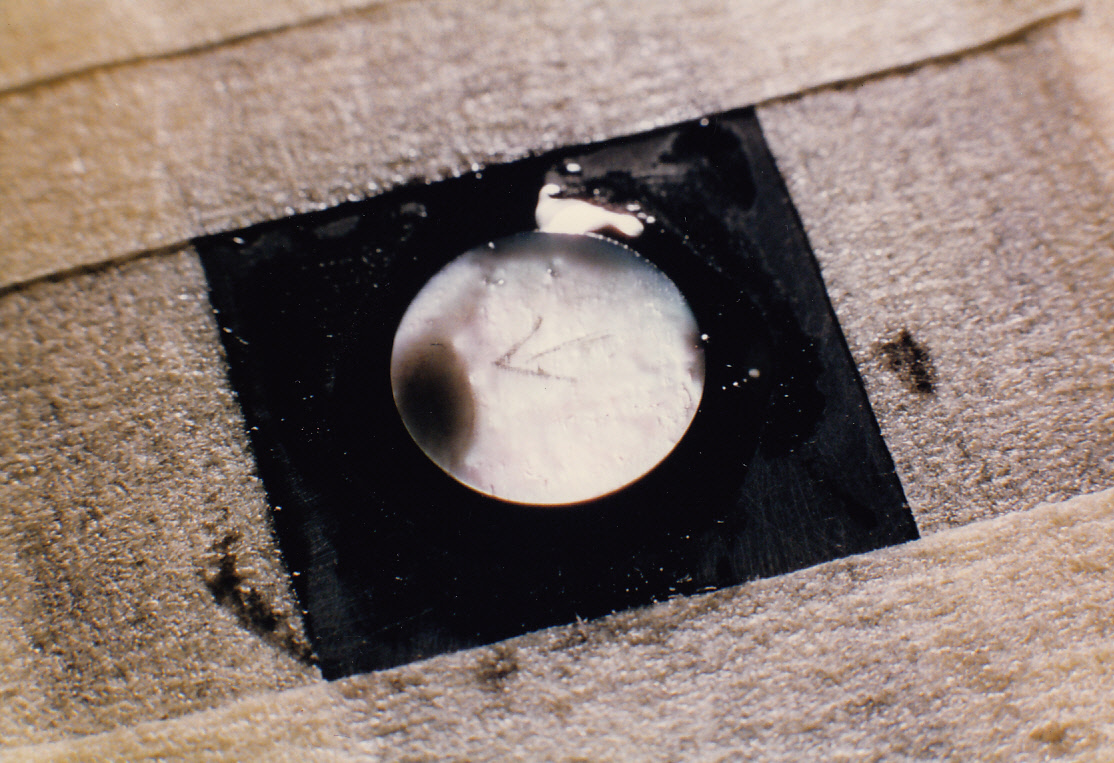
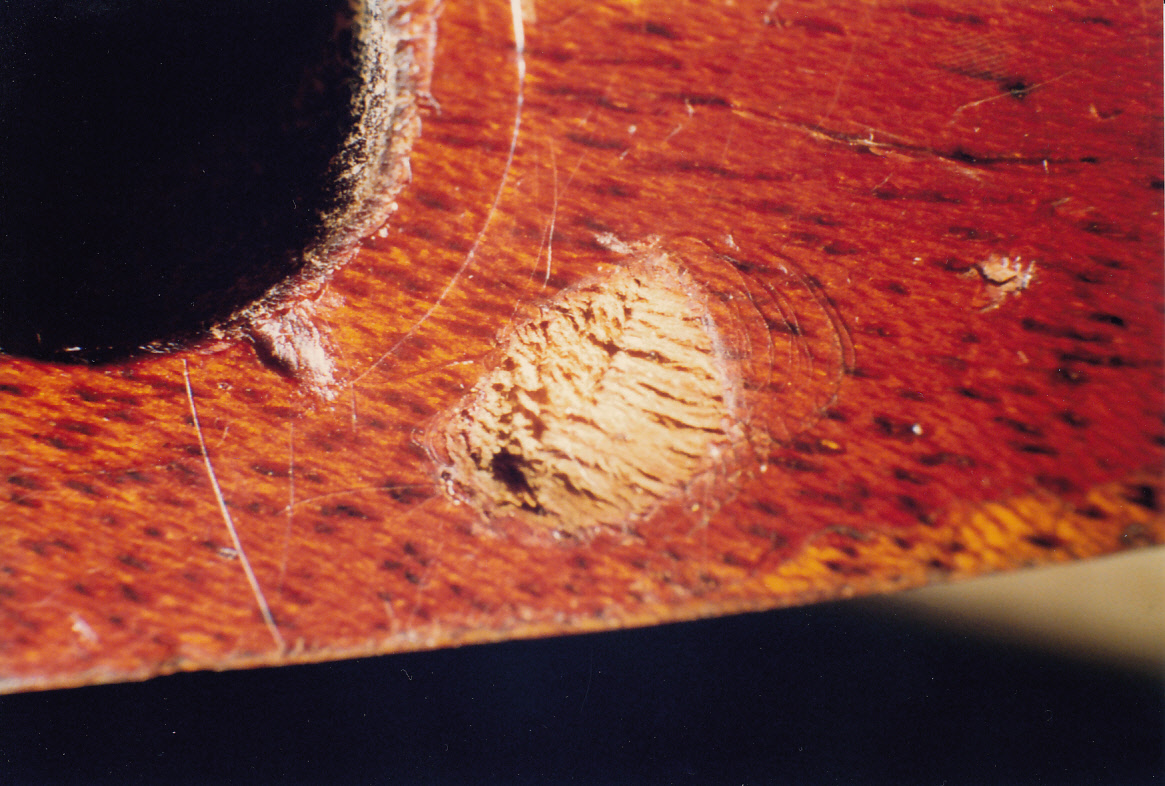
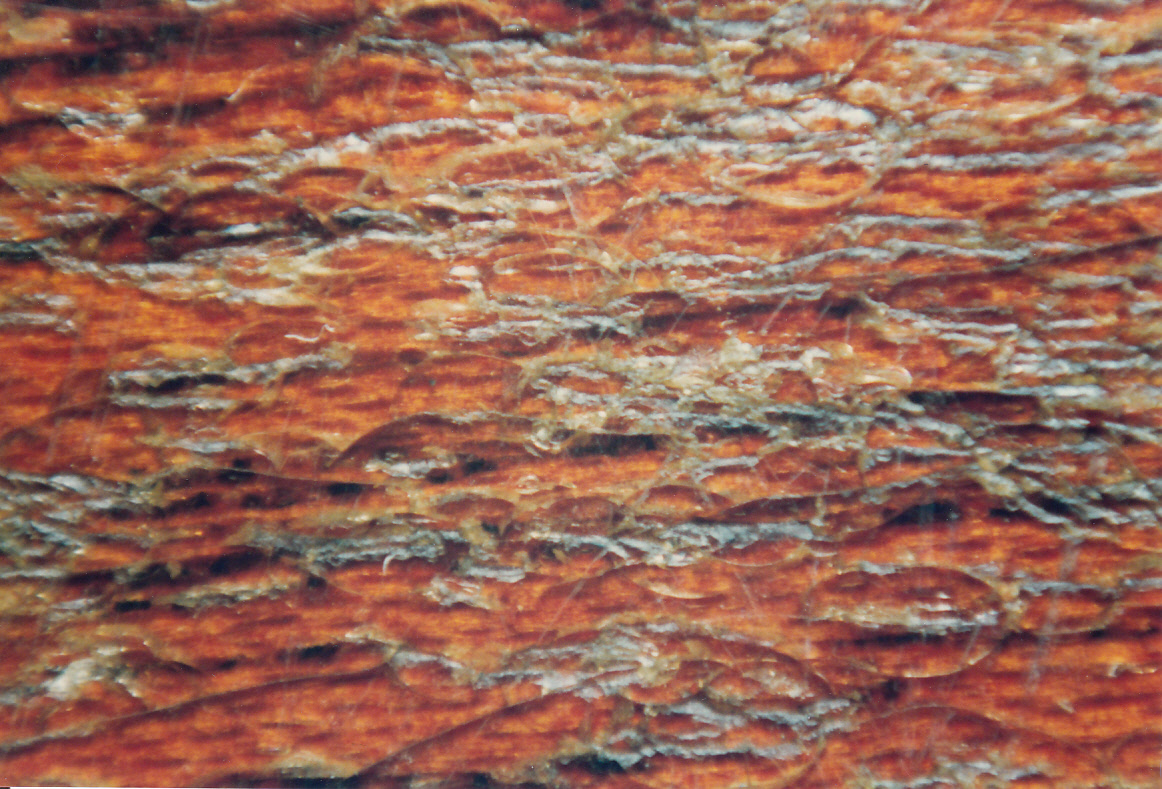
March 1998: Brian examines under a microscope the Red Special’s 5th fret dot marker hole after the temporary red wooden dot was removed. The fingerboard area surrounding the dot marker hole had worn greatly over the years and this posed a difficult repair dilemma
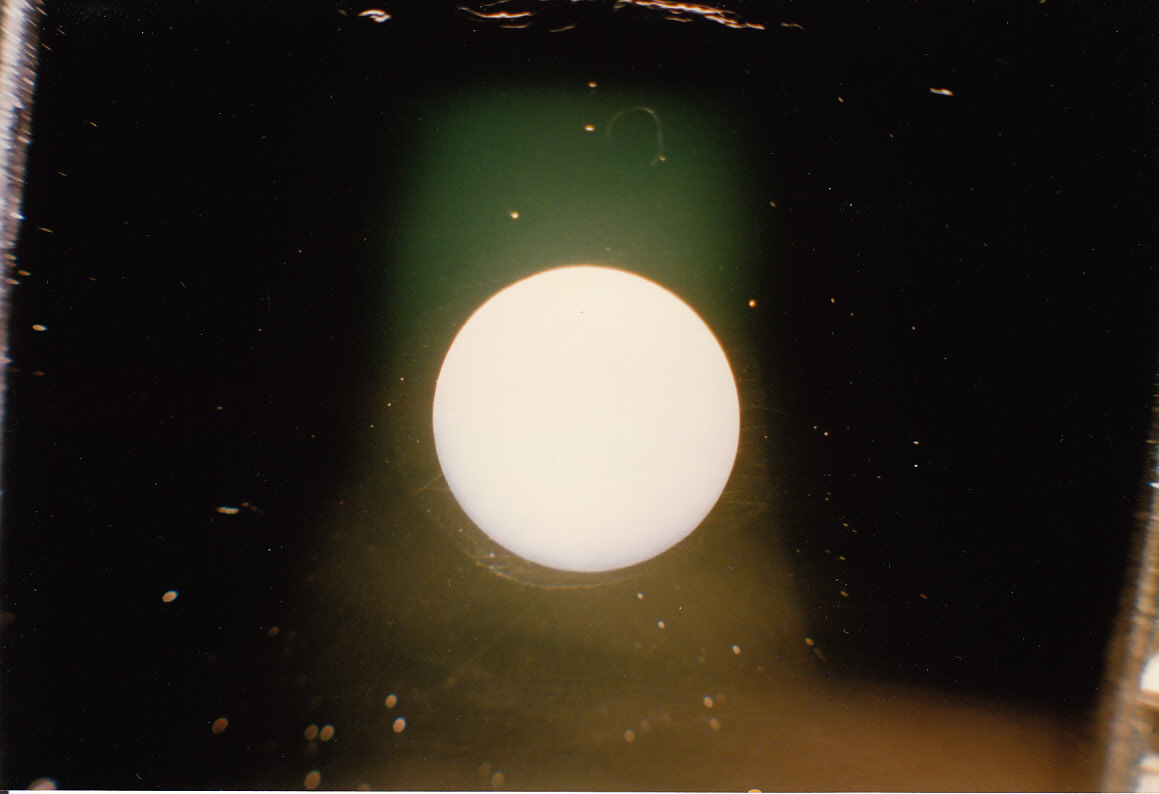
Red Special dot work #2
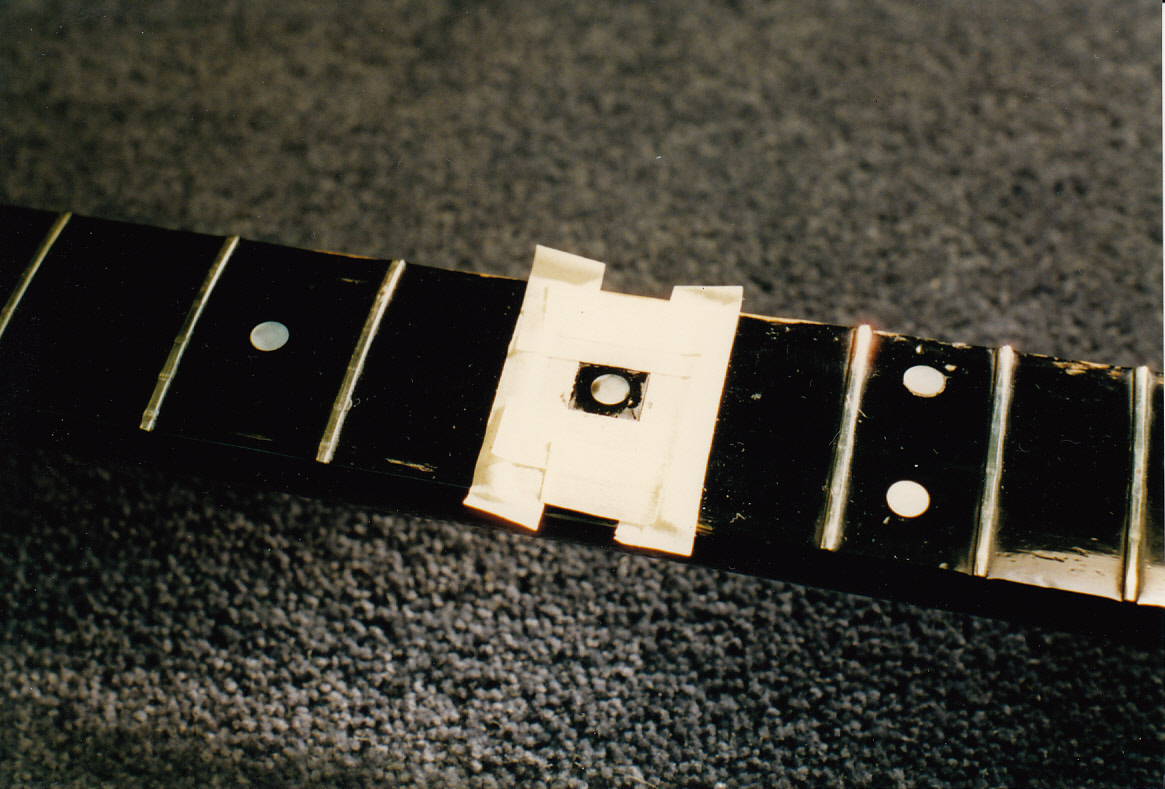
Red Special new 5th fret mother of pearl dot glued in
5th fret new dot glued in close up
5th fret dot closer view
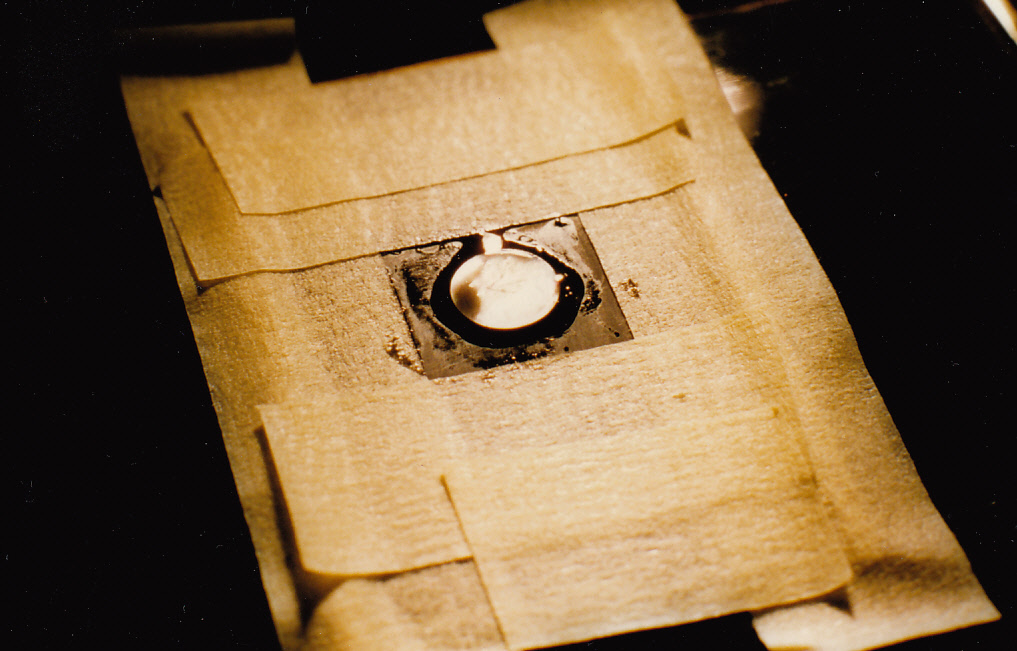
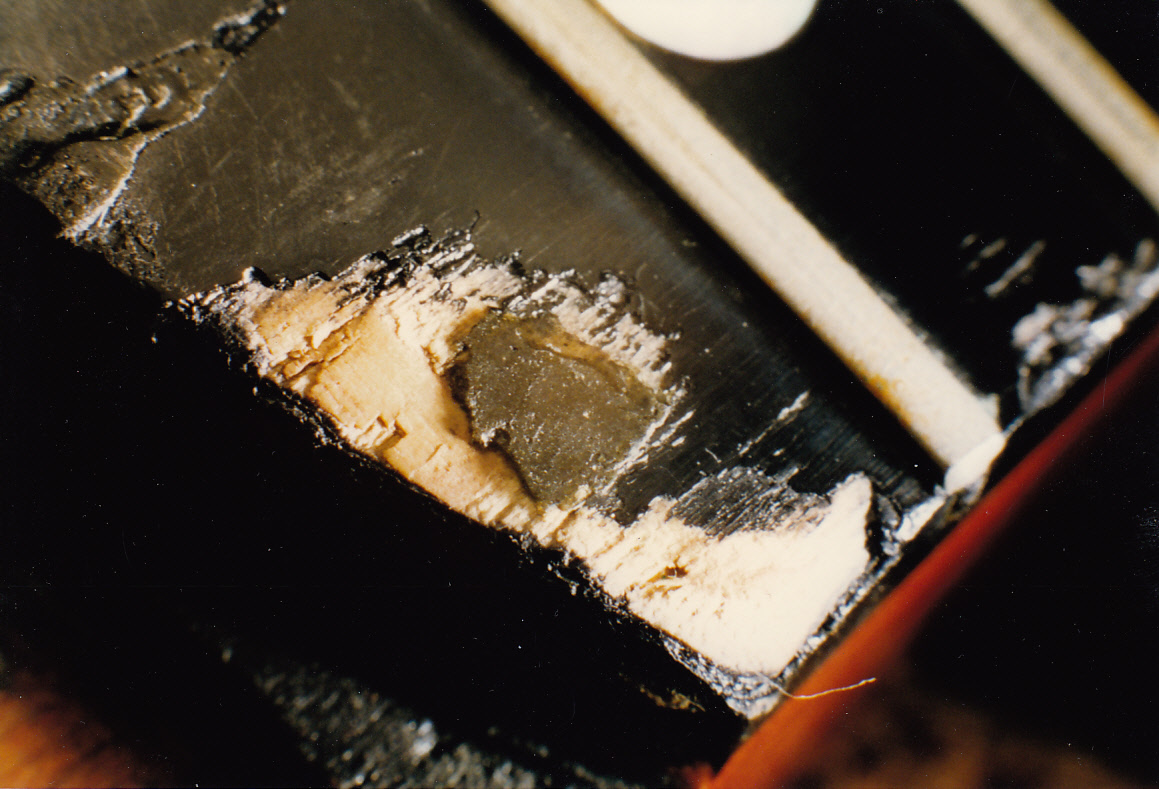
Red Special fingerboard after dot and black epoxy resin mix were filed and sanded level with the fingerboard surface
Red Special new 5th fret dot sanded and polished level with
the surface. In fact the surface of the fingerboard was anything but consistent having had 30 years of playing wear and this posed problems when sanding the pearl dot and black epoxy mix. The worn egg shaped ‘crater’ that the former red wooden dot was sitting in can be seen here especially visible to the left and right of the dot and is easy to see here in this photograph due to the reflection of the strong light used. I handshaped the new mother of pearl dot using the original handmade method and tool that Brian used when he made his original fingerboard marker dots from his Mum’s pearl buttons.

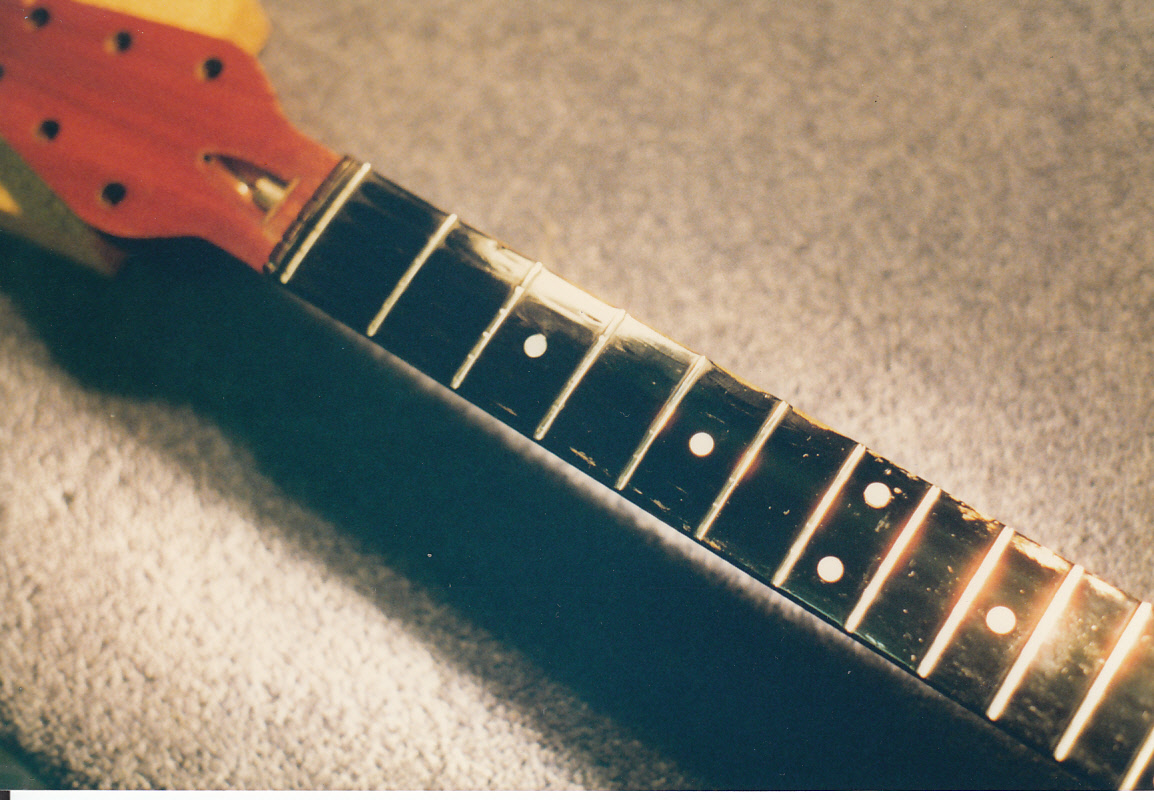
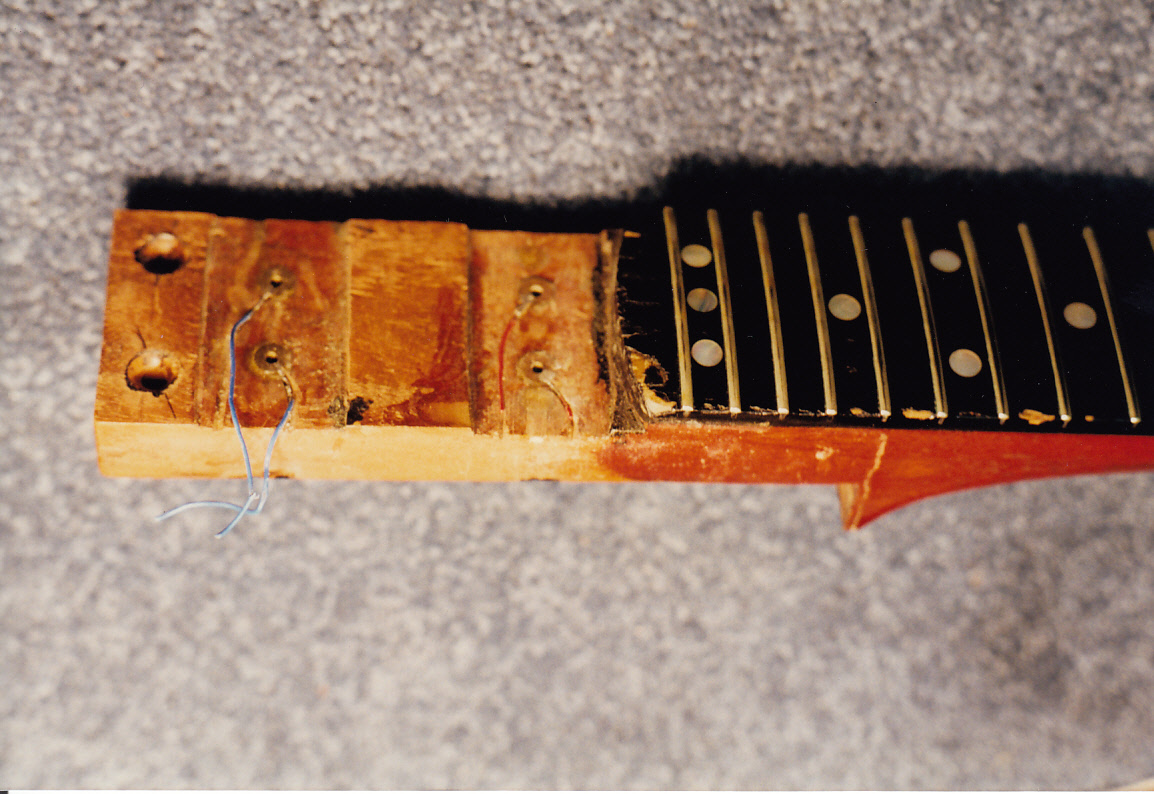
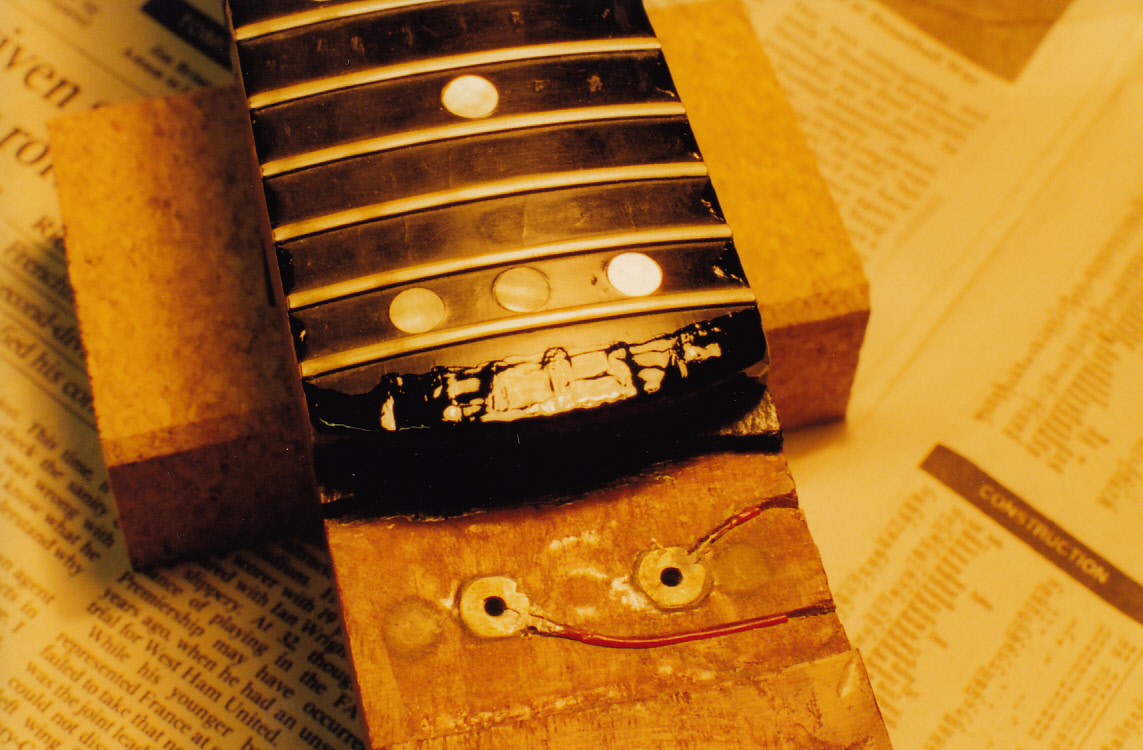
Red Special 24th fret end of fingerboard showing wear before repairs. This pic illustrates how much Brian played his beloved guitar and what damage the sixpence occasionally did to the fingerboard. Interesting to see the 2 brass 6BA hank rivet nuts used as connectors with red wires inlaid into the mahogany neck for the original neck pickup that Brian first used in the guitar, these being the pickups that Brian designed and made that were later replaced by the 3 Burns Trisonics.
Close up of the wear and tear to the fingerboard at the 24th fret end
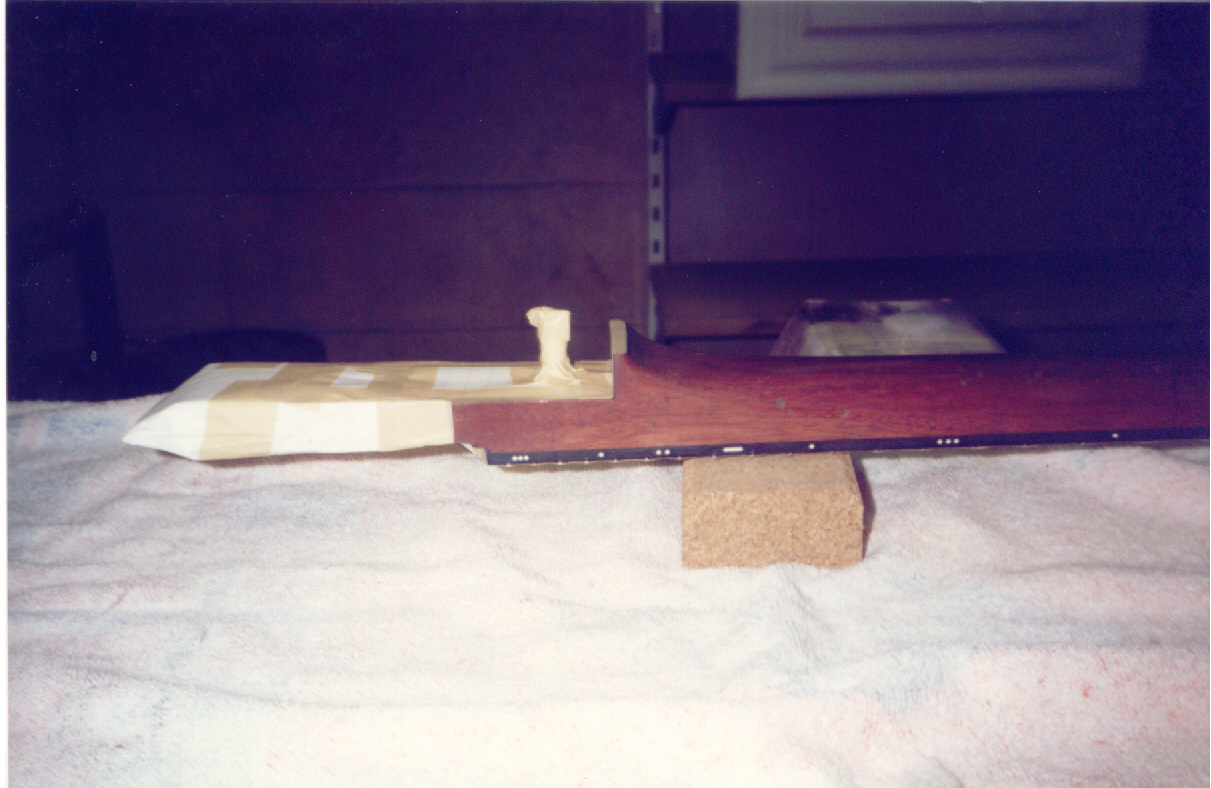
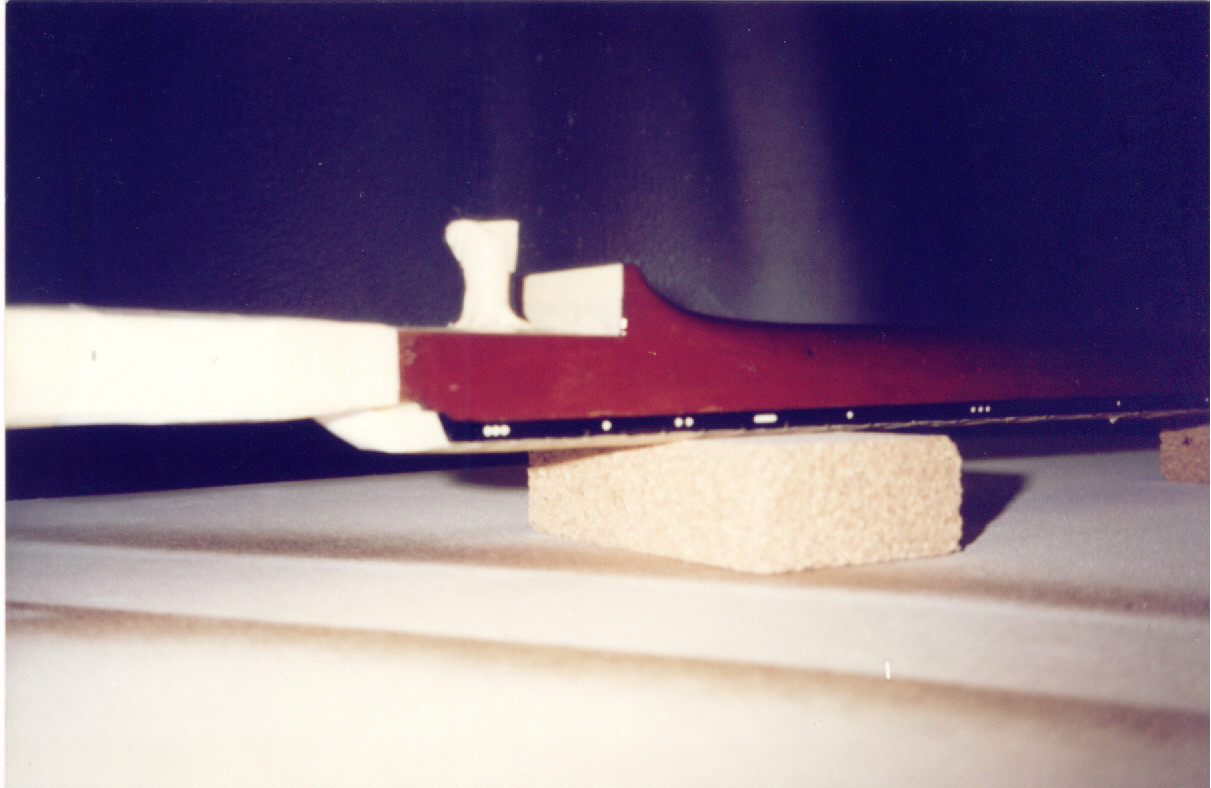
Red Special fingerboard and neck heel/tongue 9th Jan 1998
24th fret fingerboard painting. Brian and I discussed the best way to go about repairing the damage, and Bri thought that (after preparing the damaged area thoroughly) he would try brushing on layers of Rustin’s Plastic Coating with black stain mixed in, pictured here. It took several goes of brushing on coats and sanding back carefully to get a flat surface each time and gradually the damaged sections were filled up. With the benefit of hindsight and experience I think we would have preferred to have filled the crevices here in the fingerboard with West System epoxy resin and then painted black Rustins on afterwards. This worked well for other areas of the body and neck which I later worked on when Brian got too busy to help with the repairs, and as we went on we learned that the West System resin gave a more stable base for the top coats of Rustins and this meant less likelihood of the top coats crazing later due to movement in the underlying layers. Later the whole of the fingerboard and neck was overcoated with clear Rustins during the spray painting process.
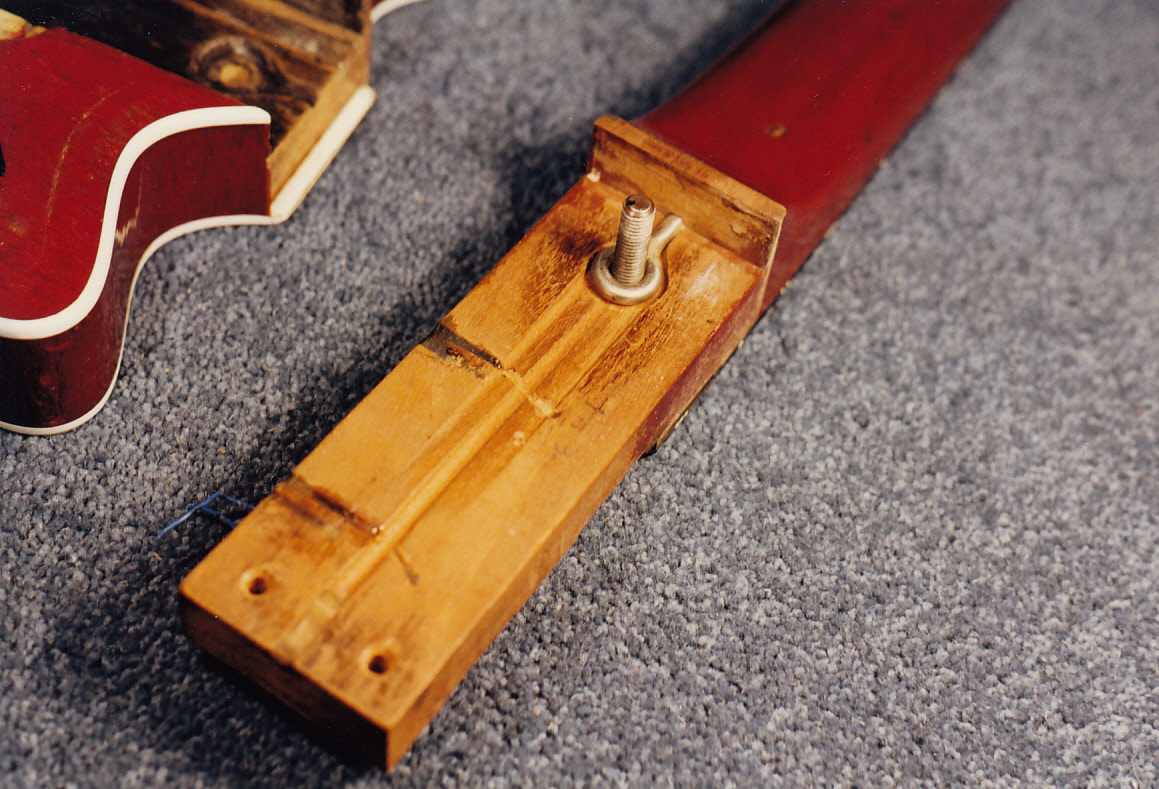
neck heel tongue #2 9th Jan 1998

Neck heel tongue #3 9th Jan 1998
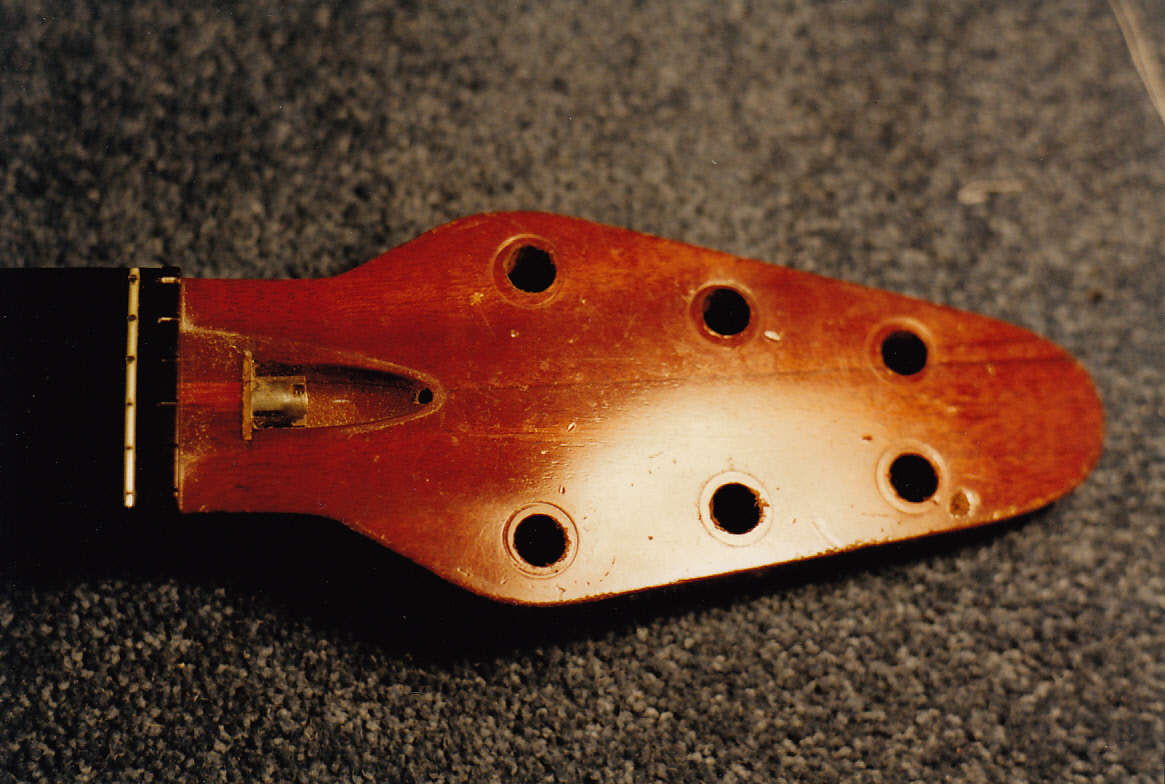
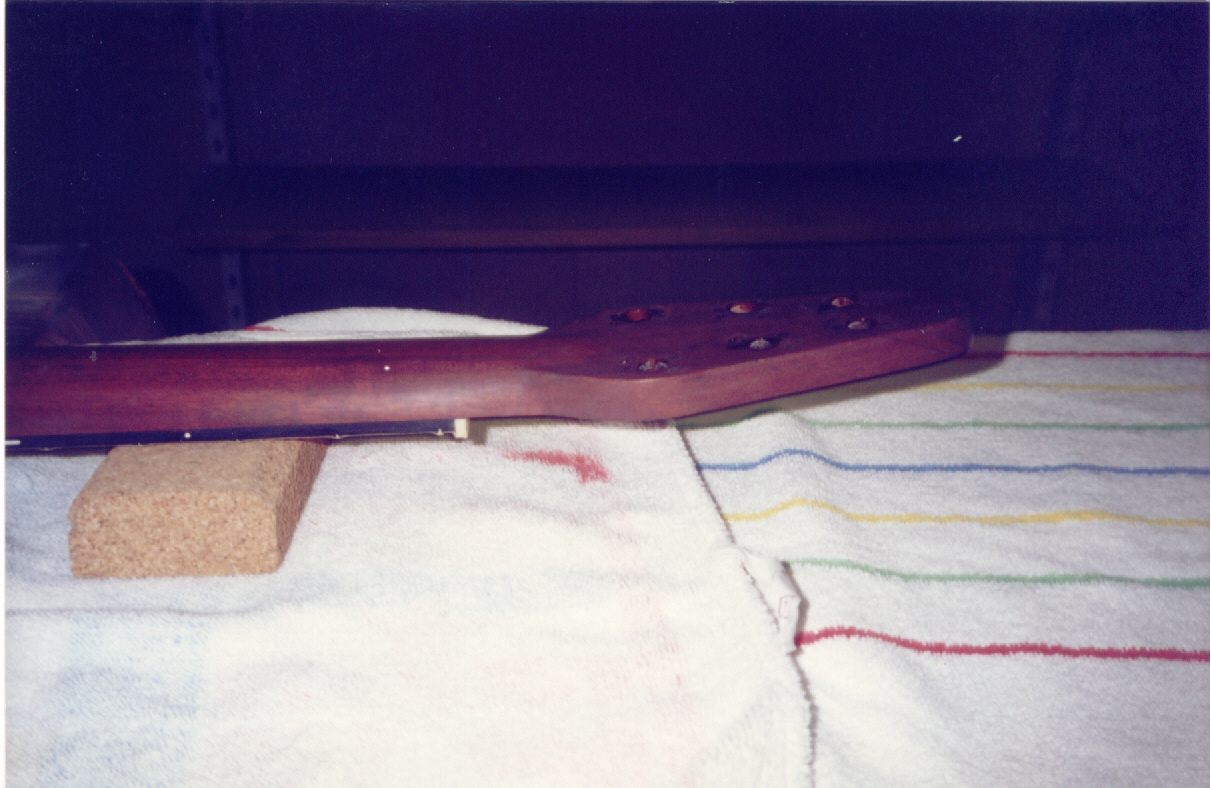
Red Special neck head 9th Jan 1998
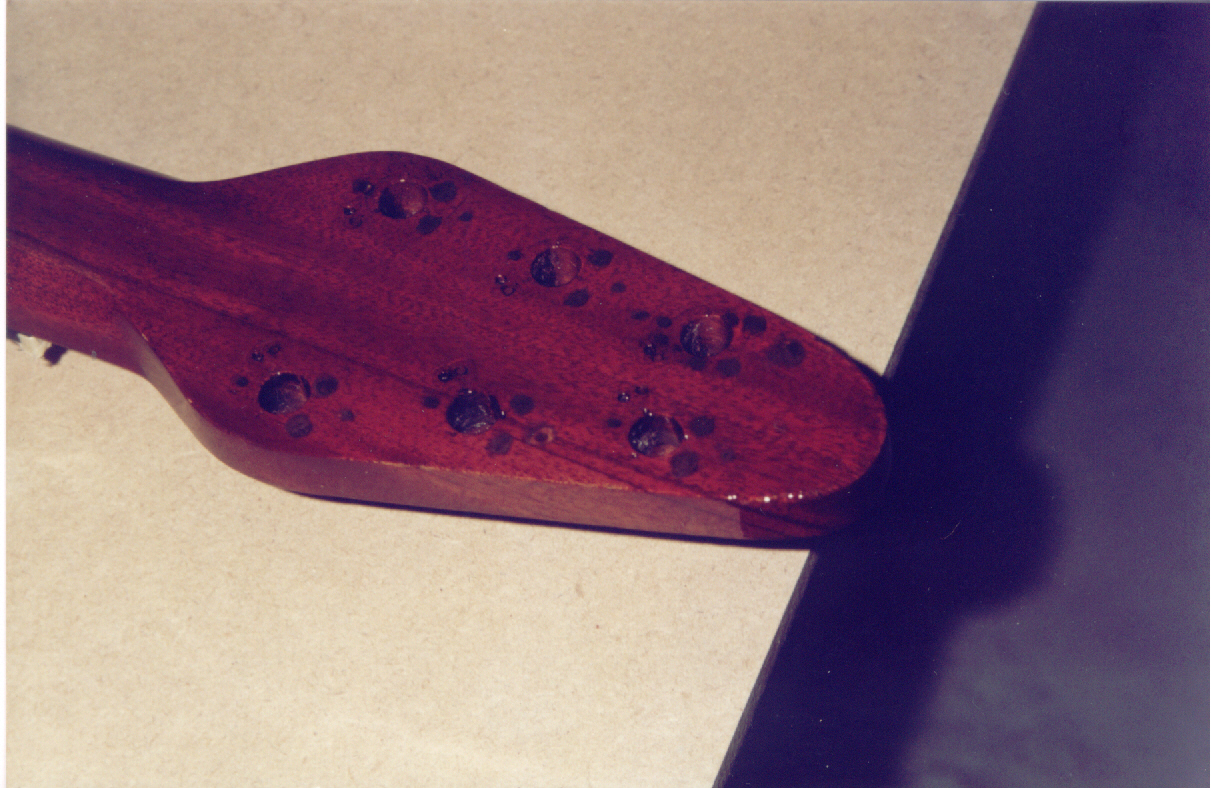
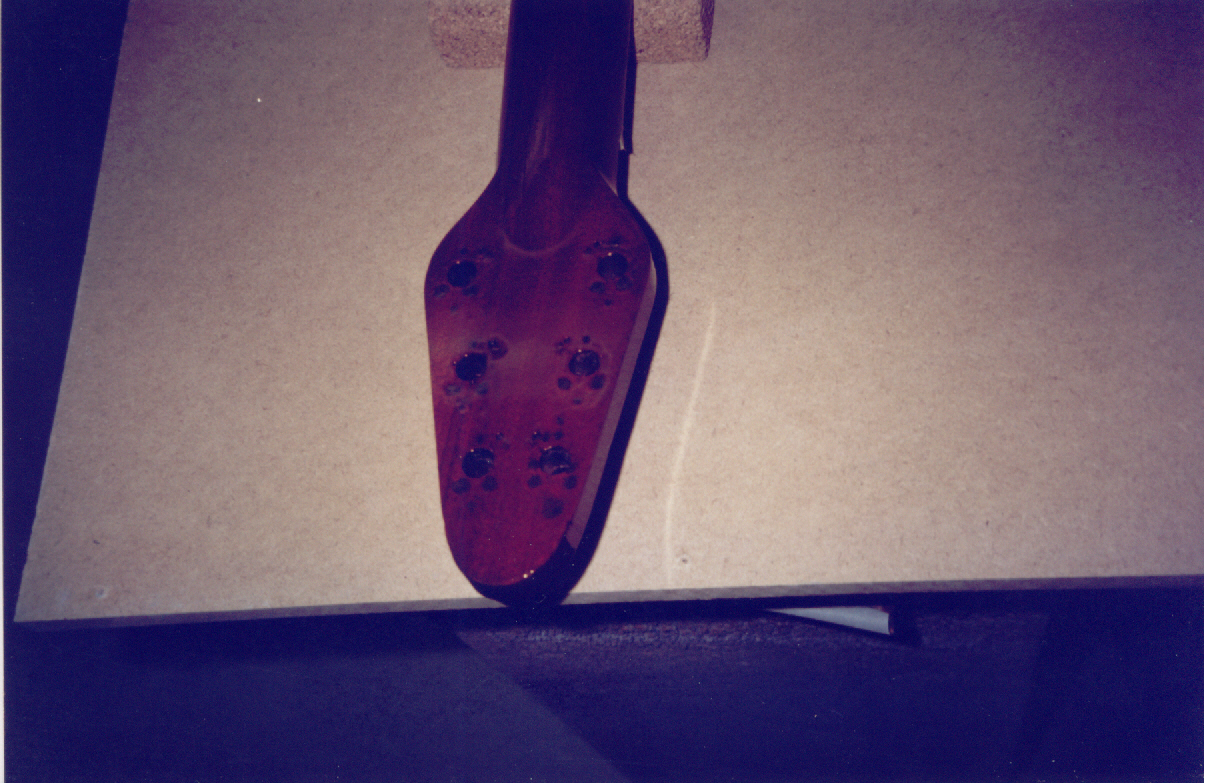
Back of headstock gouge to be filled
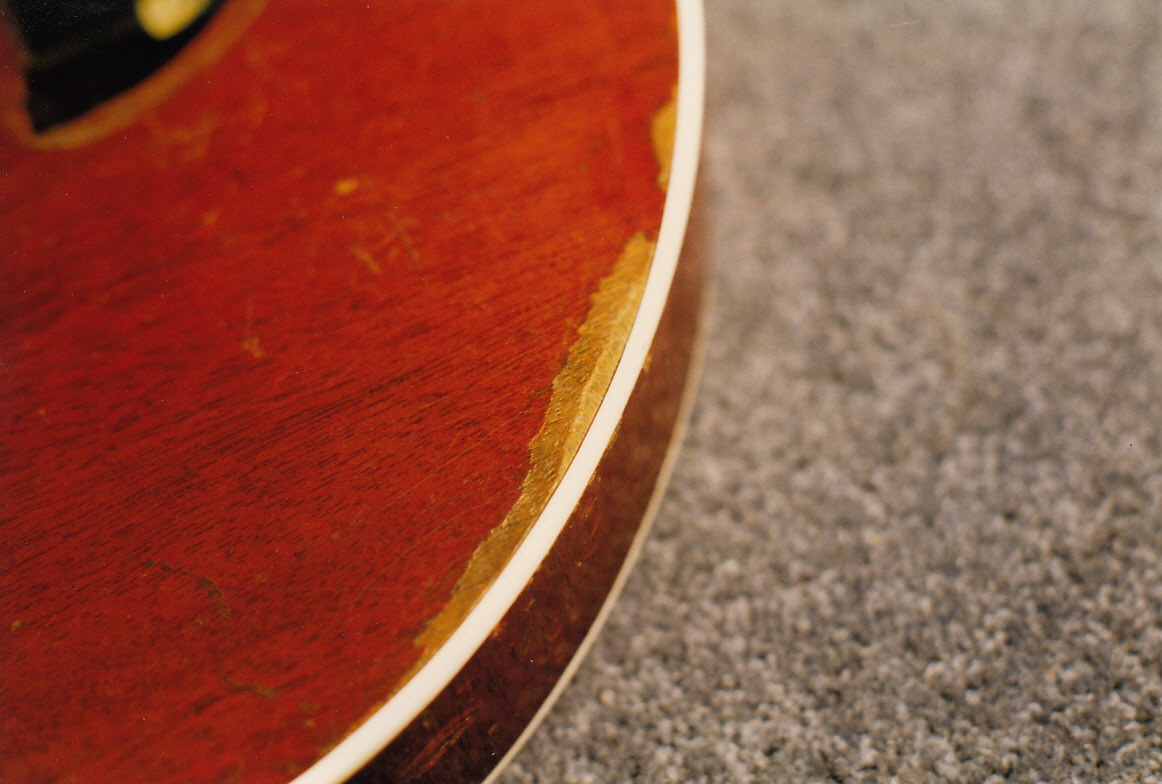
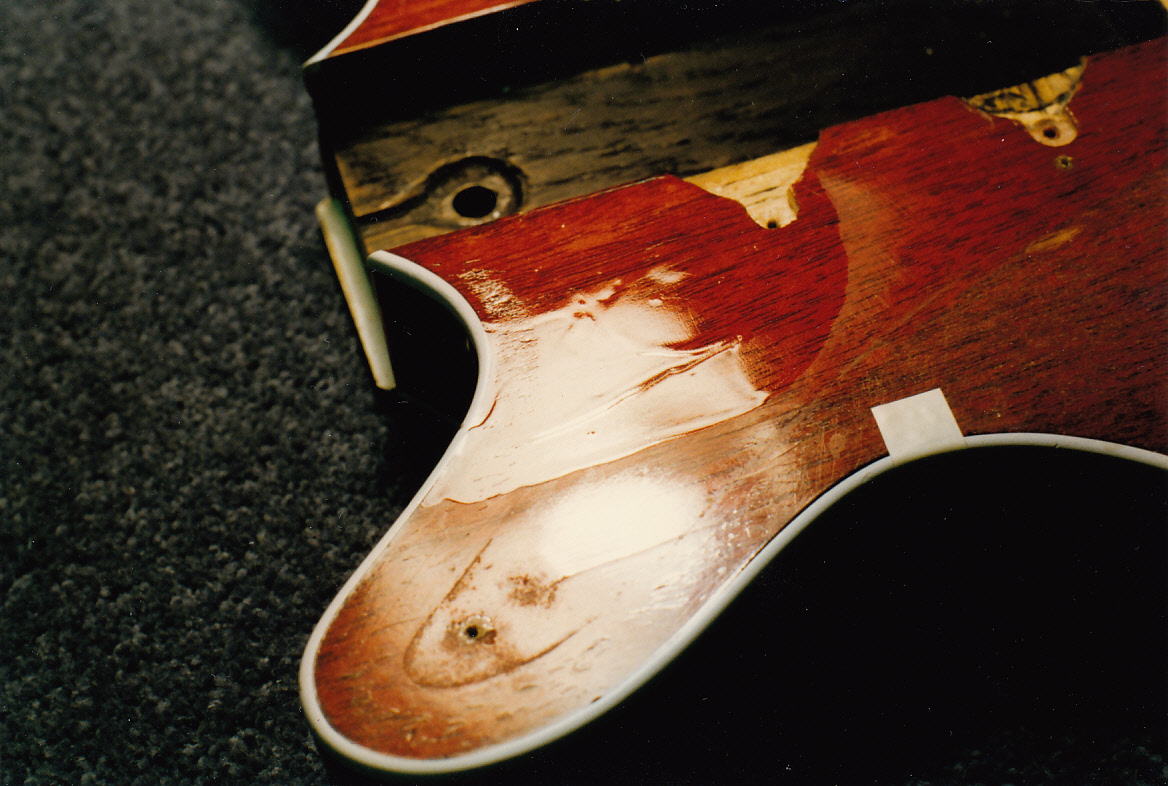
Body edge veneer damage
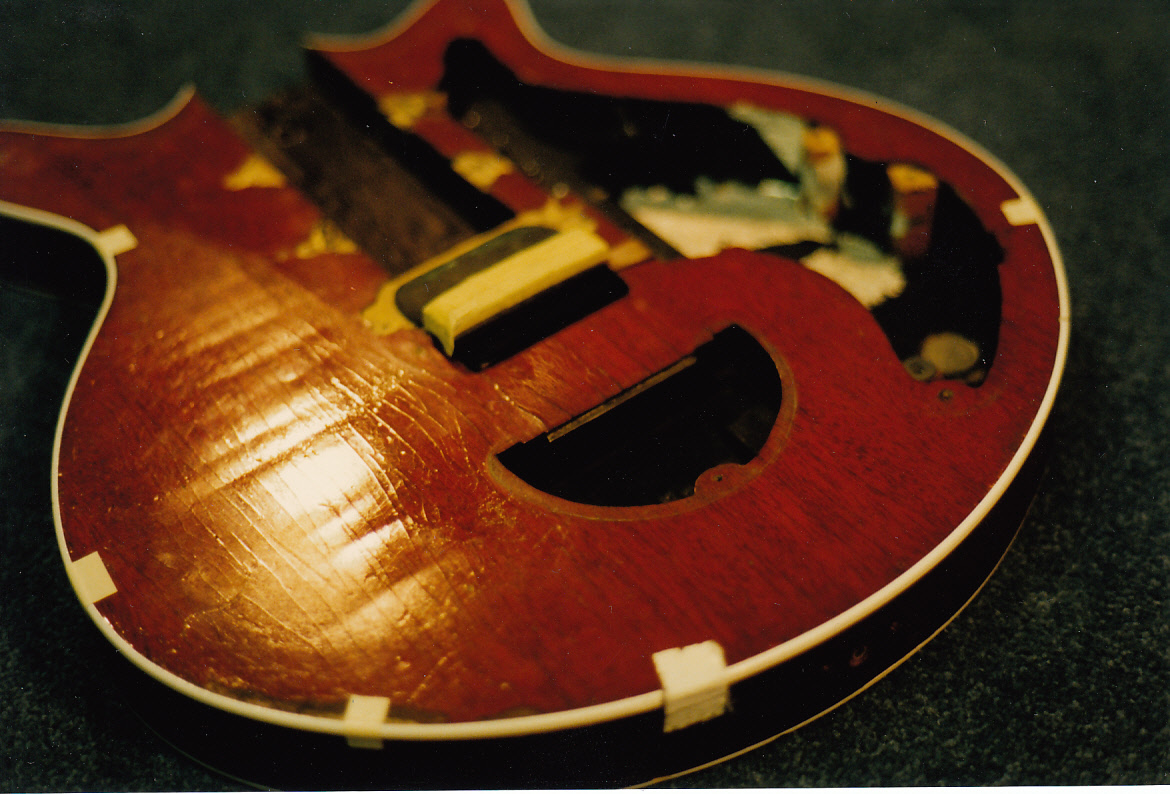
Red Special body Feb 1998, light in this photo shows the undulating surface of blockboard ply and mahogany veneer plus crazing of the Rustins Plastic Coating

Veneer ripples/undulations and lacquer crazing
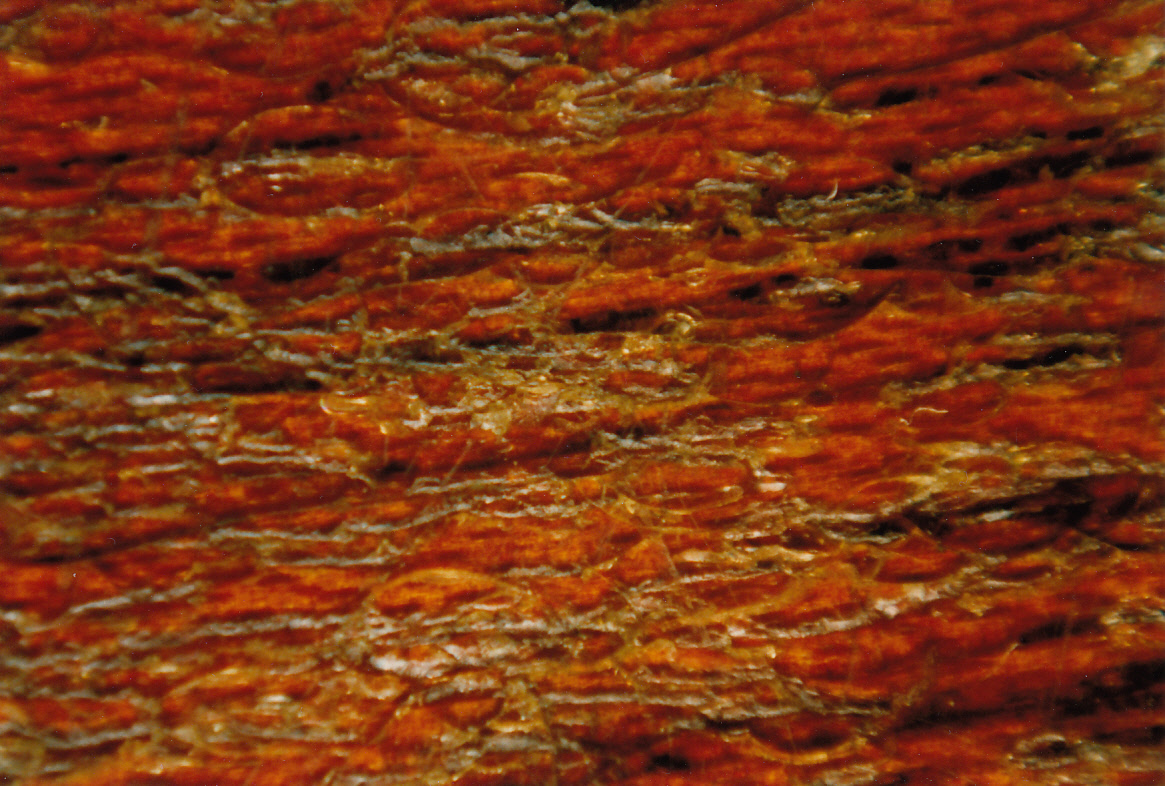
Close up of Red Special lacquer crazing and fracturing near left hand side upper cutaway
Close up #2 of damage from 30 years of playing, undoubtedly the sixpence is the main offender here causing the fracturing and gouging
Red Special body Rustins experiments with overcoating. Brian and I decided to brush Rustins Plastic Floor Coating onto a couple of relatively inconspicuous areas to see how the lacquer under would look and if there was going to be any adverse reaction. We first degreased thoroughly and prepared the surface with several abrasives including mainly the excellent 3M multi-flex abrasive pads supplied by my friend Alan Bottle from 3M Sydney. These pads allowed us to sand better into the difficult surface ‘crevices’ so that the fresh Rustins would have good adhesion to the worn fractured surfaces. Soon after however, Martin James from ‘Foxell and James’ in London told Brian and I about the original style Rustins Plastic Coating. Other paint stores had told us this didn’t exist and the Rustins Plastic Floor Coating was the only product now available, but Martin having had decades of experience in the paint trade knew his subject well and sourced us the original Rustins Plastic Coating which apparently didn’t have the melamines and other additives which made the ‘floor coating’ product more flexible but less see through. The two closeup photos above are of the area that we painted near the binding

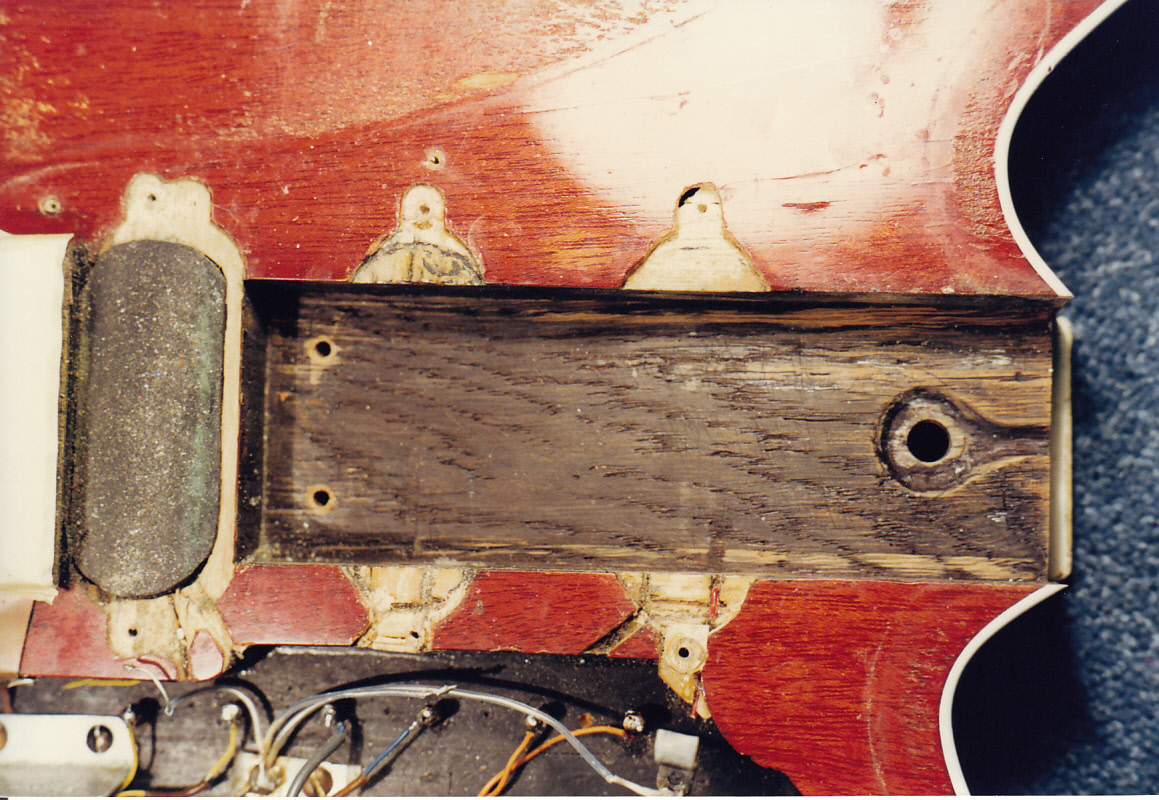
Red Special body to neck join 9th Jan 1998. 4 brass 6BA hank rivet nuts can be clearly seen here inlaid into the long neck heel/tongue along with red and blue wires soldered to the underside of the nuts. These were used as connectors which took the electrical signal from the original pickups that Brian designed and handmade to the switches and controls. Because the original pickups had one major drawback: they produced a strange ‘whooshing’ type of sound when strings were bent across the polepieces, Brian decided to buy the set of Burns Trisonic pickups which have been in the ‘Red Special’ ever since. The orignal single coil pickups sounded very good in themselves, but the whooshing sound was caused because the Eclipse magnet design produced polepieces of alternating polarity across the pickup ie north south north south north south etc, so when a plain string was bent across from being over one polepiece to another the whooshing sound was heard.
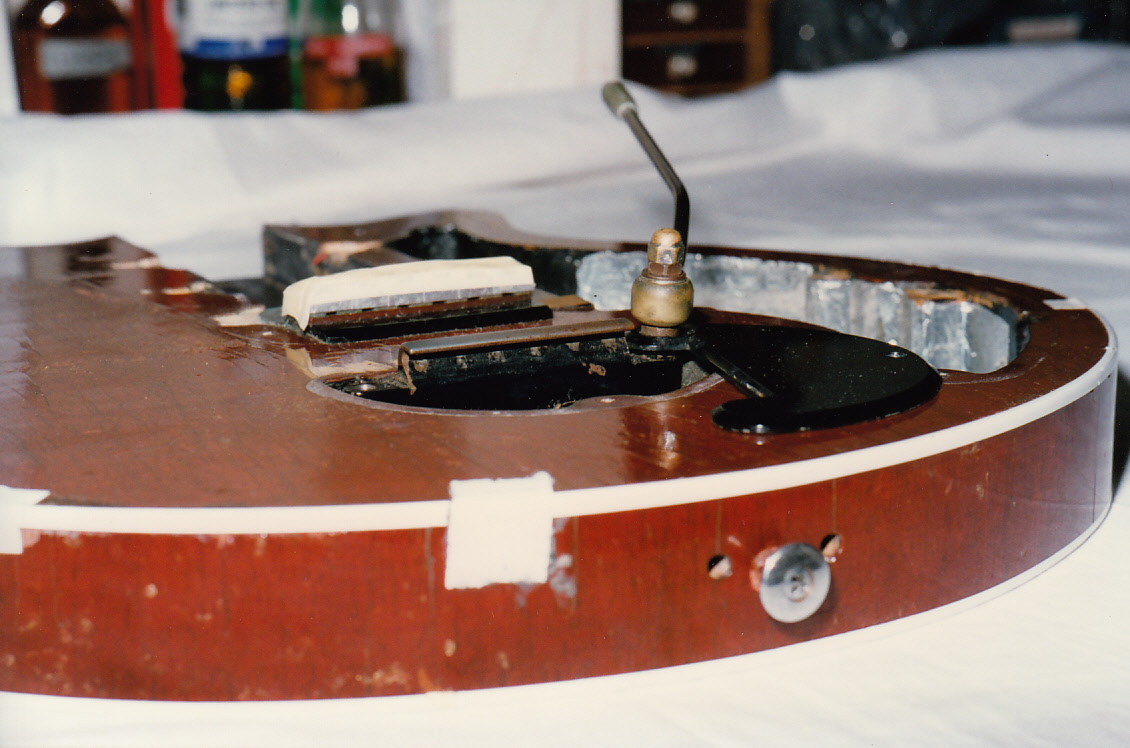
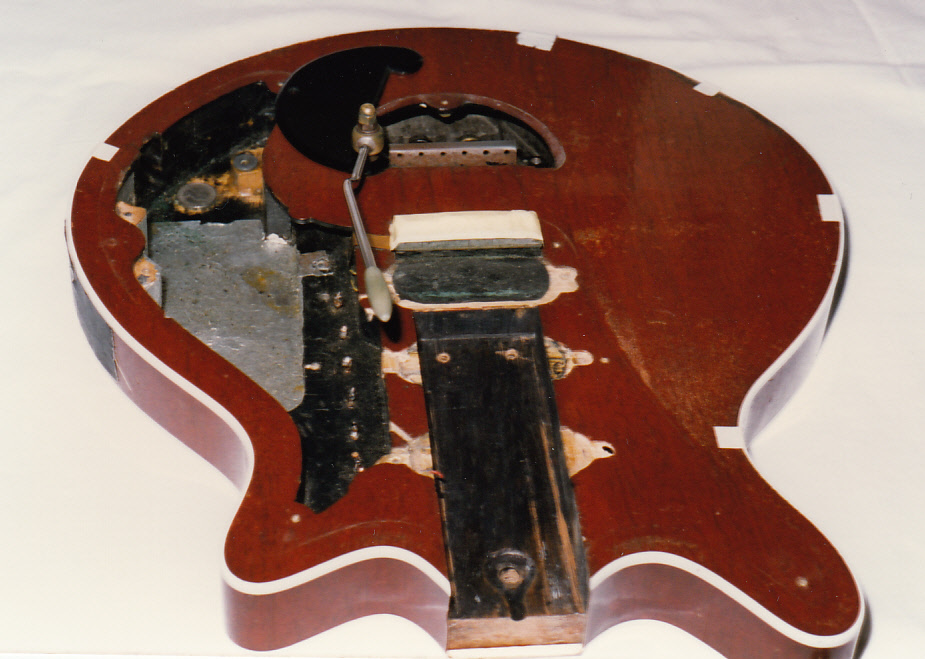
Red Special body and neck cavity 9th Jan 1998
Red Special body and switchplate 9th Jan 1998

Red Special body and switchplate #2 9th Jan 1998

Red Special body 29th Jan 1998
Red Special body #1 29th Jan 1998

Red Special body #2 29th Jan 1998
Red Special body #3 29th Jan 1998

Red Special body #4 29th Jan 1998
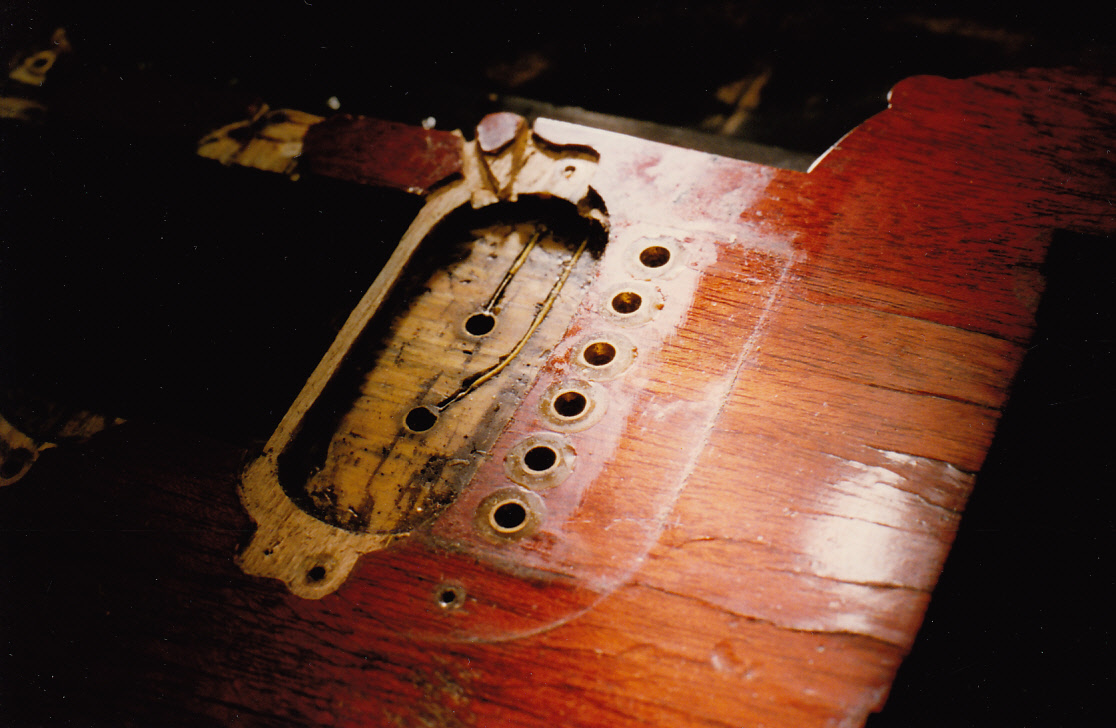
Bridge mounting brass inserts and original bridge pickup cavity. The black piece which usually fills up where the deeper original bridge pickup sat is made Brian told me from a piece of rubber sole from a shoe. This gave us a source of pun-laden Beatles ‘Rubber Soul’ jokes!
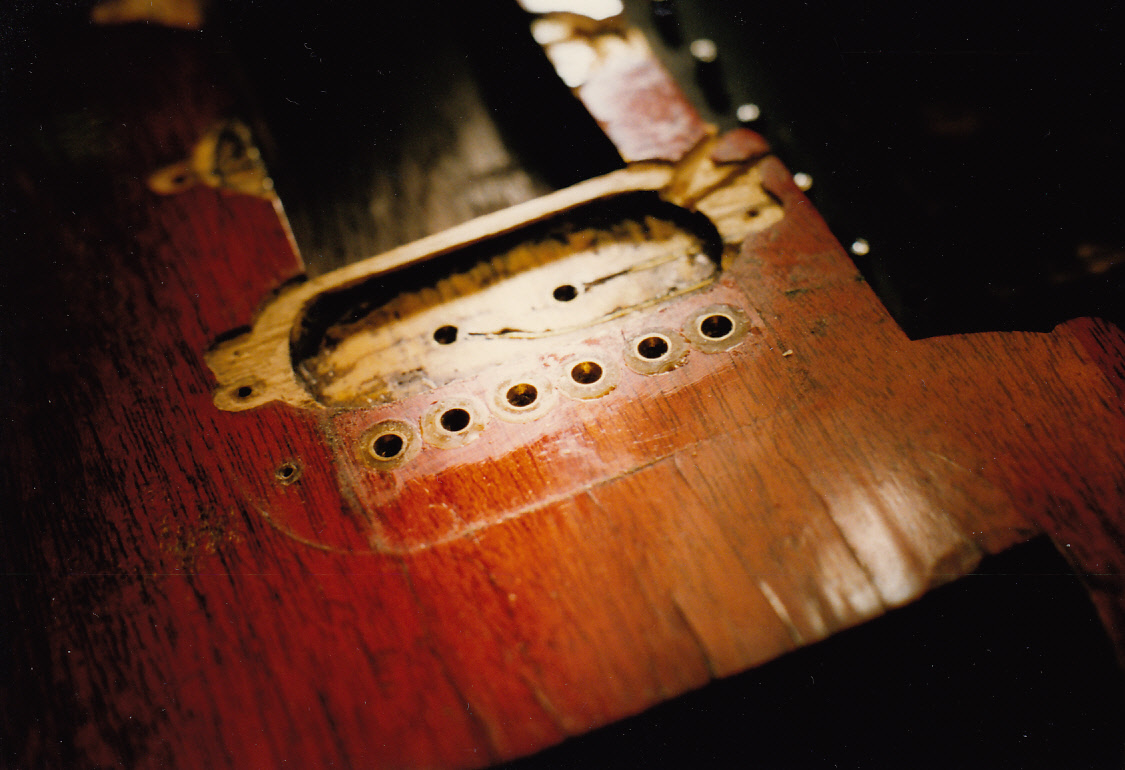
Bridge mounting brass inserts #2

Bridge mounting brass 6BA hank rivet nuts were glued in place with Araldite epoxy resin, with the thin cupped edge facing upwards. The same hank rivet nuts were used (with thin cup edge facing downwards) in the long neck tongue/heel as connectors for the first set of handmade pickups that Brian designed and wound.
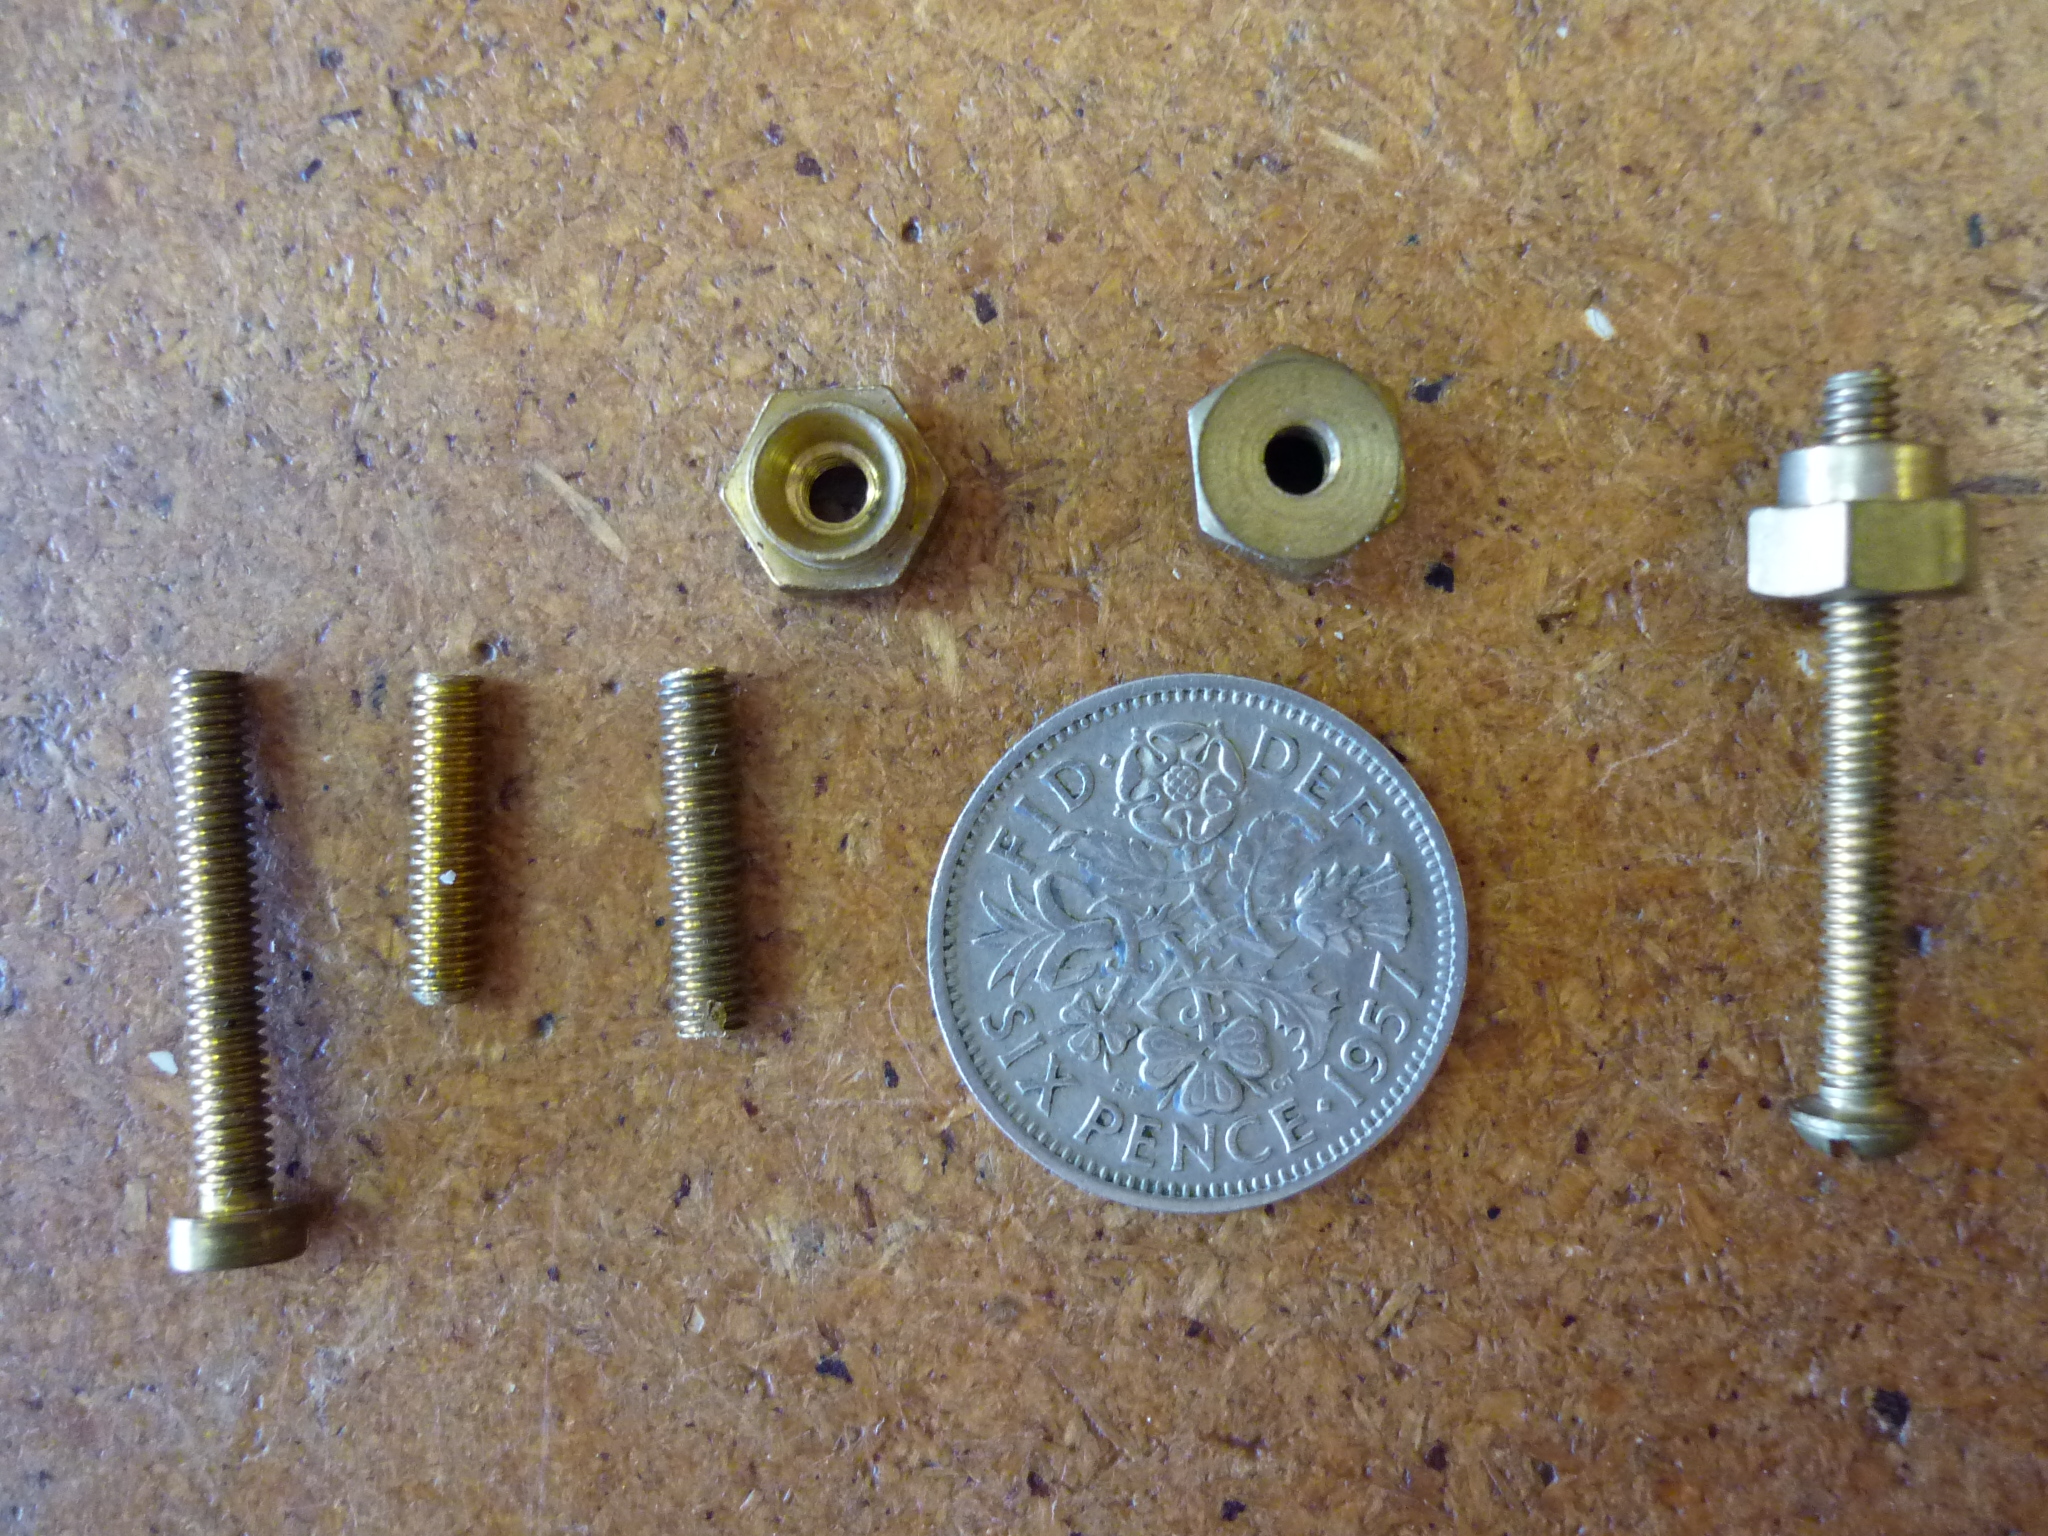
Red Special 6BA nuts, screws and 7/16″ long threaded rod sections. Thanks to Mark Reynolds for the correct term for these brass nuts: ‘hank rivet nuts’
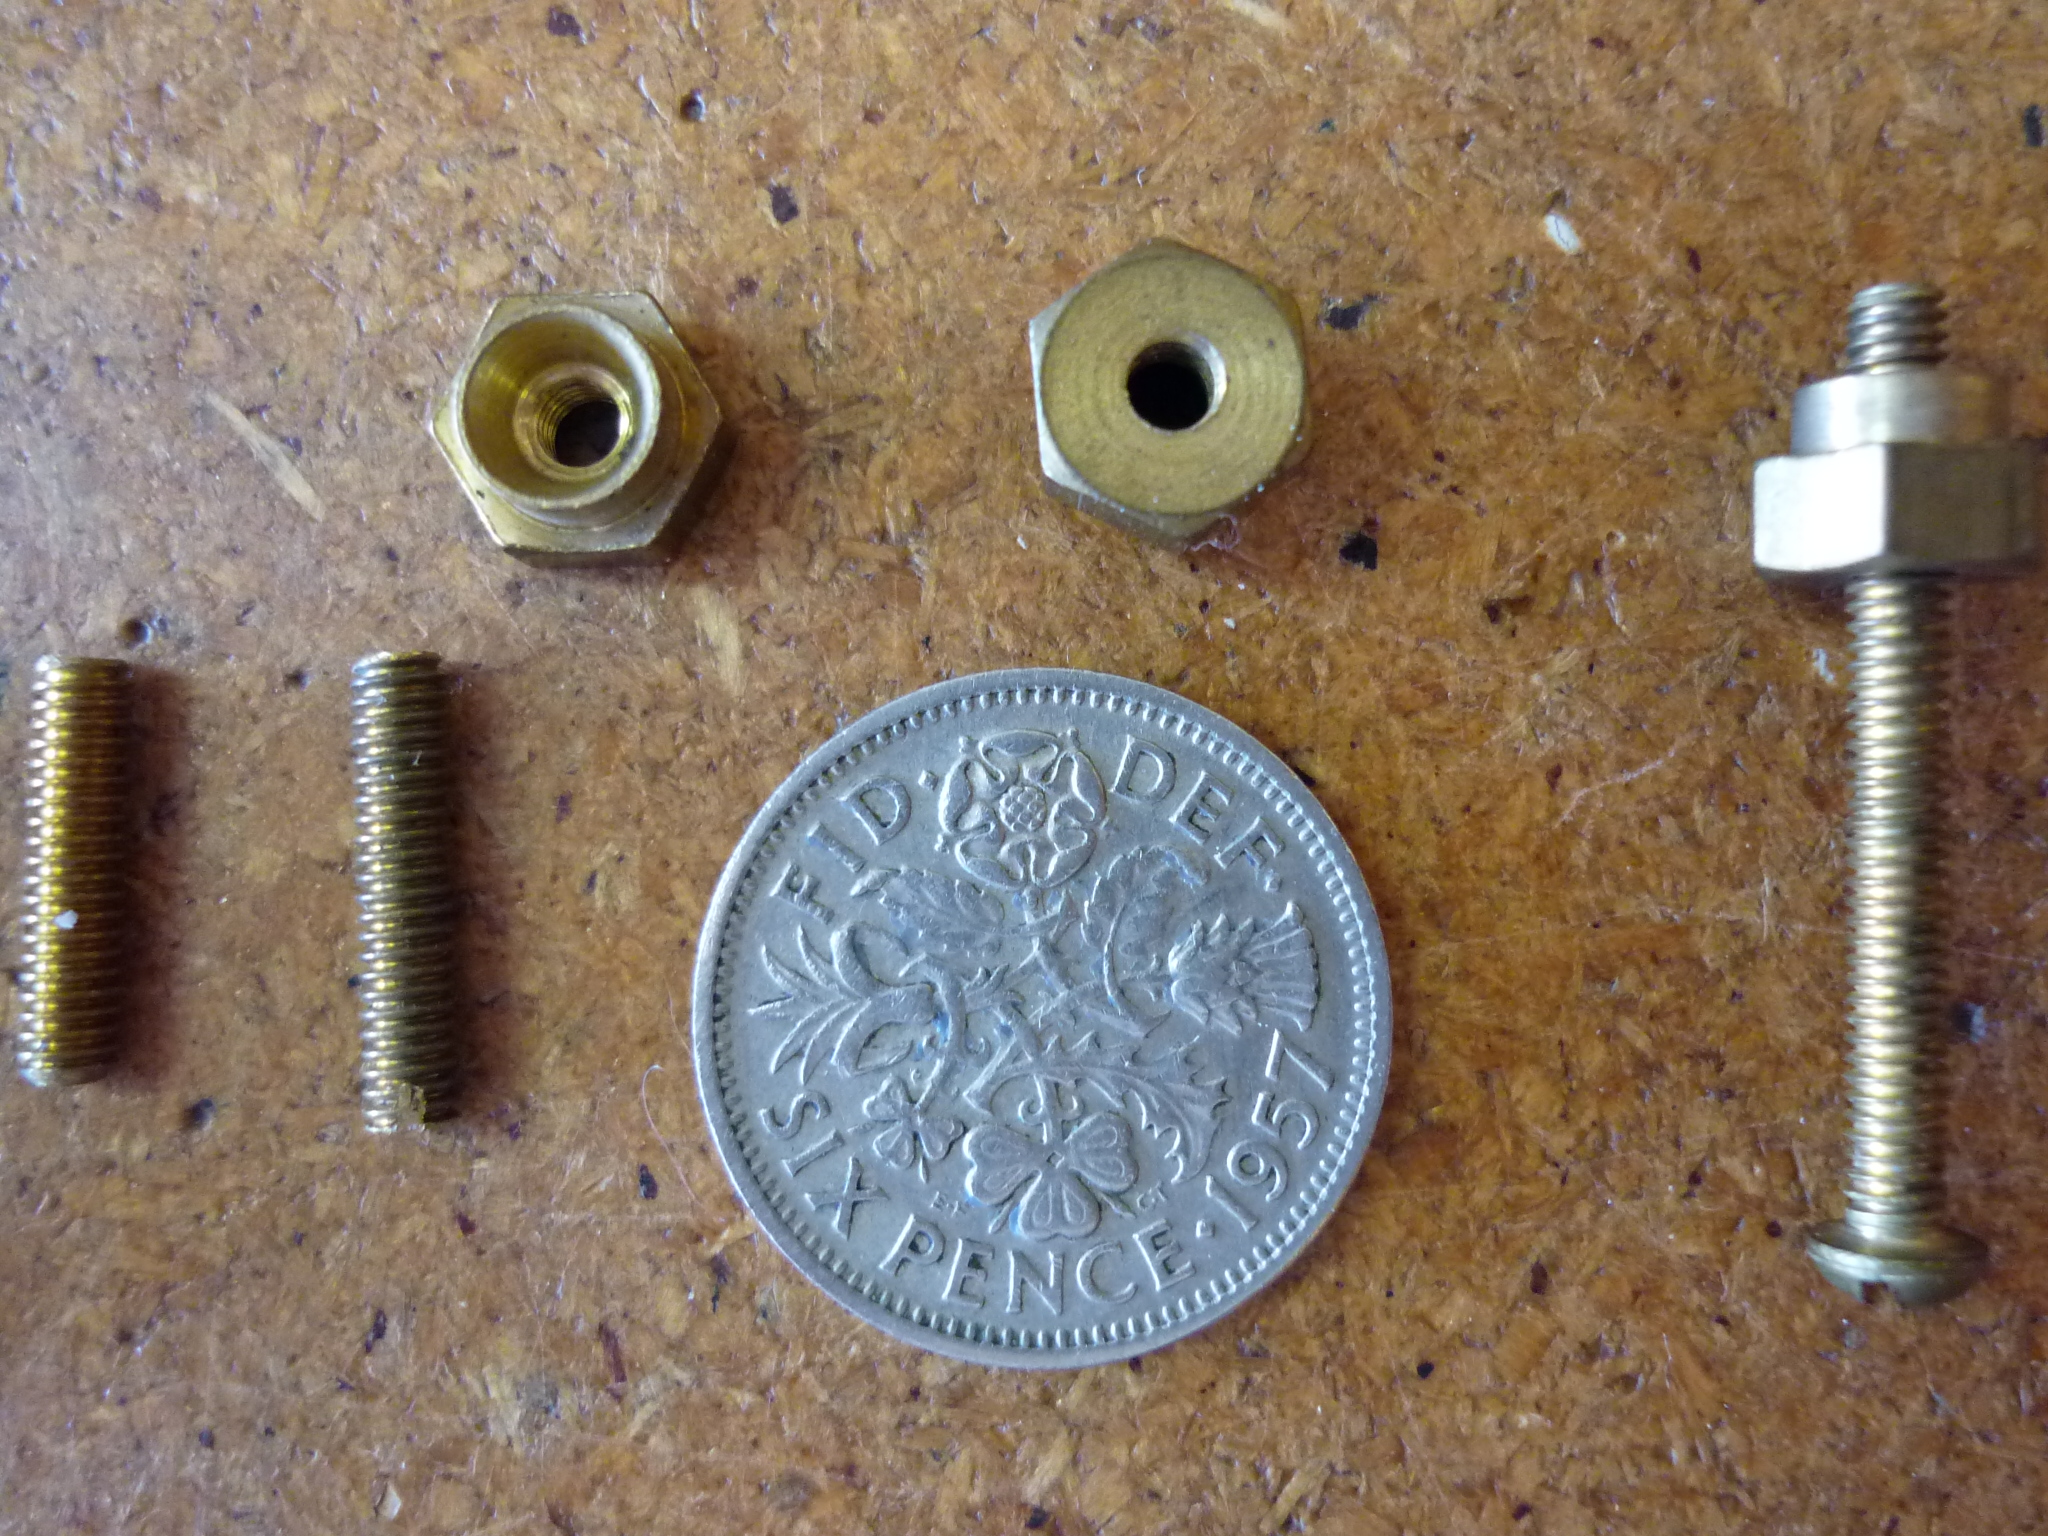
Closeup of 6BA screws and hank rivet nuts with a nice sixpence in the middle. Threaded 7/16″ long section at left is what Brian used for the 6 posts which were screwed into the guitar body, soldered at the top end and had the pickup wires then soldered to them
Tremolo tailpiece and springs:
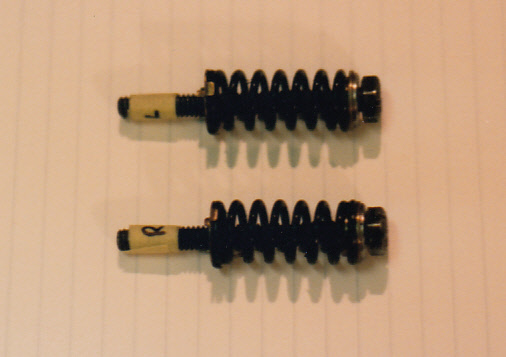
Tremolo bolts and springs: the 2 Panther 1928 motorcycle inner valve springs give Brian and Harold’s unique design a superior ‘feel’ to any other tremolo system in the world
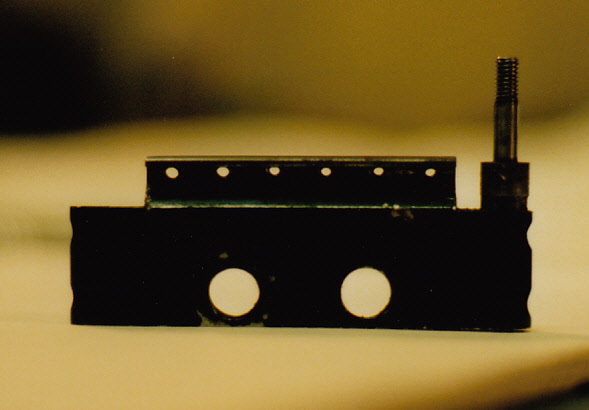
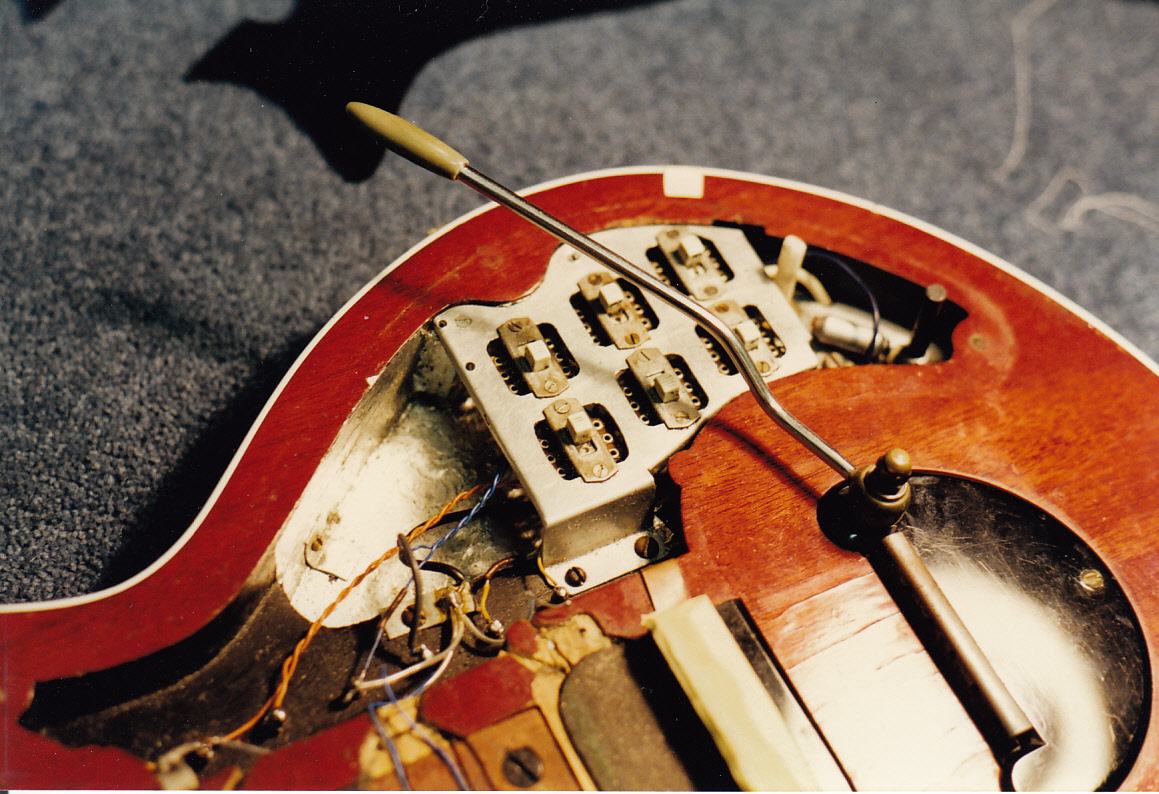
Tremolo Tailpiece 29th Jan 1998: a work of genius by Brian and Harold and undoubtedly the best guitar tremolo system ever designed
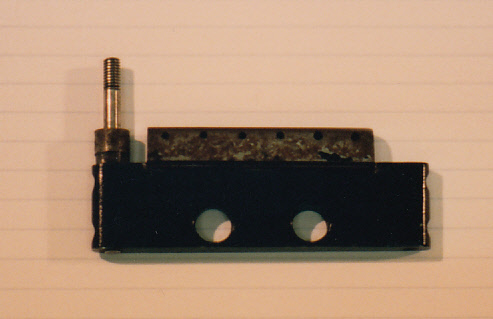
Tremolo tailpiece 29th Jan 1998 : Brian screwed ‘winglets’ onto left and right ends of the main tremolo block, this allowed for placement of the arm at either right or left hand ends, although Brian told me that after he tried the arm in its ‘top E’ side position pictured above he decided that it felt right and never tried it at the other end. The whole block is made from mild steel, and the top section was originally painted but over the years had shed its paint and developed the surface rust that we can see above. I then sanded back the surface rust using a little wooden block and silicone carbide abrasive paper going through the grades from 360 to 1200 grit.The surface was then polished using a silicone car polish so that this would ‘seal’ the mild steel to prevent corrosion as best as possible and keep the ‘steel’ metal look which Brian liked. At first we discussed repainting this top area like it was originally but Brian said that he had grown to like the bare metal look over the years. The plan was that every year or so this area would be cut back lightly and polished again to maintain its appearance.
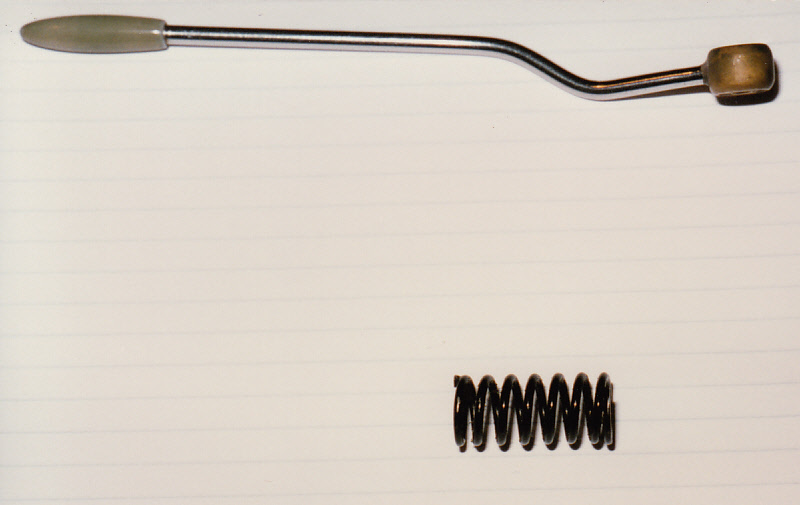
Tremolo arm and spring: the spring came from a 1928 Panther motorcycle inner valve spring, the arm from Brian’s bicycle saddle bag holder and the tremolo arm tip was fashioned from one of Mrs May’s knitting needles. The bronze bush was silver soldered by Brian and Harold onto the steel chrome plated arm
Scratchplate Repairs:
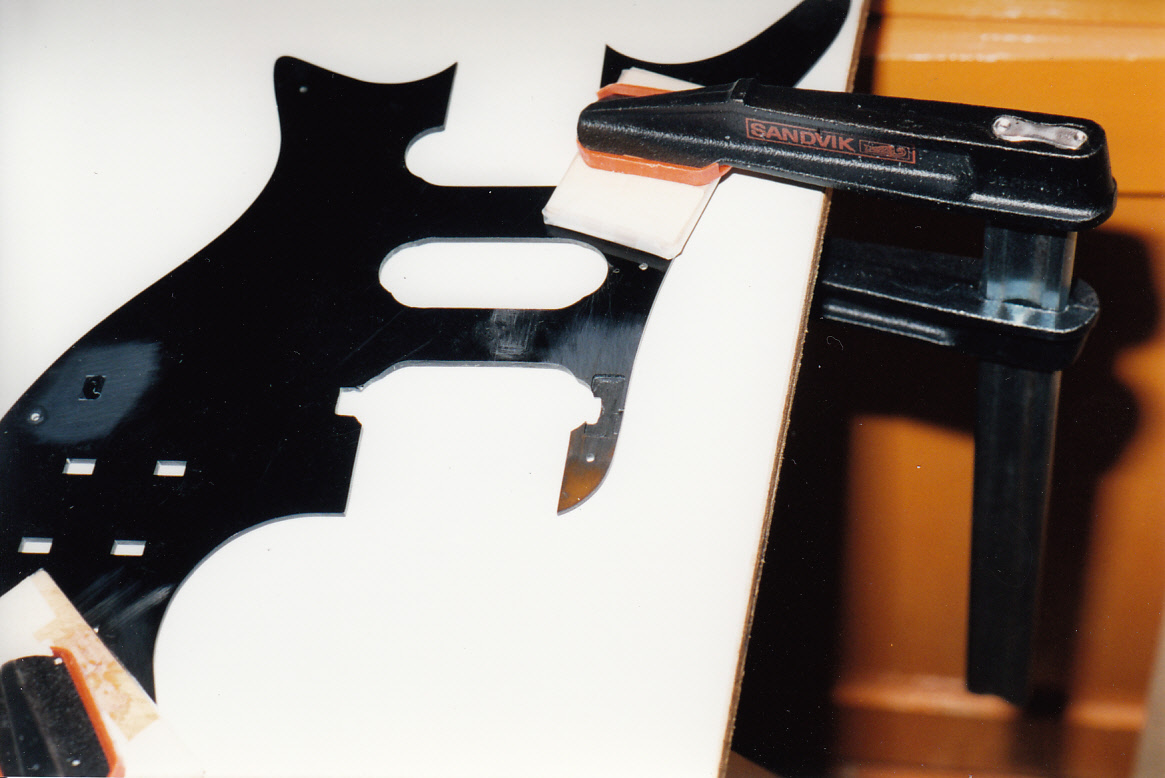
Red Special scratchplate repairs: the glued-in piece at the lower right posed a dilemma because of the likelihood that if the broken perspex (acrylic) piece was simply glued back on with a butt-join that it would break off soon after due to flexing in the narrow join area. This part of the guitar top isn’t particularly flat and the pickup foot and its screw also stick up a little above the surface which probably led to this piece breaking off in the first place. So I called my friend Alan Bottle who is a plastics and abrasives expert at 3M Sydney and asked his advice. Alan also happens to be a very keen guitarist and a Telecaster devotee. Alan sent over some special 3M black plastics glues which he thought would have the right aggressiveness to ‘bite’ into the perspex but would also have the flexibility not to break under flexing. He recommended that I first butt join the broken piece onto the rest of the scratchplate, then when the glue was dry using a Dremel tool and base like a mini router, to rout across the joined section as far down as I dared so the join ‘isthmus’ might be 1.0mm or less in thickness.Remember that the scratchplate is made from 1/8″ or 3.2mm thick perspex which has a limited amount of flex but is quite brittle compared to the other plastics usually found in guitar scratchplates. This routed section was probably about an inch long. Alan then told me to prepare a brass piece which would be glued onto the thin narrow routed area. The brass added both strength and flexibility across the join. When its glue was dry the surface was prepared again with 120-180 grit silicone carbide abrasive paper and a new piece of black perspex glued onto the brass. The perspex piece gave back the look of the scratchplate and added some bulk and strength. When that glue was dry the repaired two layer section was sitting higher than the rest of the scratchplate and was then carefully dremelled, filed and sanded lower so that it was the same overall thickness as the scratchplate. The inner pickup side edge was filed so that the pickup foot would still fit and the outer edges were filed and sanded to the same bevelled angle and round as the rest of the scratchplate so that the join was nearly invisible to the eye, and the whole area then fine sanded to 2000 grit and polished with Brasso. The brass insert which would have been visible from side-on as a thin stripe was then painted black. This pic above shows the fine sanding of the underneath of the scratchplate after repairs to the section described above, as well you can see at the left hand side the little rectangular piece glued in to fill the switch hole which Brian had originally made to turn on or off the inbuilt Vox distortion unit. After the distortion unit was removed in the late 1960s the rectangular hole was covered by either pieces of black tape or a red sticker over the years. Brian asked me to inlay a mother of pearl star into the front side of the scratchplate where the hole had been filled with the black perspex piece. I think I have some photos somewhere of that procedure.
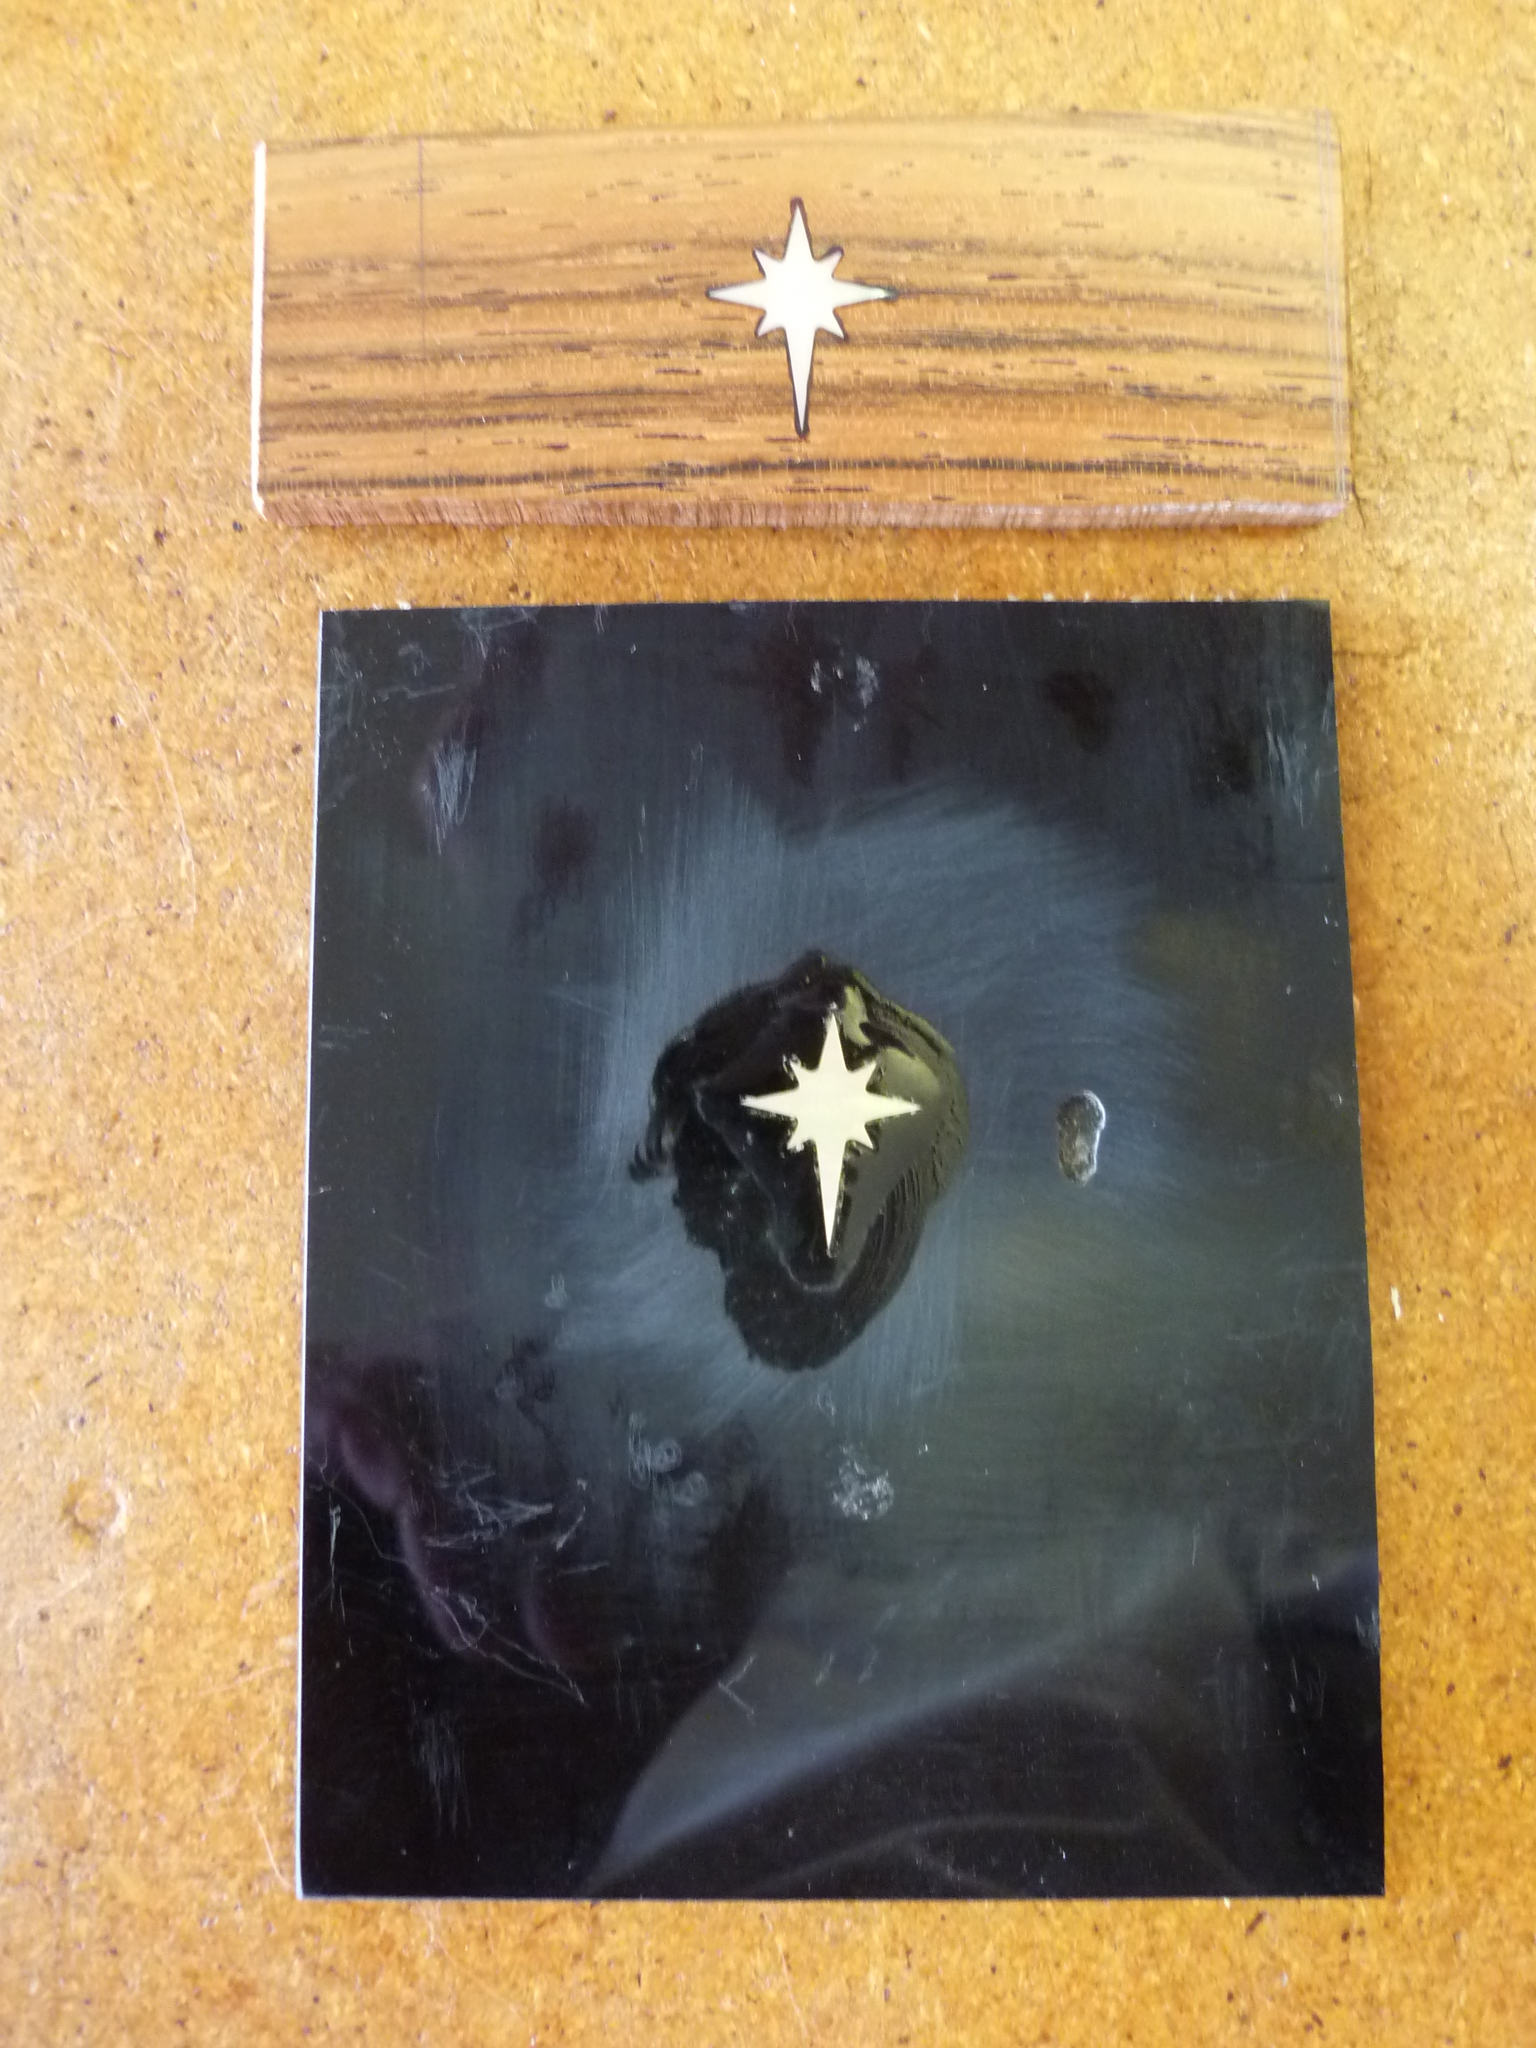
Practice pieces for inlaying the mother of pearl Maystar shape into: above Brazilian Rosewood practice run of several for George Burns’ gold pearl star; and below a piece of black perspex/acrylic being one of several practice runs for the inlaying of the white pearl star into the Red Special’s scratchplate. This shows a glue that I decided not to use because of the whitish voids which happened especially around the points of the star. Again it was one of Alan Bottle’s 3M glues which was used for the glueing of Brian’s scratchplate star
Pickup surrounds:
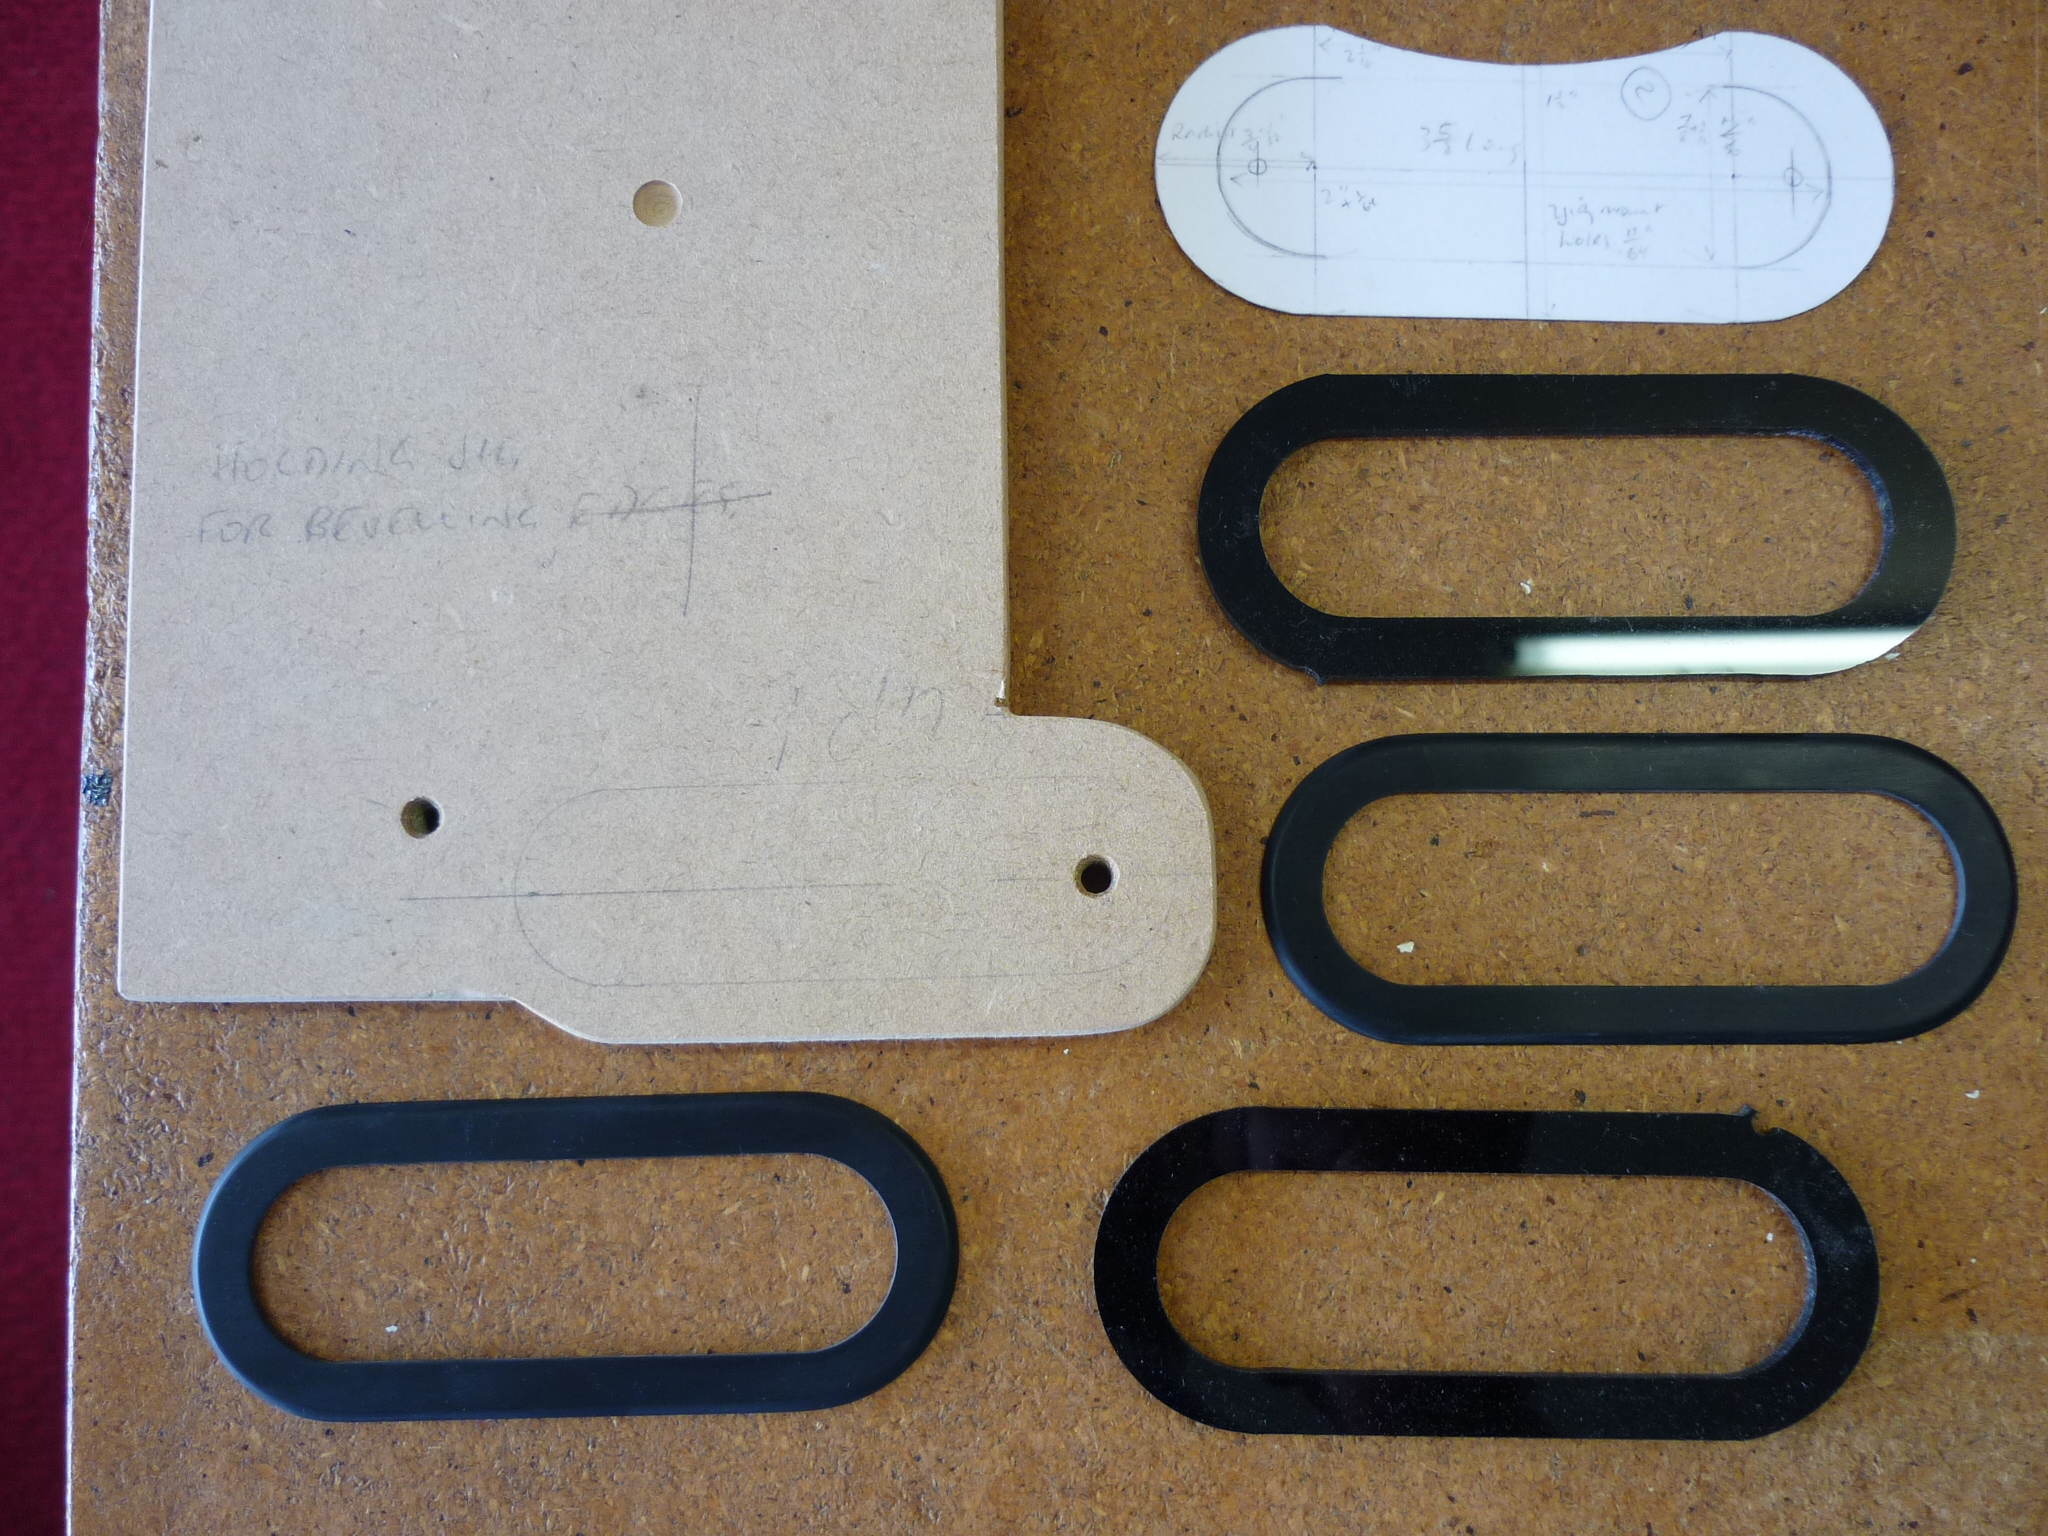
Pickup surrounds: completed ones and Mark’s machined blanks plus the holding jig that I used to file and sand the edges then polish the completed surround. Brian preferred the polished look rather than the 1200 grit fine sanded matte look. Brian also asked me if I could thin out the 1/8″ (3.2mm) thick acrylic surrounds to be closer to the thickness of his original 3 pickup surrounds which over time had cracked up and perished and still had some pieces of these left which I could refer to. I took all the semi-finished new pickup surrounds to a nearby factory and used their milling machine (with the surrounds held in a jig with little felt lined clamps) to mill them to approx half their original thickness: between 1.60 and 1.75mm. From there I finished the surrounds by hand using the holding jig pictured above and finally polished them with Brasso – voila! The pickup surrounds were then glued to the scratchplates of the Red Special, John, Paul and George Burns using Alan Bottle’s .005″ thick 3M #467 doublesided acrylic tape after first degreasing the scratchplate area with isopropyl alcohol. The 3M #467 tape did a very strong, permanent and near invisible job.
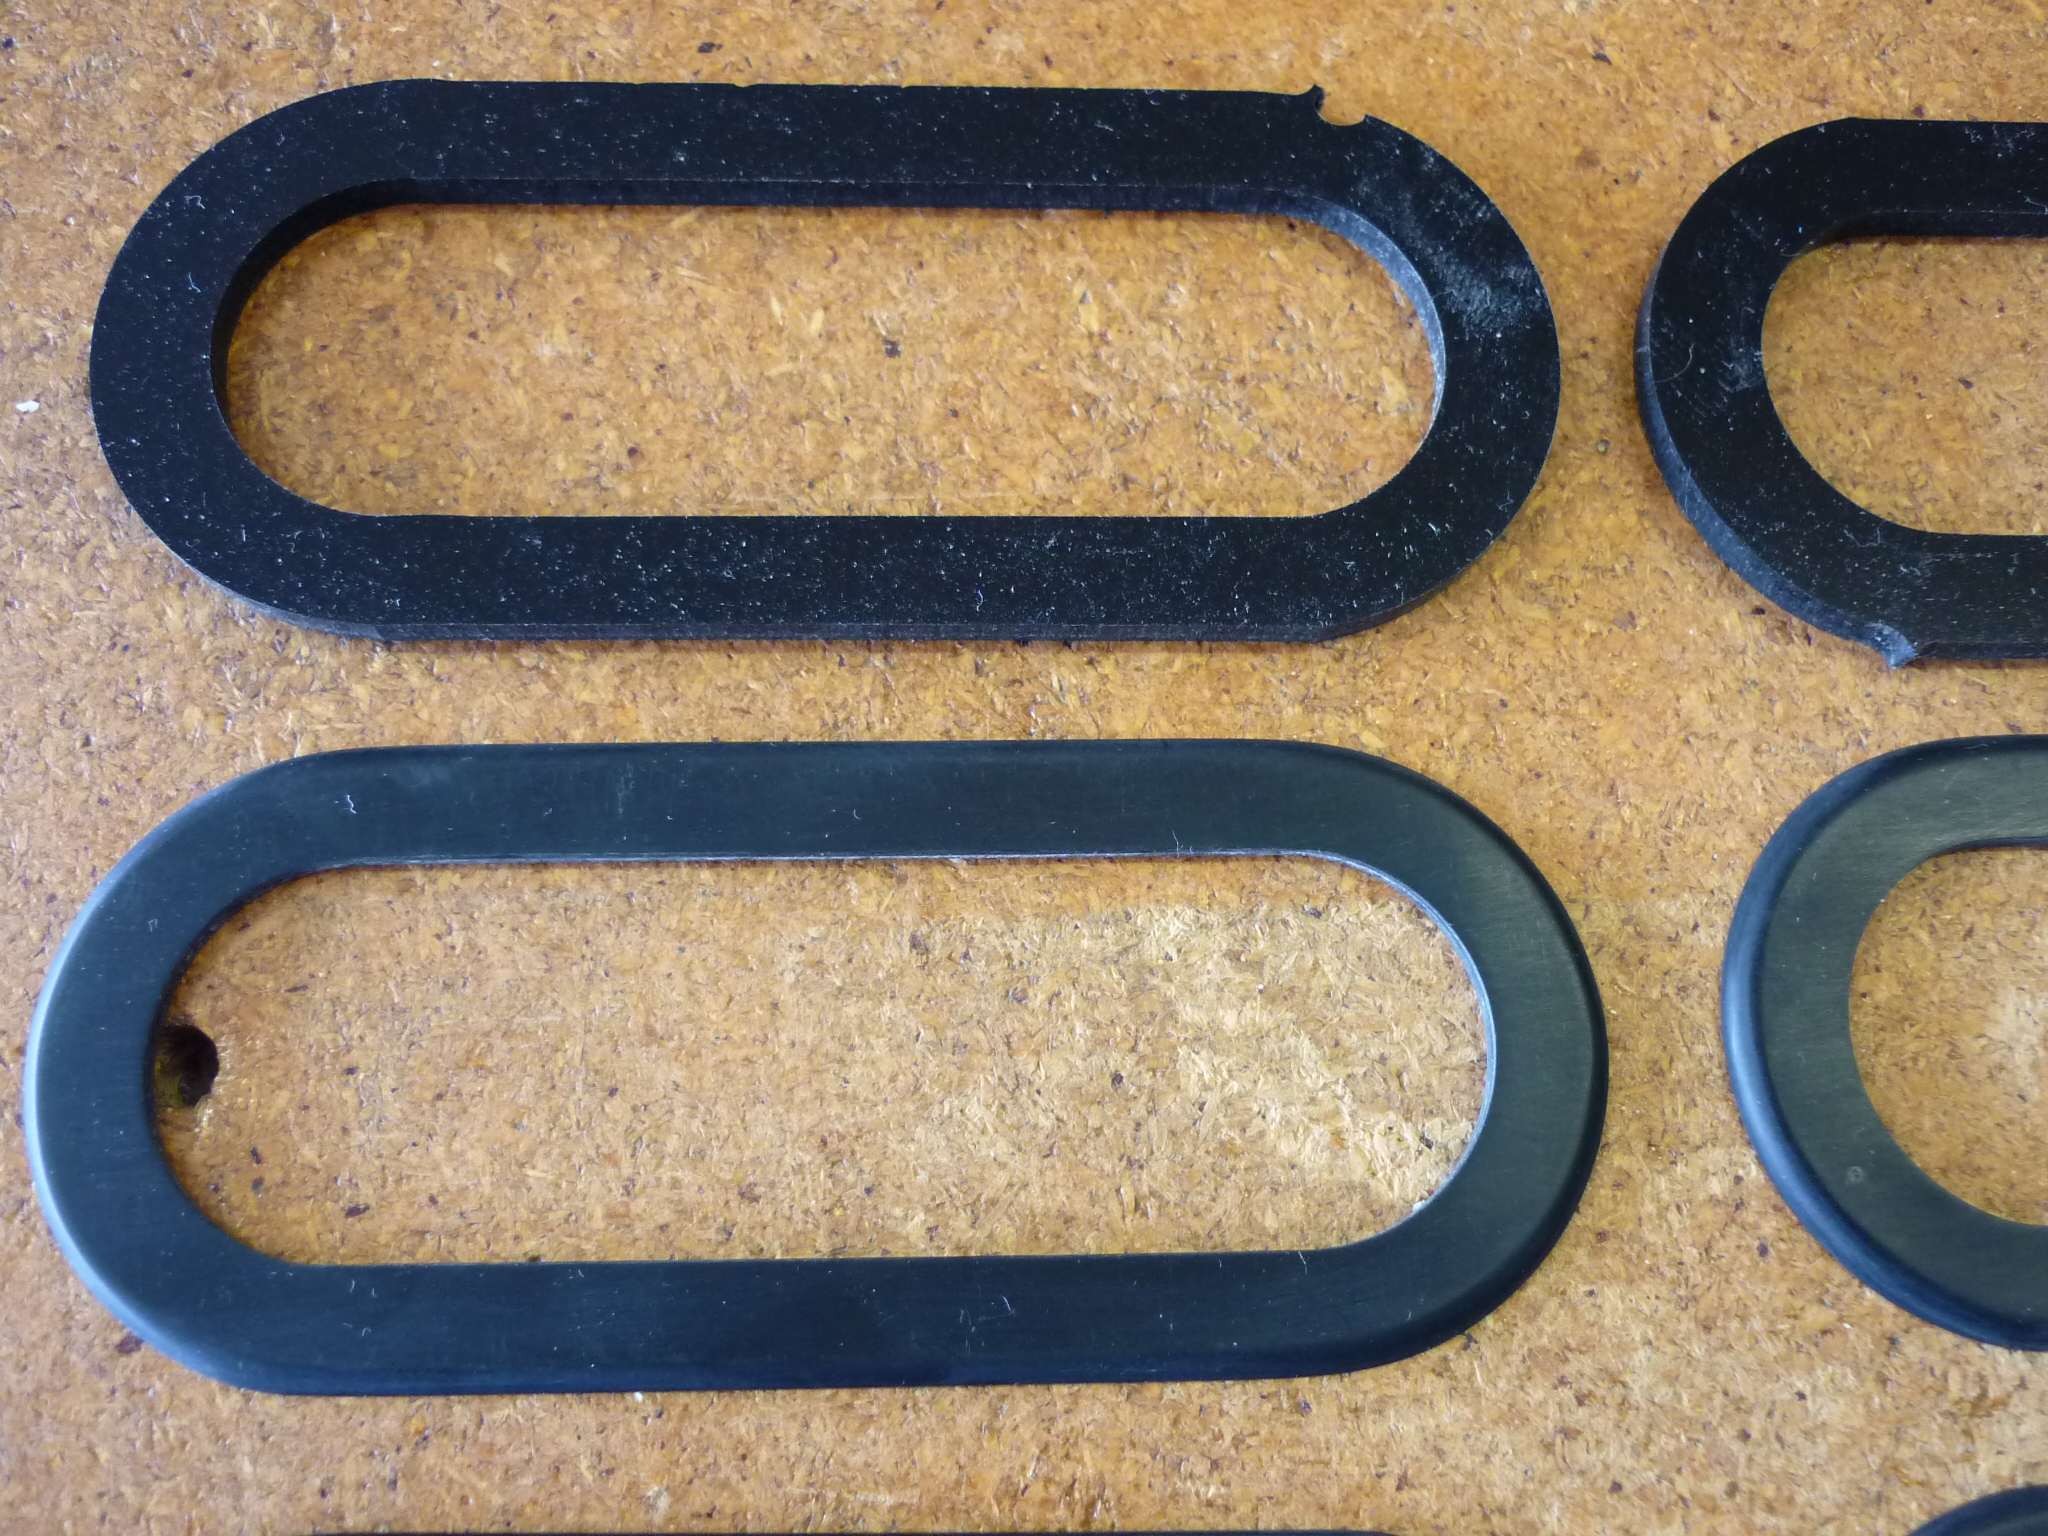
Closeup of the completed polished pickup surround 1.75mm thick and rounded edges. Mark’s machined blanks are at top
Burns Trisonic pickups:
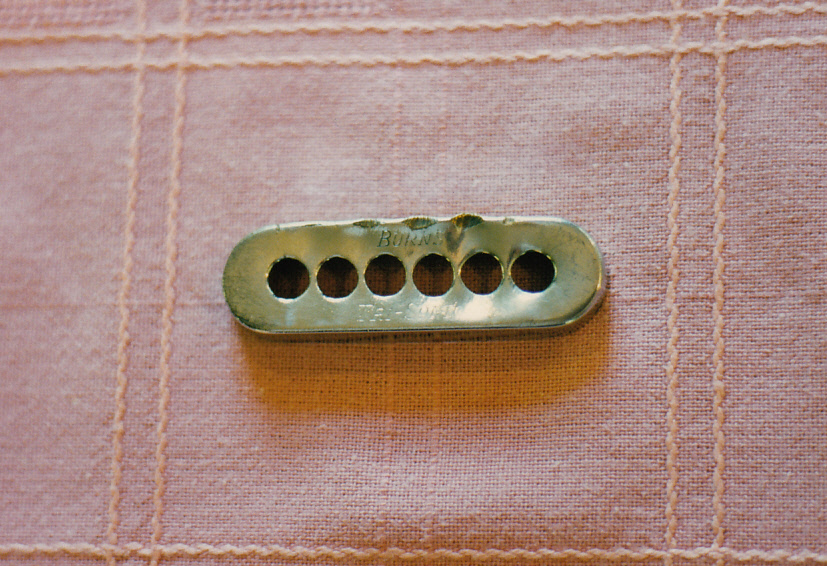
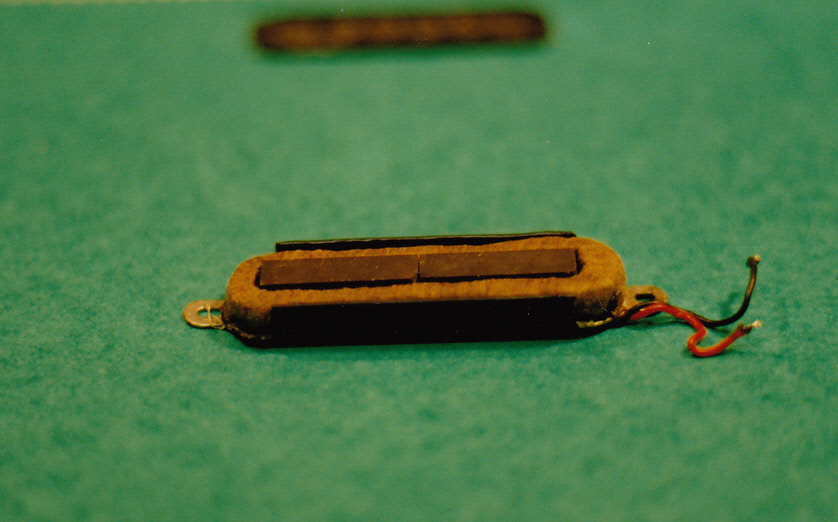
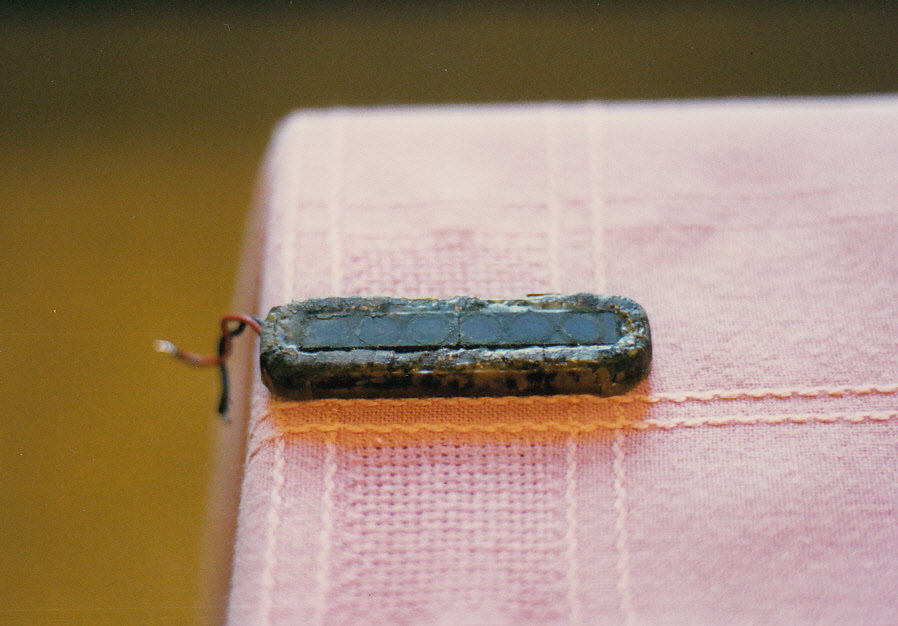
Red Special bridge pickup cover showing many years of sixpence attack

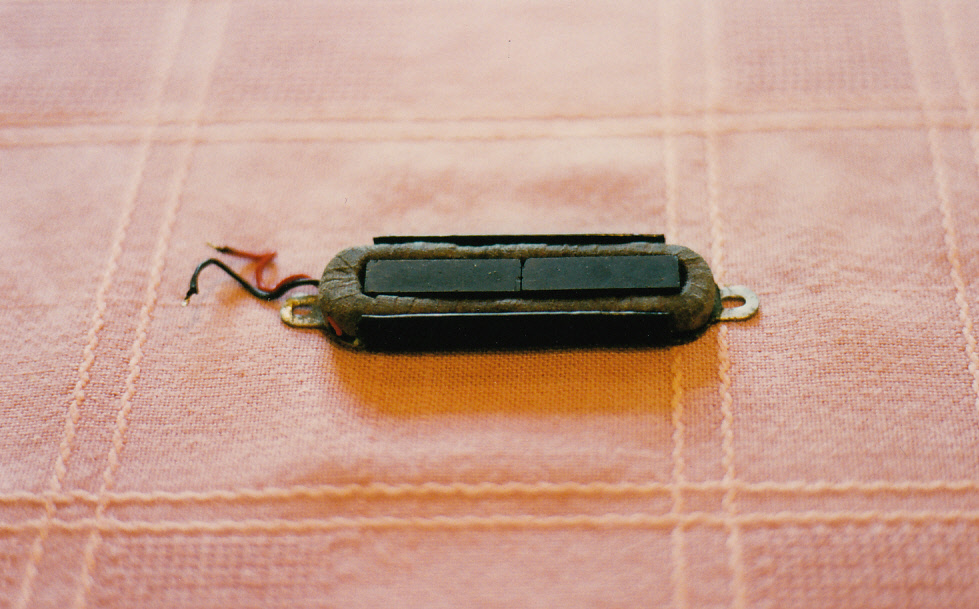
Red Special bridge pickup without cover, this pickup’s coil and magnets were encased in Araldite epoxy resin. On all 3 pickups I added a piece of 0.5mm thick rubber which sat on top of the coil and underneath the metal cover in order to help damp vibrations which could lead to microphonic feedback. The saturation of the coil and structure with wax further helped reduce vibration. The metal pickup covers also had an earth wire soldered to their inside before assembly and waxing which made the connection to earth more solid than before. Bridge pickup: 7.02K 2.202H magnet: North approx 620-640 gauss

Red Special bridge pickup without cover, bottom view
Red Special middle pickup without cover
Middle pickup without cover 7.44K 2.326H magnet: South approx 700-740 gauss
Middle pickup without cover, upside down view of gaffa tape on baseplate
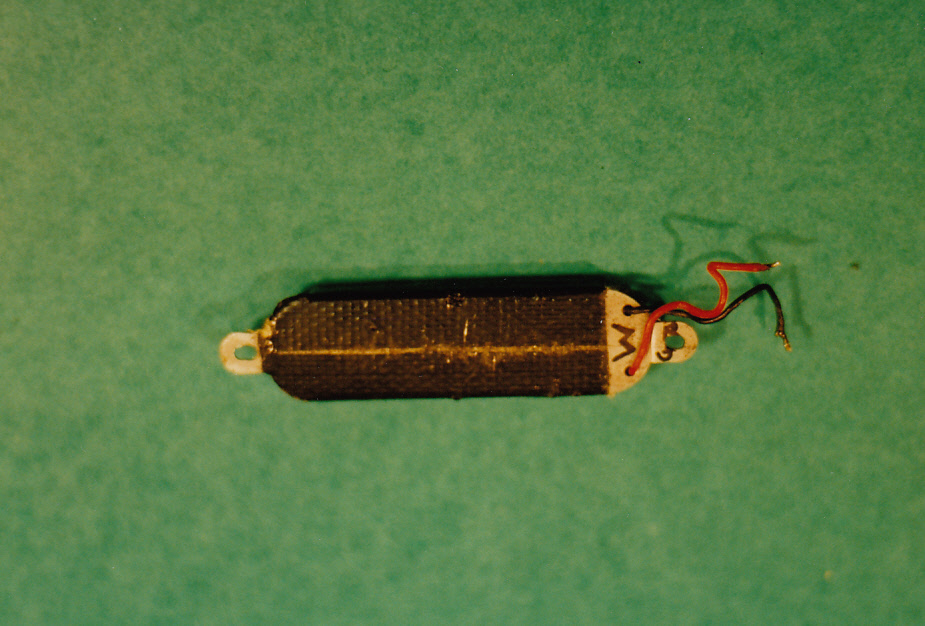
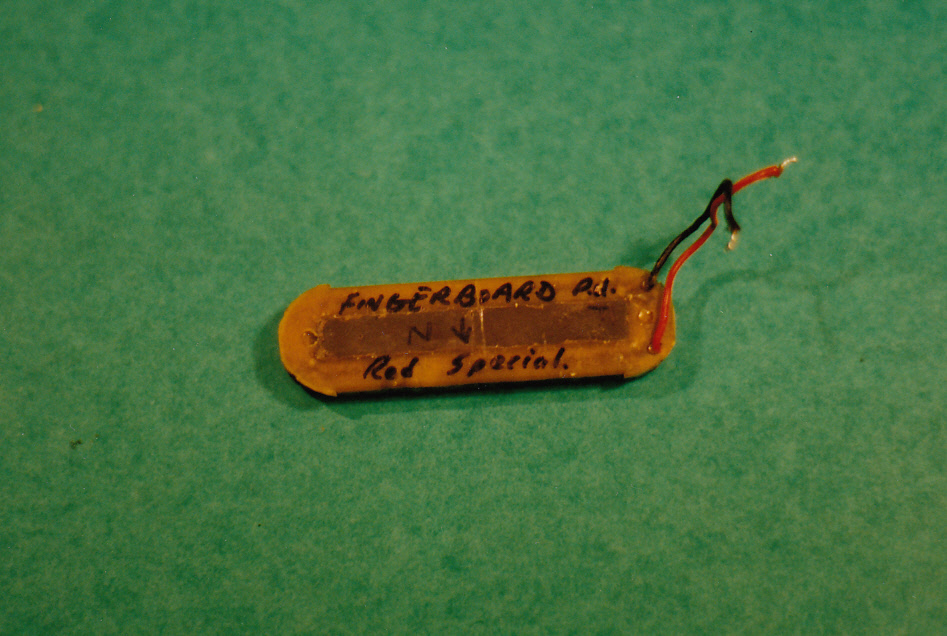
Red Special neck pickup without cover, upright view. This coil was also encapsulated in Araldite by Brian. Neck pickup: 6.96K 1.620H Magnet: North approx 500-570 gauss. There is no steel baseplate on the Neck pickup and this alters the inductance and the tonal makeup produced by the neck pickup.
Red Special neck pickup without cover, bottom view. Brian removed the baseplate from this pickup and encased the coil and magnet in the epoxy resin Araldite, easily seen in this pic. Having no baseplate gave the pickup a lower inductance and a different sound to the other two Burns Trisonics and therefore created some very interesting sounds when used by itself or combined in or out of phase with the other two pickups. The famous ‘neck and middle pickups out of phase’ Brian May sound would not have come about if the neck pickup had its baseplate as per usual. The swirling harmonics and overall tone of that particular sound happens because of the disssimilar pickups combining in the interesting way they do…. and also because of the little matter of Brian’s incredible ‘feel’ and deft touch as a guitar player
Pickup waxing:

Red Special pickups in 60 degrees Celsius melting point paraffin wax bath
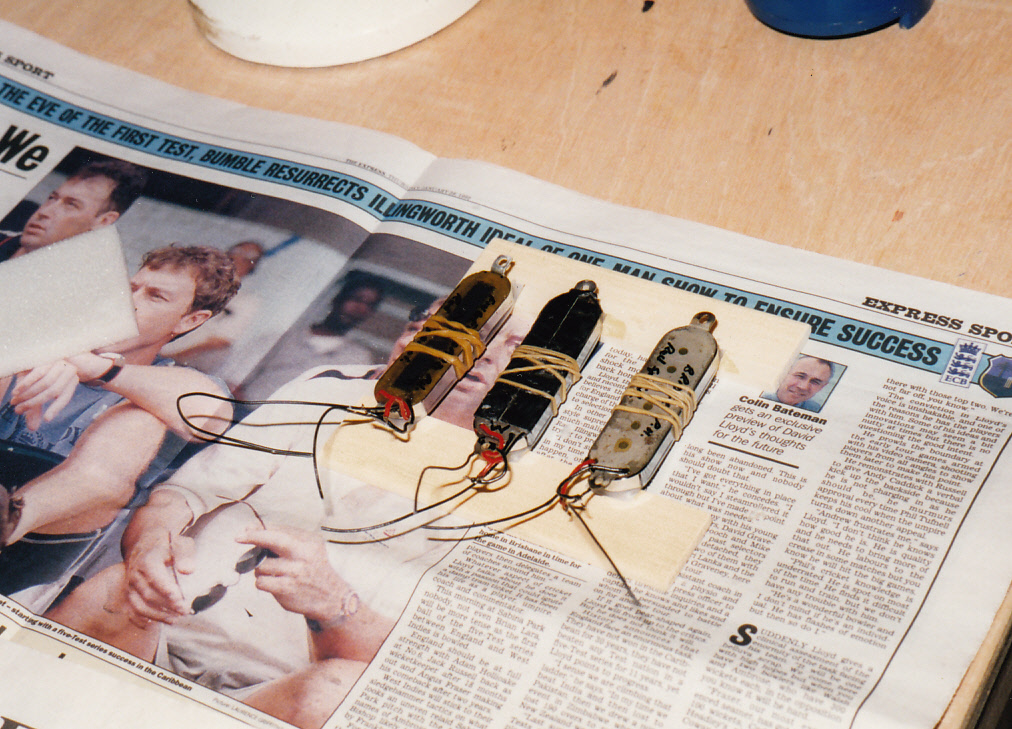
Red Special pickup waxing #2

Red Special parts 29th Jan 1998, putting the frying pan lid to good use
Spray painting was done at Leicester at Mark Reynolds’ uncle’s spray booth:

At Mark Reynolds’ spray booth at Leicester #1
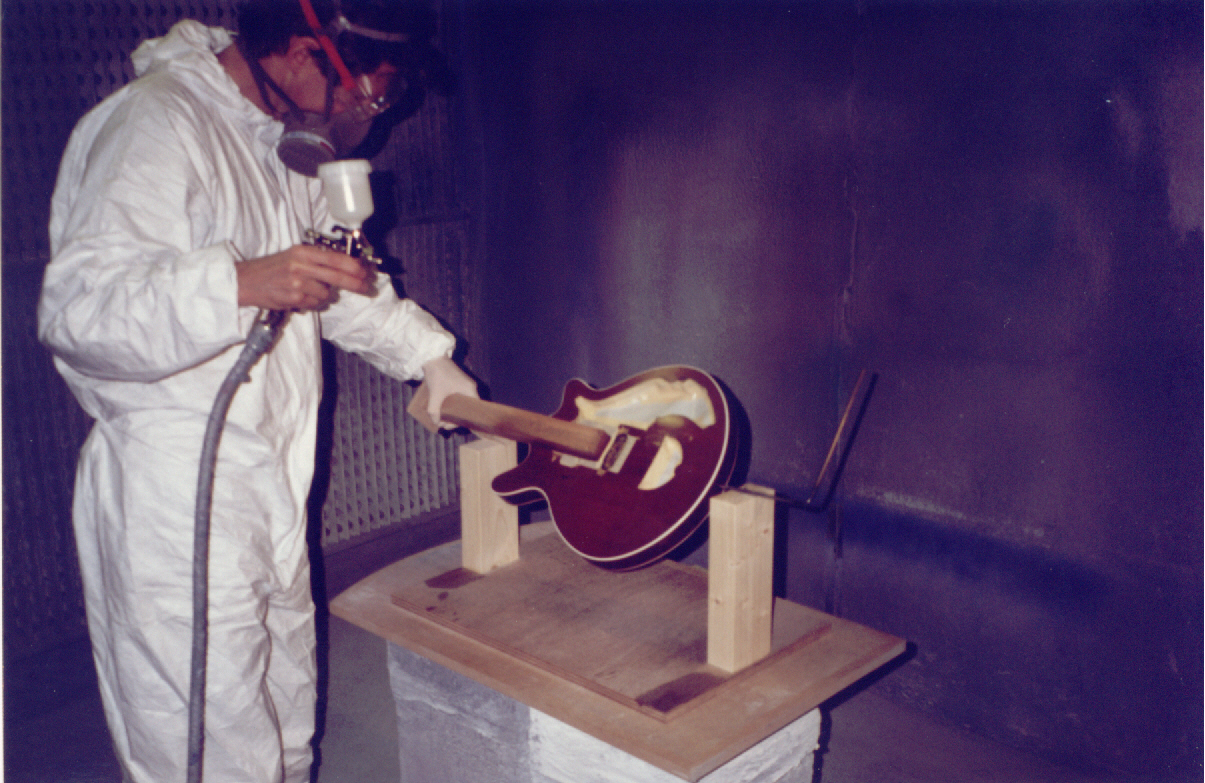
Spray painting old style Rustins Plastic Coating kindly suppiled to us by Martin James of Foxell and James London

I am not a big fan of Rustins Plastic Coating
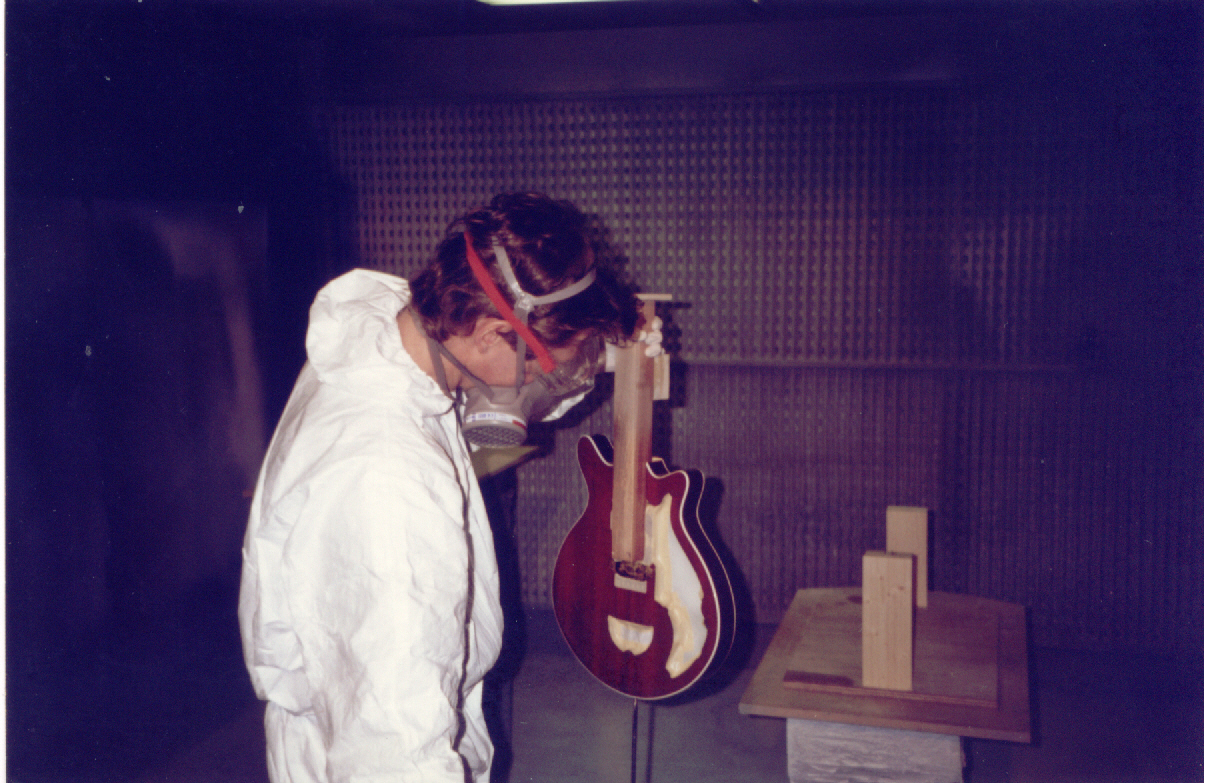
Leicester spray booth
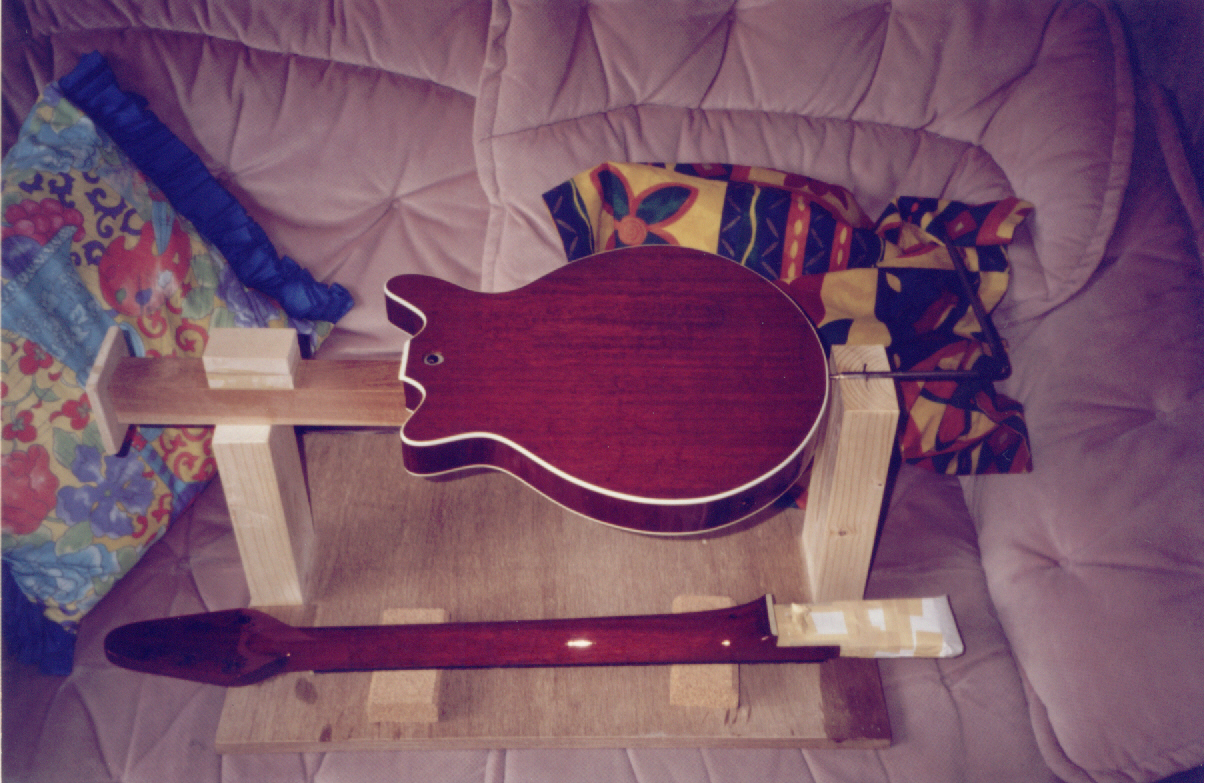
Back at Mark’s place at 3am with the paint still very soft and hardly touch dry yet, the guitar spends the night on the couch
Greg in ‘the lab’: pics taken by Brian January 1998

Greg Fryer and Red Special body and neck in the lab…don’t blink!
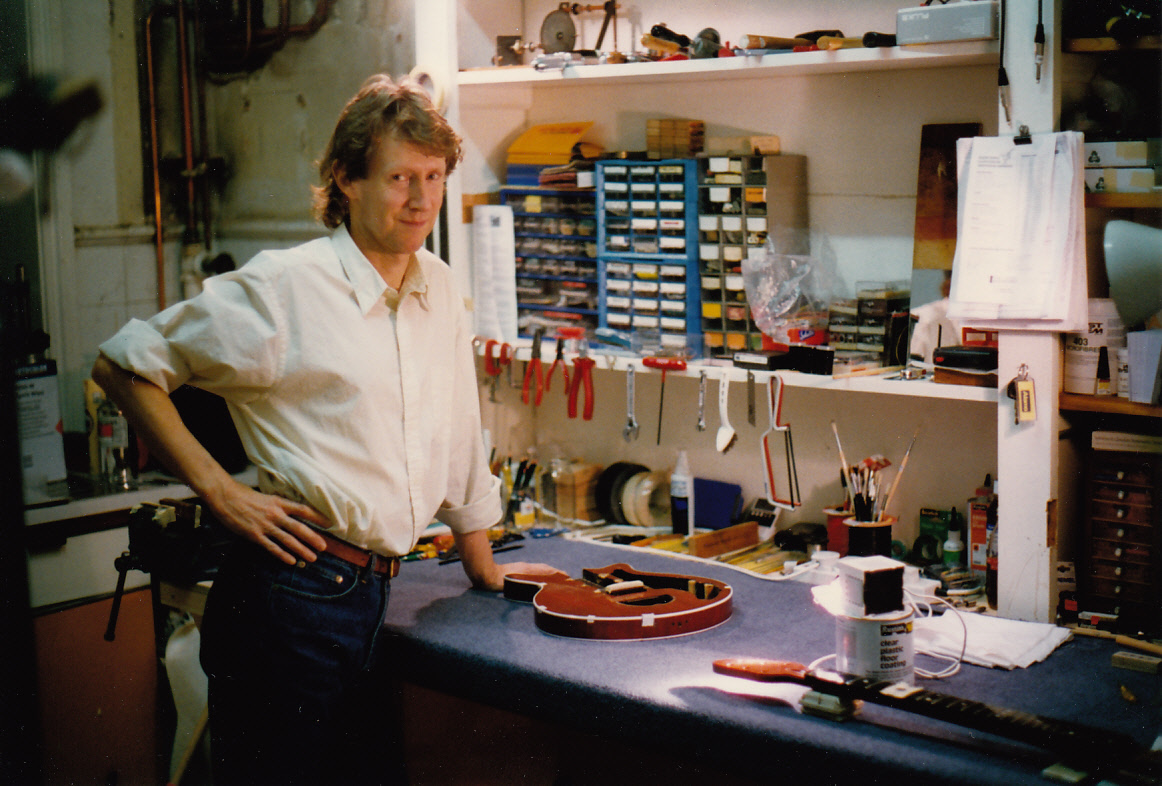
Greg Fryer and Red Special body and neck in ‘the lab’…Bri you didn’t take my photo when I was blinking did you?? Haha! even though many of the difficult repairs to the Red Special made me lose a lot of sleep at night there were also so many funny hilarious moments that I lost count of them. Brian reminded me very much of my mentor and good mate Romney Godden, both very generous and exceptionally talented people who also have a highly developed sense of humour

You must be logged in to post a comment.